
In this series of Apache Ignite Tutorial articles, I will describe what Apache Ignite is and how to deploy it at a beginner's level. In this first blog post, I will cover clustering and deployment.
What is Apache Ignite?
Apache Ignite is an in-memory data fabric. Its main goals are to provide performance and scalability. It partitions and distributes data within a cluster. The cluster provides very fast data processing.
The fabric consists of a number of different components. These components are built to support the goals of performance and scalability. Figure 1 shows the major components of Apache Ignite as of the time of writing this article.
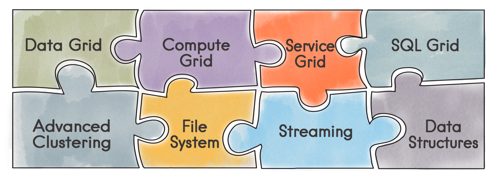
Figure 1. Main components of Apache Ignite
One of the major benefits of having many components within Apache Ignite is the integration between these components.
For applications developed to be used within a distributed environment, two important goals are to minimise data movement and minimise network traffic. So, we perform data processing and computations on the data that resides on a particular cluster node. Rather than moving data, we bring the processing to the data.
By providing support for a wide-range of integrated components, we also have the flexibility to apply many different types of data processing on a particular cluster node.
In forthcoming articles in this series, we will look more closely at many of these components. For now, let's look briefly at clustering.
Clustering
Clustering forms the basis for any distributed system. So, we will discuss how clustering can be configured in Apache Ignite with a particular focus on auto-discovery.
There are many definitions of clustering. Here we define clustering as the ability to start multiple nodes in a cluster deployment and for those nodes to discover each other and work together. In Apache Ignite, nodes can automatically discover each other in any environment. This environment could be a public cloud such as Amazon Web Services or OpenStack, a private cloud, a hybrid cloud, or even a personal computer such as a desktop or a laptop. Apache Ignite can also run in containerized environments, such as Docker. Apache Ignite supports all of these environments by default.
Let's see an example of auto-discovery in action.
I have previously downloaded the Apache Ignite binary distribution from the Apache website. My Operating System is Linux. The file has been unzipped into a directory called ignite in the home folder, as shown in Figure 2.
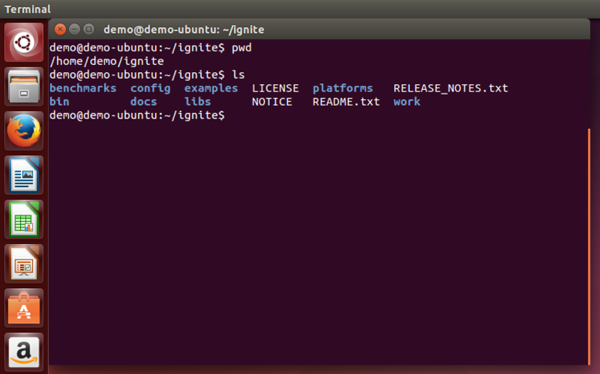
Figure 2. Apache Ignite unzipped into a folder
I am also running Oracle JDK 8 and have set the variable IGNITE_HOME to point to the folder where I unzipped the Apache Ignite binary distribution, as shown in Figure 3.
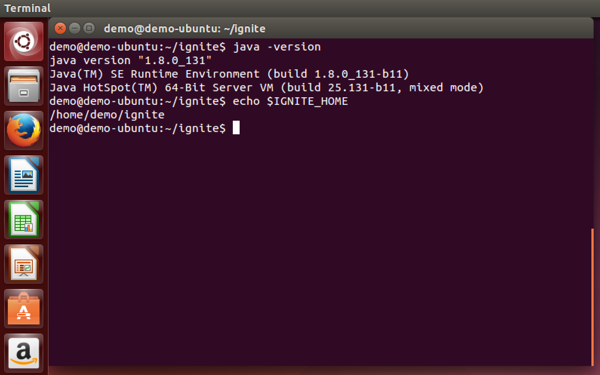
Figure 3. Java version and IGNITE_HOME
Next, let’s start a single local node using the command ignite.sh that can be found in the bin directory. We will also pass a configuration file as a parameter. The complete command is as follows:
./bin/ignite.sh examples/config/example-ignite.xml
The result can be seen in Figure 4.
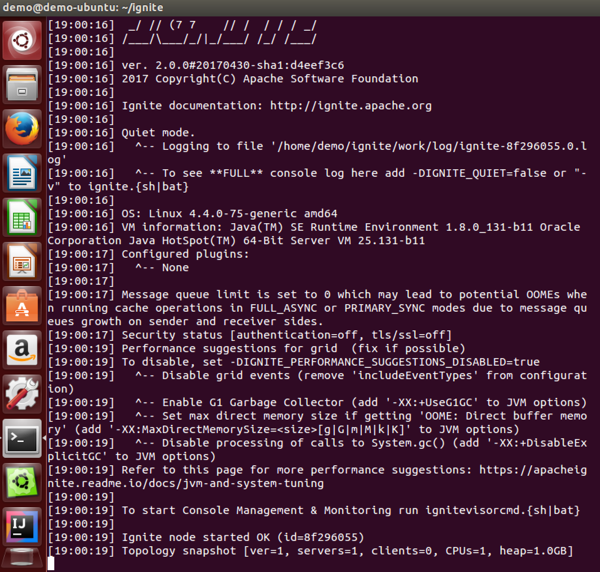
Figure 4. First Apache Ignite node
Looking at the very last line of output, we can see servers=1 indicating that there is currently one node running. Let’s open another terminal window and launch another node, as shown in Figure 5.
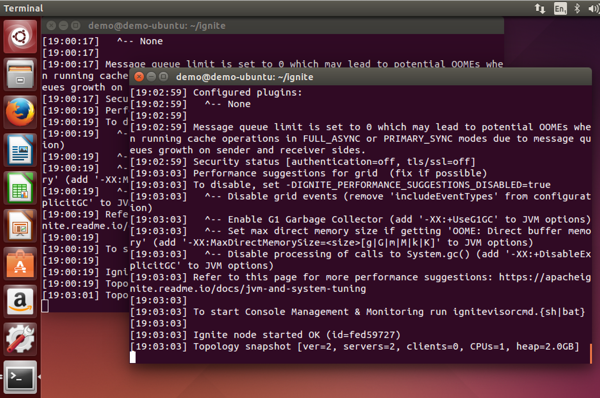
Figure 5. Two Apache Ignite nodes
We can see that the last line of output shows servers=2. The two nodes have auto-discovered each other and I now have a very small cluster running. Therefore, other than ensuring that there is a suitable version of Java installed, the installation of Apache Ignite is trivial and starting a cluster is also trivial. In a future article, we will create a simple application from an IDE and broadcast a “Hello World” message to all the nodes in our cluster.
Let’s now briefly look at deployment.
Deployment
As mentioned earlier, Apache Ignite can run in a number of different environments. One environment is a Docker container. Let’s see how we could do this.
In my Linux environment, I have Docker already installed. The following command will download the latest version of Apache Ignite:
sudo docker pull apacheignite/ignite
The following command will run the Apache Ignite Docker container:
sudo docker run -it --net=host -e "IGNITE_CONFIG=https://raw.githubusercontent.com/apache/ignite/master/examples/config/example-cache.xml" apacheignite/ignite
This uses the same config file we used earlier that came with the binary distribution. The result can be seen in Figure 6.
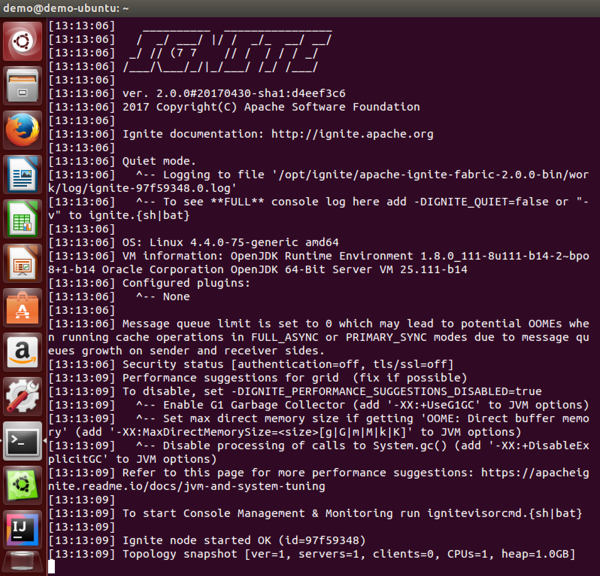
Figure 6. Apache Ignite node running in Docker
Looking at the very last line of output, we can see servers=1 indicating that there is currently one node running. Some configuration options are also available and described in the online documentation.
Summary
This article has been a quick run-through of Apache Ignite and its overall high-level architecture. We have seen how easy it is to download and use Apache Ignite using the binary distribution or a containerized environment.
In future articles, we will dig deeper into some of the more advanced configuration options as well as exploring many more of the components.
This is part one of a seven-part series. You can find the rest of the series at the links below:
- Getting Started with Apache® Ignite™ Tutorial (Part 1: Introduction) (this blog post)
- Getting Started with Apache® Ignite™ Tutorial (Part 2: Data Grid)
- Getting Started with Apache® Ignite™ Tutorial (Part 3: Compute Grid)
- Getting Started with Apache® Ignite™ Tutorial (Part 4: Streaming Grid)
- Getting Started with Apache® Ignite™ Tutorial (Part 5: Distributed SQL Database)
- Getting Started with Apache® Ignite™ Tutorial (Part 6: Service Grid)
- Getting Started with Apache® Ignite™ Tutorial (Part 7: Machine Learning (ML) Grid)
Check out Apache Ignite vs Apache Spark: Integration using Ignite RDDs for information on using Apache Ignite and Apache Spark together.