My Cluster Tab
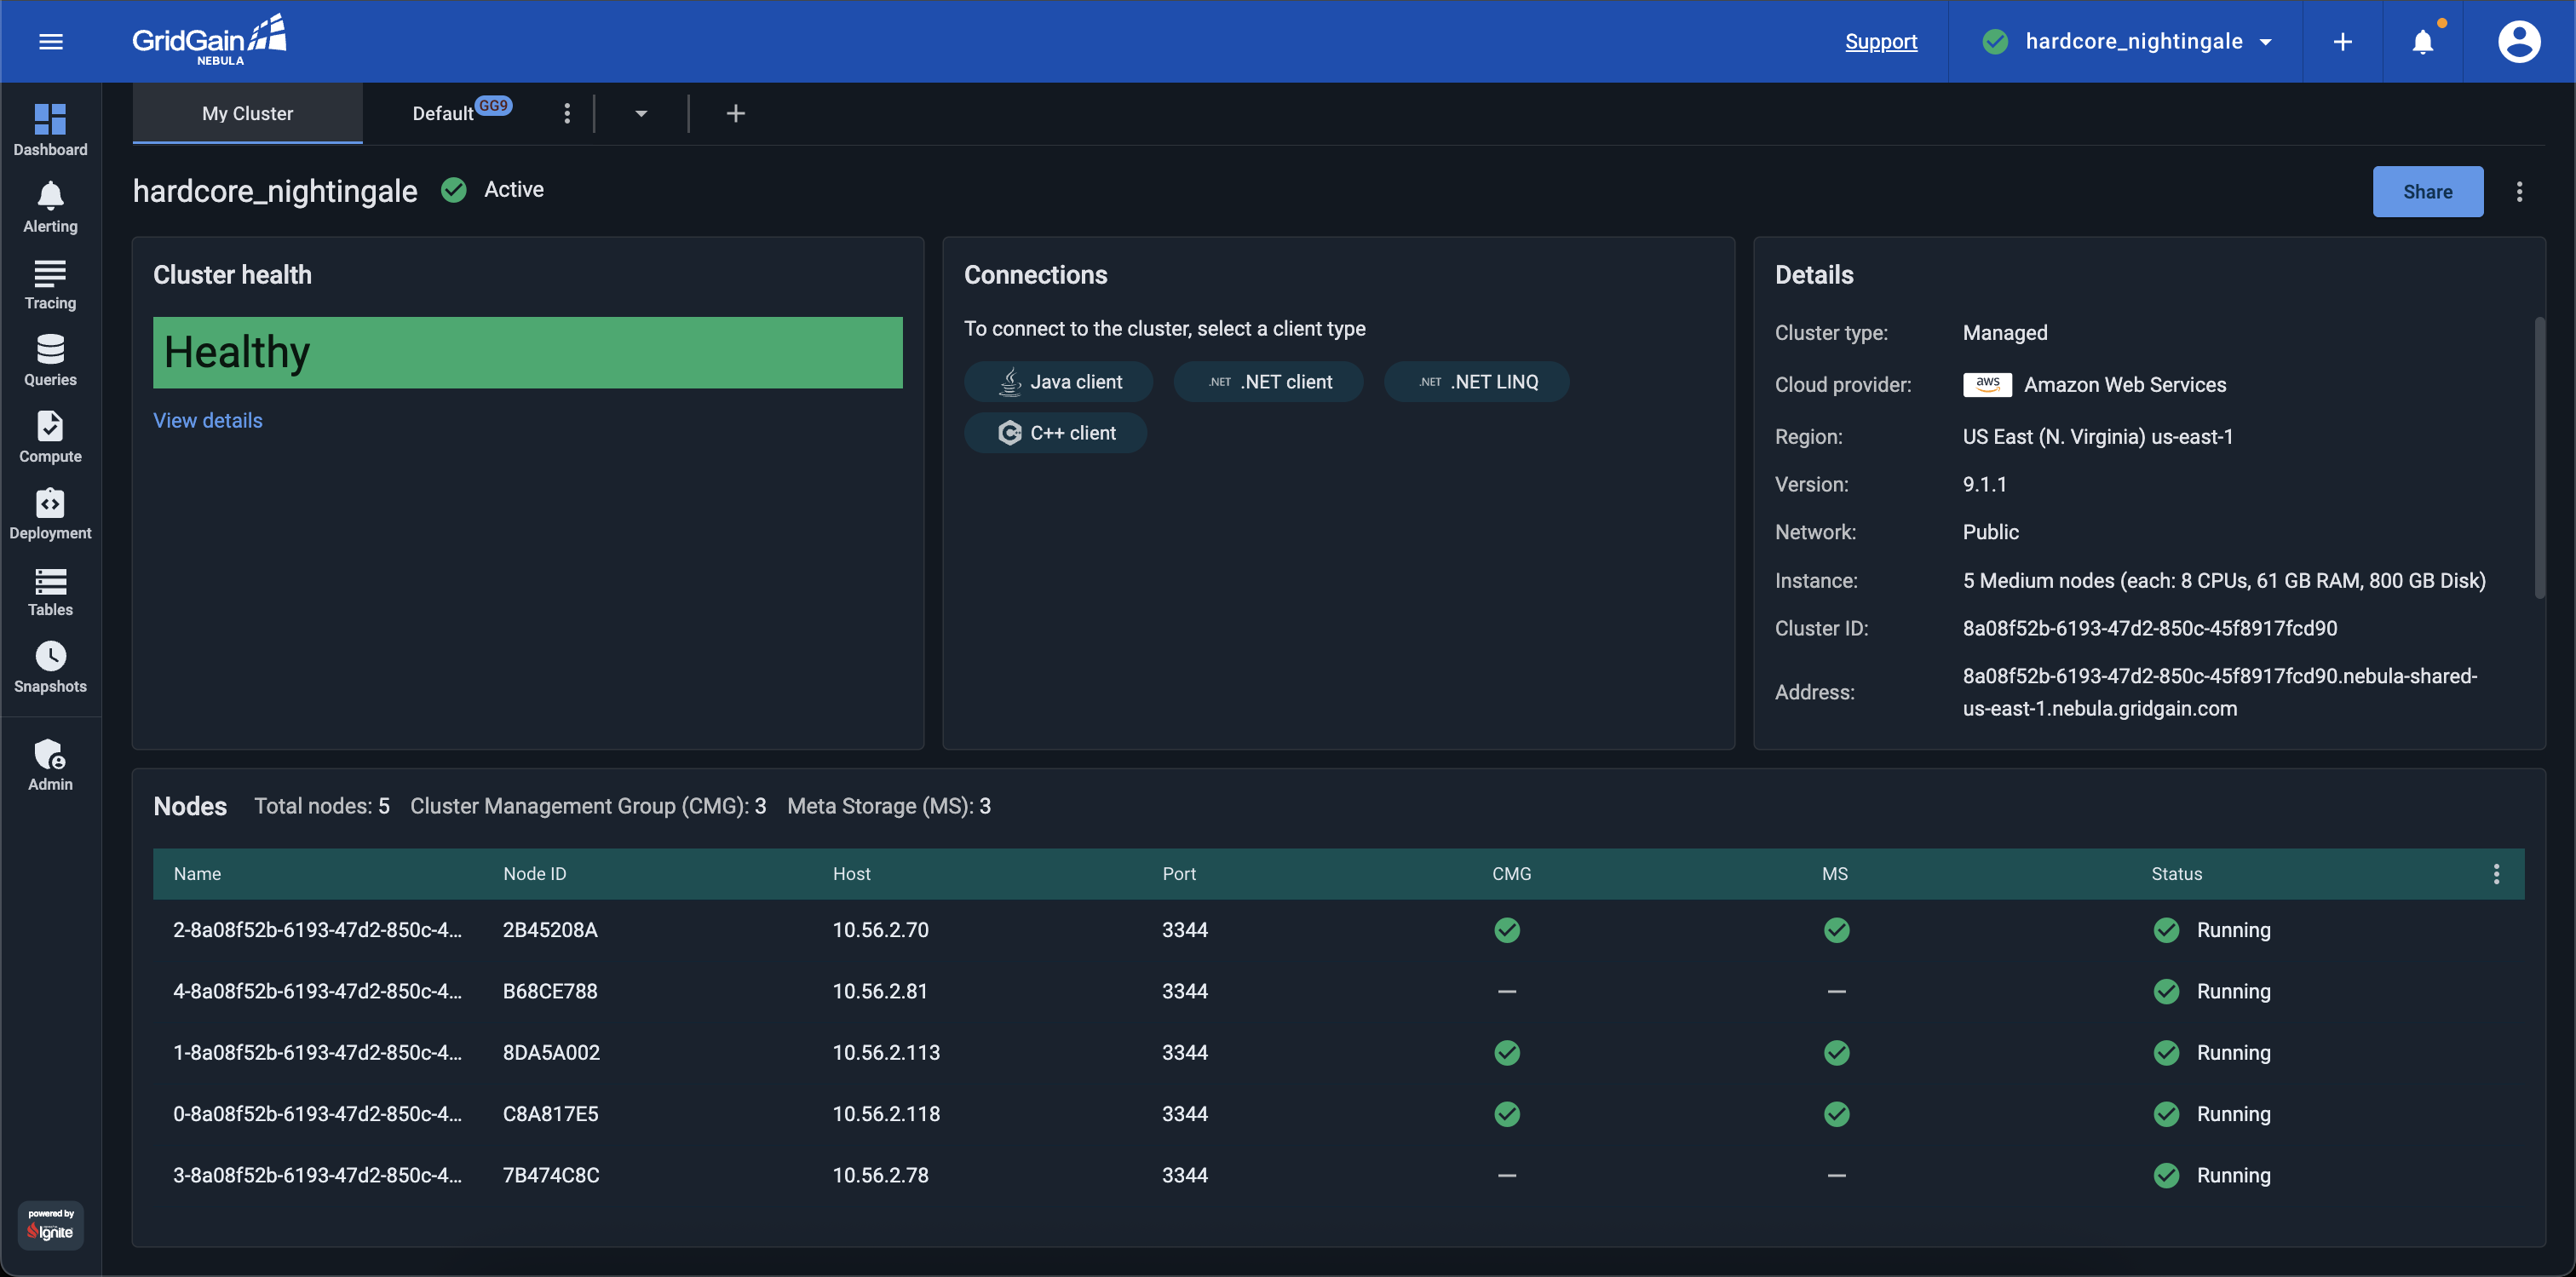
My cluster opens as the first tab of the Dashboard screen when you select Dashboard from the navigation menu. It displays numeric and tabular information for the "current" cluster (selected in the cluster selector tool on the main toolbar).
Viewing Cluster Information
Use the widgets to view the relevant cluster information:
| Widget | Description |
|---|---|
Cluster Health |
The cluster status:
|
Connections |
A set of chips for adding connections. |
Details |
A table of the cluster details, including |
Nodes |
A list of cluster’s nodes. |
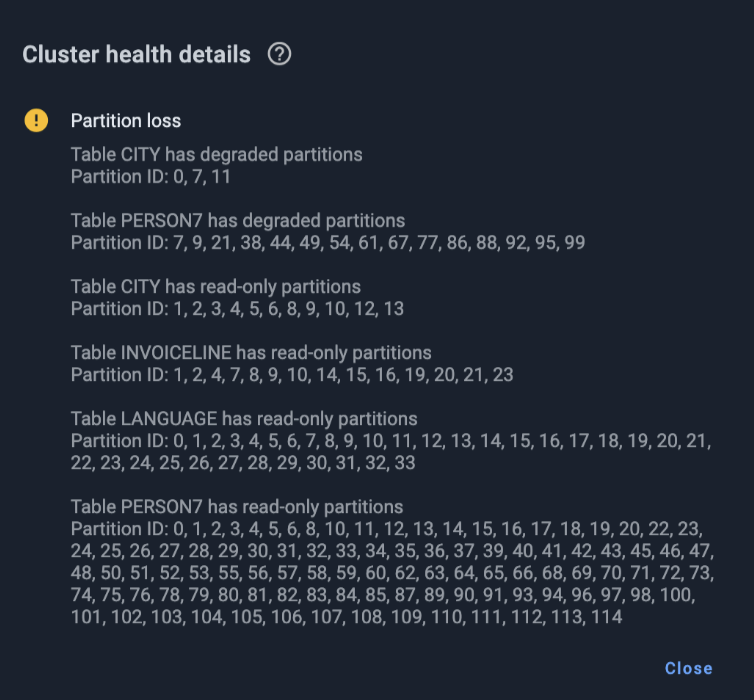
Viewing Cluster Health Details
To view details of the cluster health (status), in the Cluster Health widget, click the View Details link. The Cluster Health Details dialog shows what specific problems, if any, are observed in the cluster.
Viewing Cluster Nodes
The cluster nodes are shown in the Nodes widget at the bottom of the screen.
To auto-size a specific column or all columns in the table, select the corresponding option from the column’s context menu.
To add columns to the table or remove them from the table, select the Table Columns option from the table’s context menu, then select or clear check boxes for the columns on the list that opens.
To define the auto-adjustment timeout, click the Configuration icon above the node list, toggle the auto-adjustment on, then enter the timeout value (in seconds).
For GridGain 9 clusters, the Nodes widget displays the following columns:
| Column | Description |
|---|---|
Name |
The node name. |
Node ID |
The ID of the node. |
Host |
The cluster host IP address. |
Port |
The cluster host port. |
CMG |
Whether the node is included in Cluster Management Group. |
MS |
Whether the node is included in the Metastorage Group. |
HTTP, HTTPS ports |
The ports the node exposes. |
Status |
|
Adding Connections
Initializing the Cluster
To initialize the attached GridGain 9 cluster:
-
Click Initialize in the top right corner.
The Initialize cluster dialog opens.
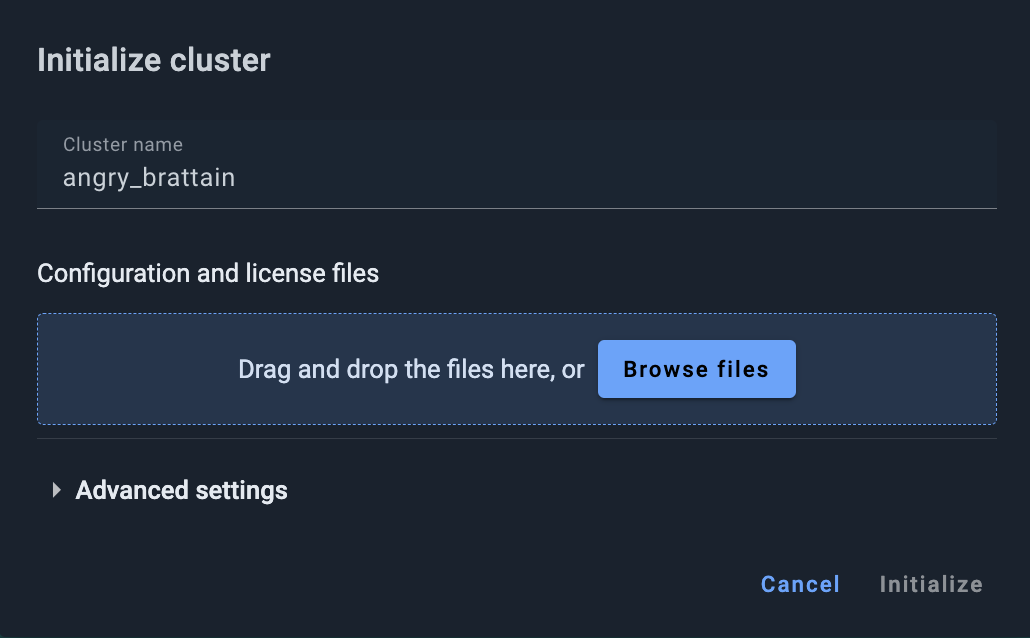
-
Add configuration and license file(s) using the Browse button or by dragging and dropping.
-
Optionally:
-
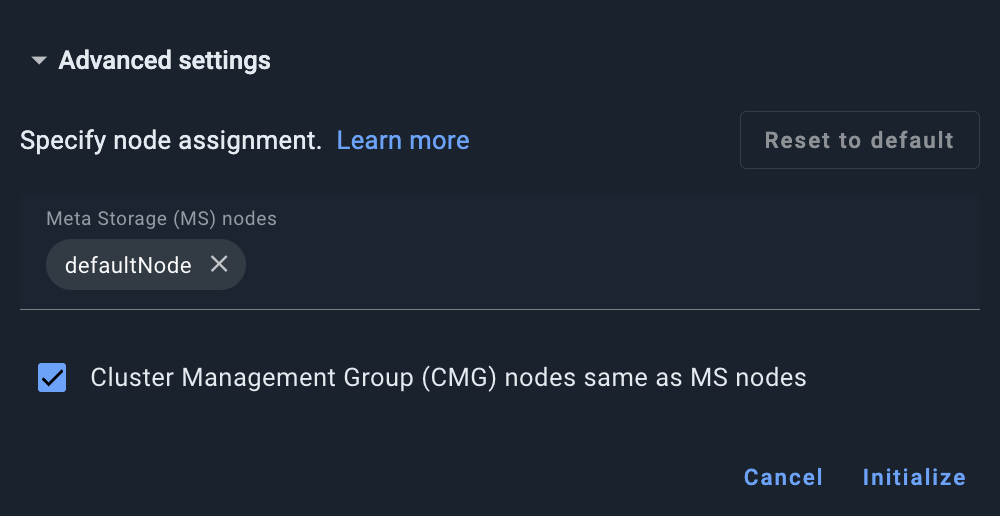
Expand the Advanced settings section.
-
Clear the Cluster Management Group (CMG) nodes same as MS nodes check box.
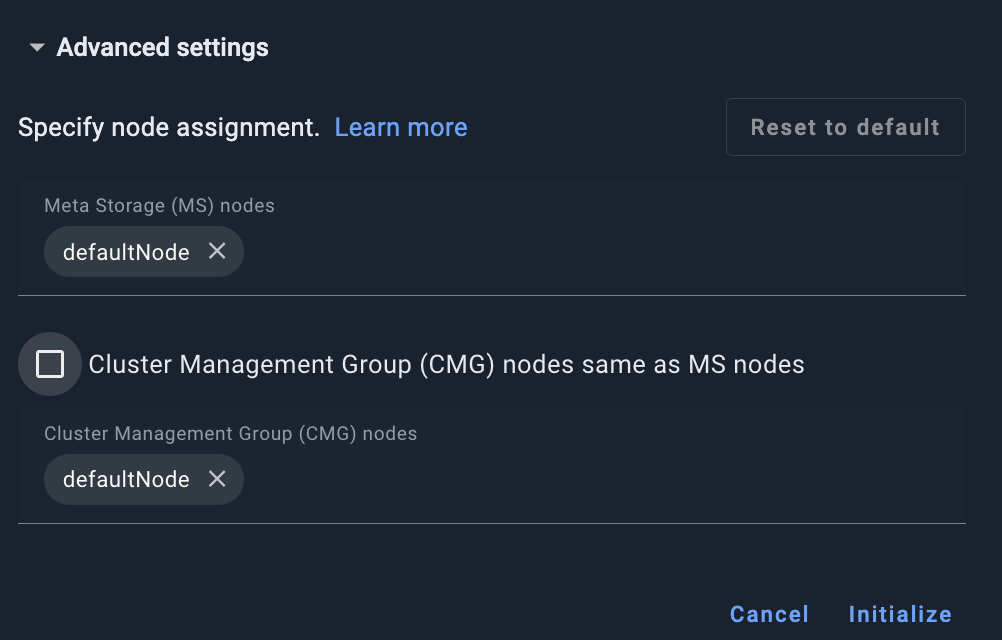
-
Manually assign MS and CMG nodes.
-
To reset the MS and CMG nodes to default configurations, click Reset to default.
-
-
Click Initialize.
The dialog closes. Once the initialization process is completed, the cluster status in the My Cluster screen changes to Active.
Cluster Configuration
The cluster configuration will be displayed in HOCON format. For more information about GridGain 9 cluster configuration, see cluster configuration parameters documentation.
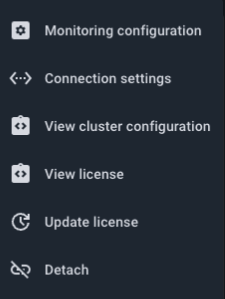
To change cluster monitoring settings click the ⋮ in the right corner of My Cluster tab and then choose Monitoring configuration option from the menu.
Managed GridGain 9 Cluster
View Configuration
To view cluster configuration, click the ⋮ in the right corner of My Cluster tab and then choose View cluster configuration option from the menu.
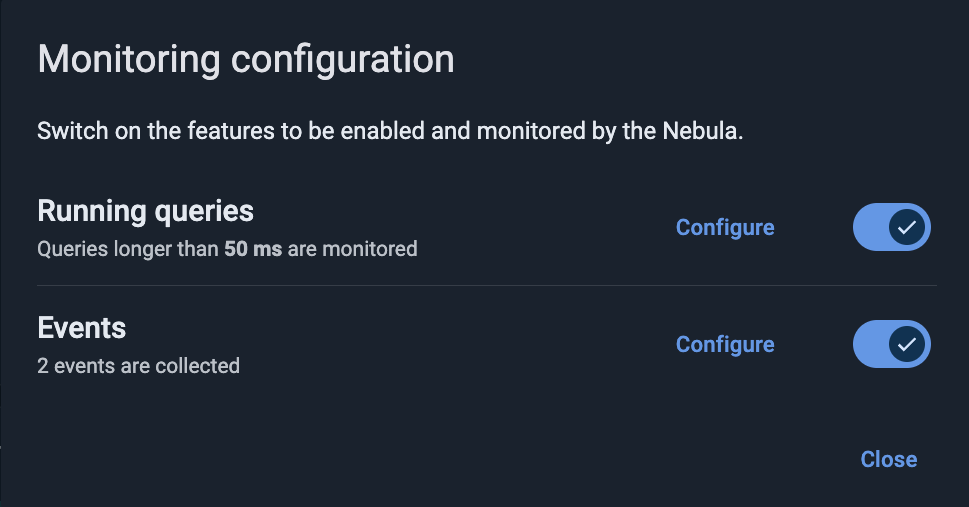
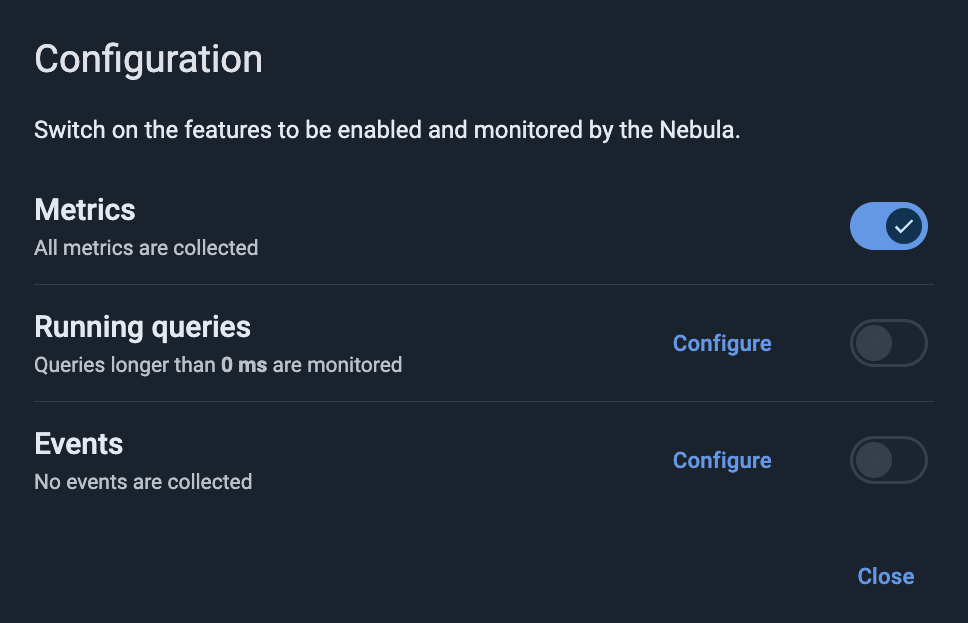
Configure Monitoring
In managed clusters, metrics are hidden by design.
Event collection is limited to 2 by default.
Running Queries are initialized to 0 by default and remain disabled unless explicitly enabled.
Attached GridGain 9 Cluster
View Configuration
To view cluster configuration, click the ⋮ in the right corner of My Cluster tab and then choose View cluster configuration option from the menu.

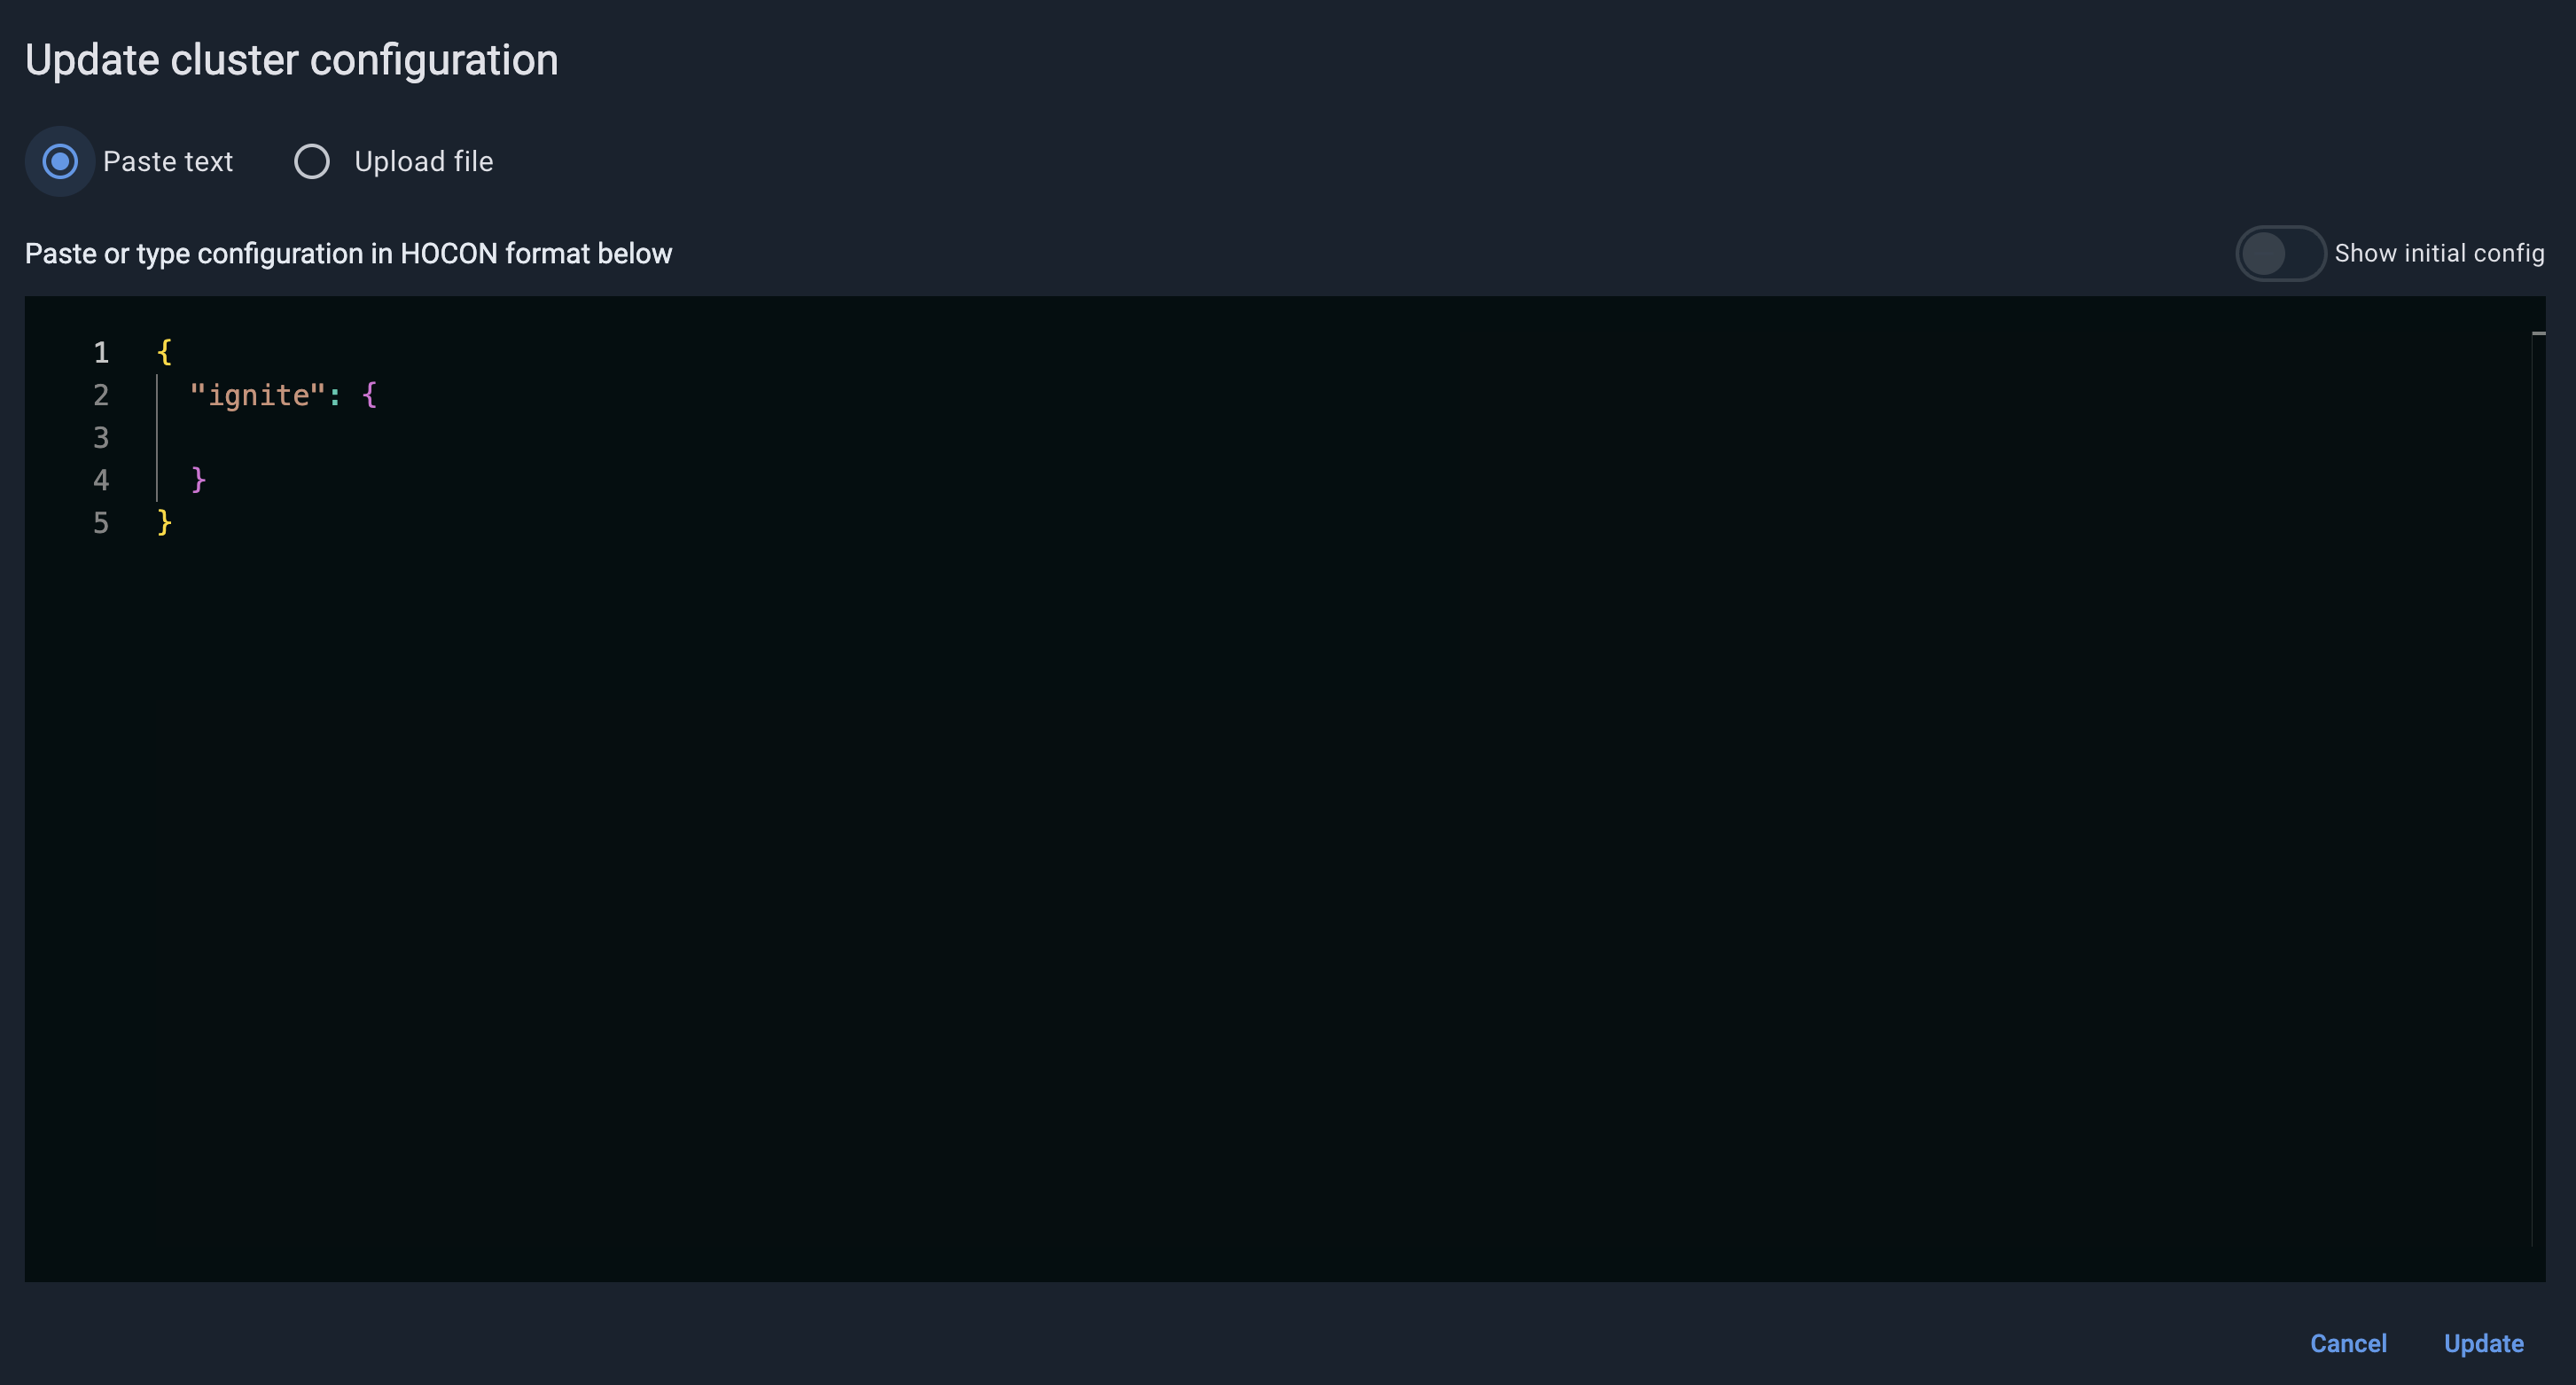
Update Configuration
To change cluster configuration, click the ⋮ in the right corner of My Cluster tab and then choose Update cluster configuration option from the menu.
You can define configuration in the build-it editor or upload as a file.
Configure Monitoring
In attached clusters Event collection is disabled by default (0), giving you control over which events to enable in the configuration dialog.
Running Queries are also set to 0 and disabled by default until explicitly enabled.
Metrics collection is enabled by default, allowing you to monitor performance indicators immediately after connection.
cluster config update "ignite.metrics.exporters=[
    {
        compression=none
        endpoint="{connector_address}"
        exporterName=otlp
        headers=[]
        name="cc_exporter"
        period=5000
        protocol="http/protobuf"
    }
]"-
If you are using a custom connector for metrics, then in the
endpointfield, enter the connector address that is reachable from the cluster nodes. Its value should matchcc.base-urlas documented in the Cloud Connector section. -
If you prefer to use the embedded connector, then set the
endpointto the Nebula portal address:https://portal.gridgain.com/.
Updating Cluster License
Your attached cluster may need a new license when:
-
Your previous license expires
-
You are installing (or updating to) GridGain Enterprise Edition (EE) or Ultimate Edition (UE)
Once you have obtained the license XML file, you can upload it via the GridGain Nebula UI.
To upload a new GridGain license for an attached cluster:
-
From the cluster’s context menu, select Update license.
-
In the Update license dialog that opens, do one of the following:
-
Paste the license file contents, or
-
Select Upload file, then click *Select file and select the required file in the Explorer/Finder window.
-
-
Click OK.
Managing Cluster API Credentials
To access a cluster, applications need to authenticate to it using API "user" credentials. When creating a cluster, you specify one set of API credentials. Once the cluster had been provisioned, you can add API credential sets, modify them, and delete the ones that are no longer required.
To manage API credentials:
-
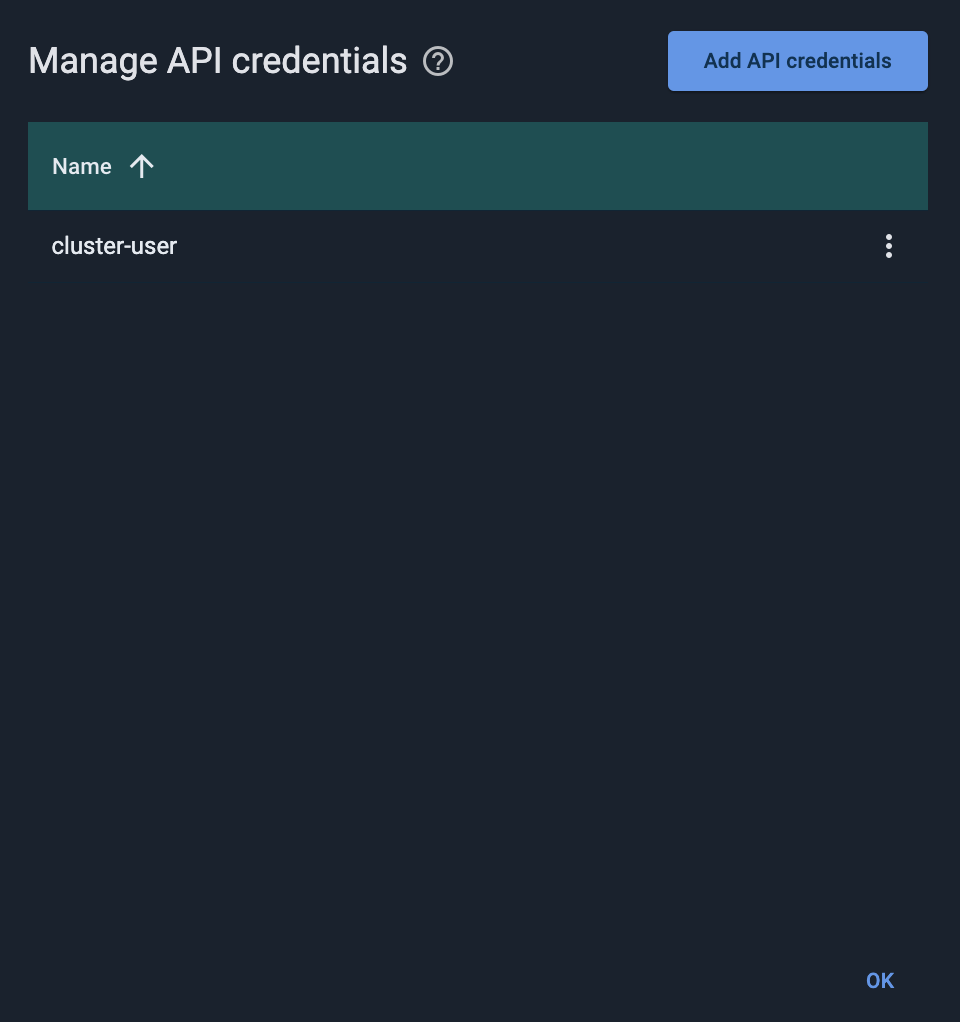
From the context menu, select API credentials.
The Manage API credentials dialog opens. It list all API "users" defined for the cluster.
-
To add a "user":
-
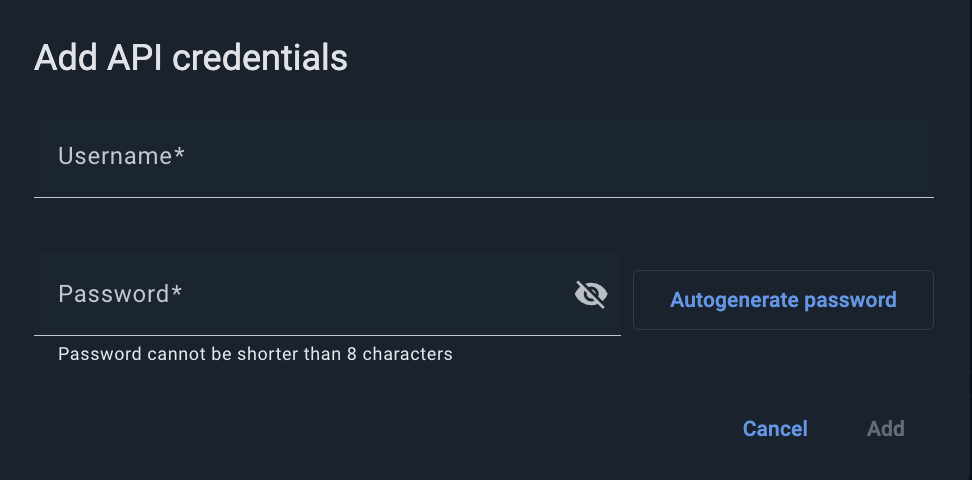
Click Add API credentials.
The Add API credentials dialog opens.
-
Enter the Username and Password values.
-
Click Add.
-
-
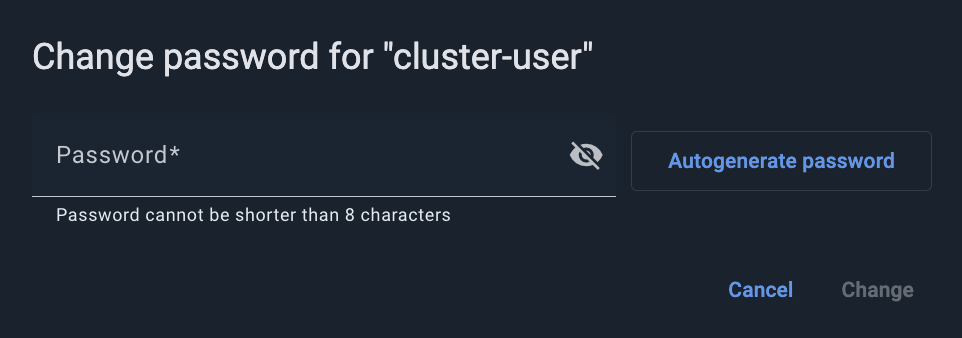
To change a "user" password:
-
From the user’s context menu, select Change password.
The Change password for <username> dialog opens.
-
Enter the new Password.
-
Click Change.
-
-
To remove a "user", select Remove from that user’s context menu.
Sharing Clusters
You can have access to a cluster as:
-
User - a regular user who can view the cluster that had been shared with them individually or via a team, as well as utilize the actions that appear in the cluster’s context menu.
-
Owner - the user who had created or attached the cluster. Owners have extended cluster access rights, including sharing the cluster with teams or users, suspension, removal, etc.
As a cluster owner, you can share that cluster with individual users and/or teams.
Sharing with Users and Teams
To share the current cluster, click Share above the Details widget. The Share cluster dialog opens.
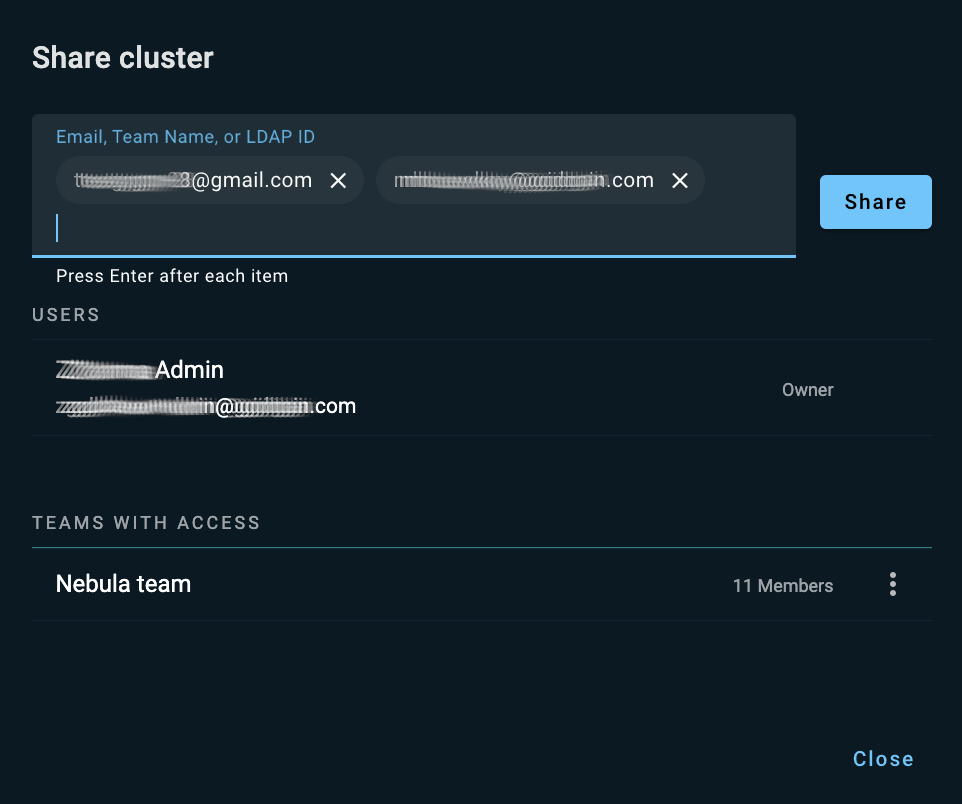
The dialog lists users and teams that already have access to the cluster.
In the entry field across the top of the Share cluster dialog, start typing a GridGain Nebula user’s email, an LDAP ID, or a team name. As you type, the incremental search mechanism displays suggestions in a drop-down list. Select one of the suggested users or teams. Alternatively, type the identifier to the end, then click [Enter]. You can add multiple users and/or teams in a single operation. When done, click Share.
The users and teams you have entered appear in the corresponding sections of the Share cluster dialog. The system notifies the users and team members that a cluster had been shared with them. To close the Share cluster dialog, click Close.
Stopping a Cluster Share
As a cluster owner, you can stop sharing your cluster with a team or with an individual user (remove access to the cluster that had been previously granted to that team or user).
To stop sharing a cluster with team(s) and/or user(s), click Share above the Details widget.
In the Share cluster dialog that opens, select Stop sharing from the context menu by the required team or user name. In the confirmation dialog, click Stop sharing.
Viewing Graphic Dashboards
To view the default graphic dashboard for the current cluster, click the Default next to the My cluster tab in the top left corner of the screen.
Switching Between Clusters
If multiple clusters are registered in GridGain Nebula, you can switch between clusters by using the Select cluster control on the top toolbar.
Adding Clusters
To add a cluster, click + on the top toolbar. From the menu that opens, select an option:
-
Create managed cluster - proceed to cluster creation instructions
-
Attach cluster - proceed to cluster attachment instructions
Next Steps
© 2026 GridGain Systems, Inc. All Rights Reserved. Privacy Policy | Legal Notices. GridGain® is a registered trademark of GridGain Systems, Inc.
Apache, Apache Ignite, the Apache feather and the Apache Ignite logo are either registered trademarks or trademarks of The Apache Software Foundation.