Transparent Data Encryption for Managed Clusters

In GridGain Nebula, your data is always encrypted:
-
In transit with the use of SSL/TLS
-
At rest at the volume level (the EBS volumes on AWS are encrypted)
However, for real-life, industry standard-compliant cluster operations, we recommend that you encrypt your data at the database level.
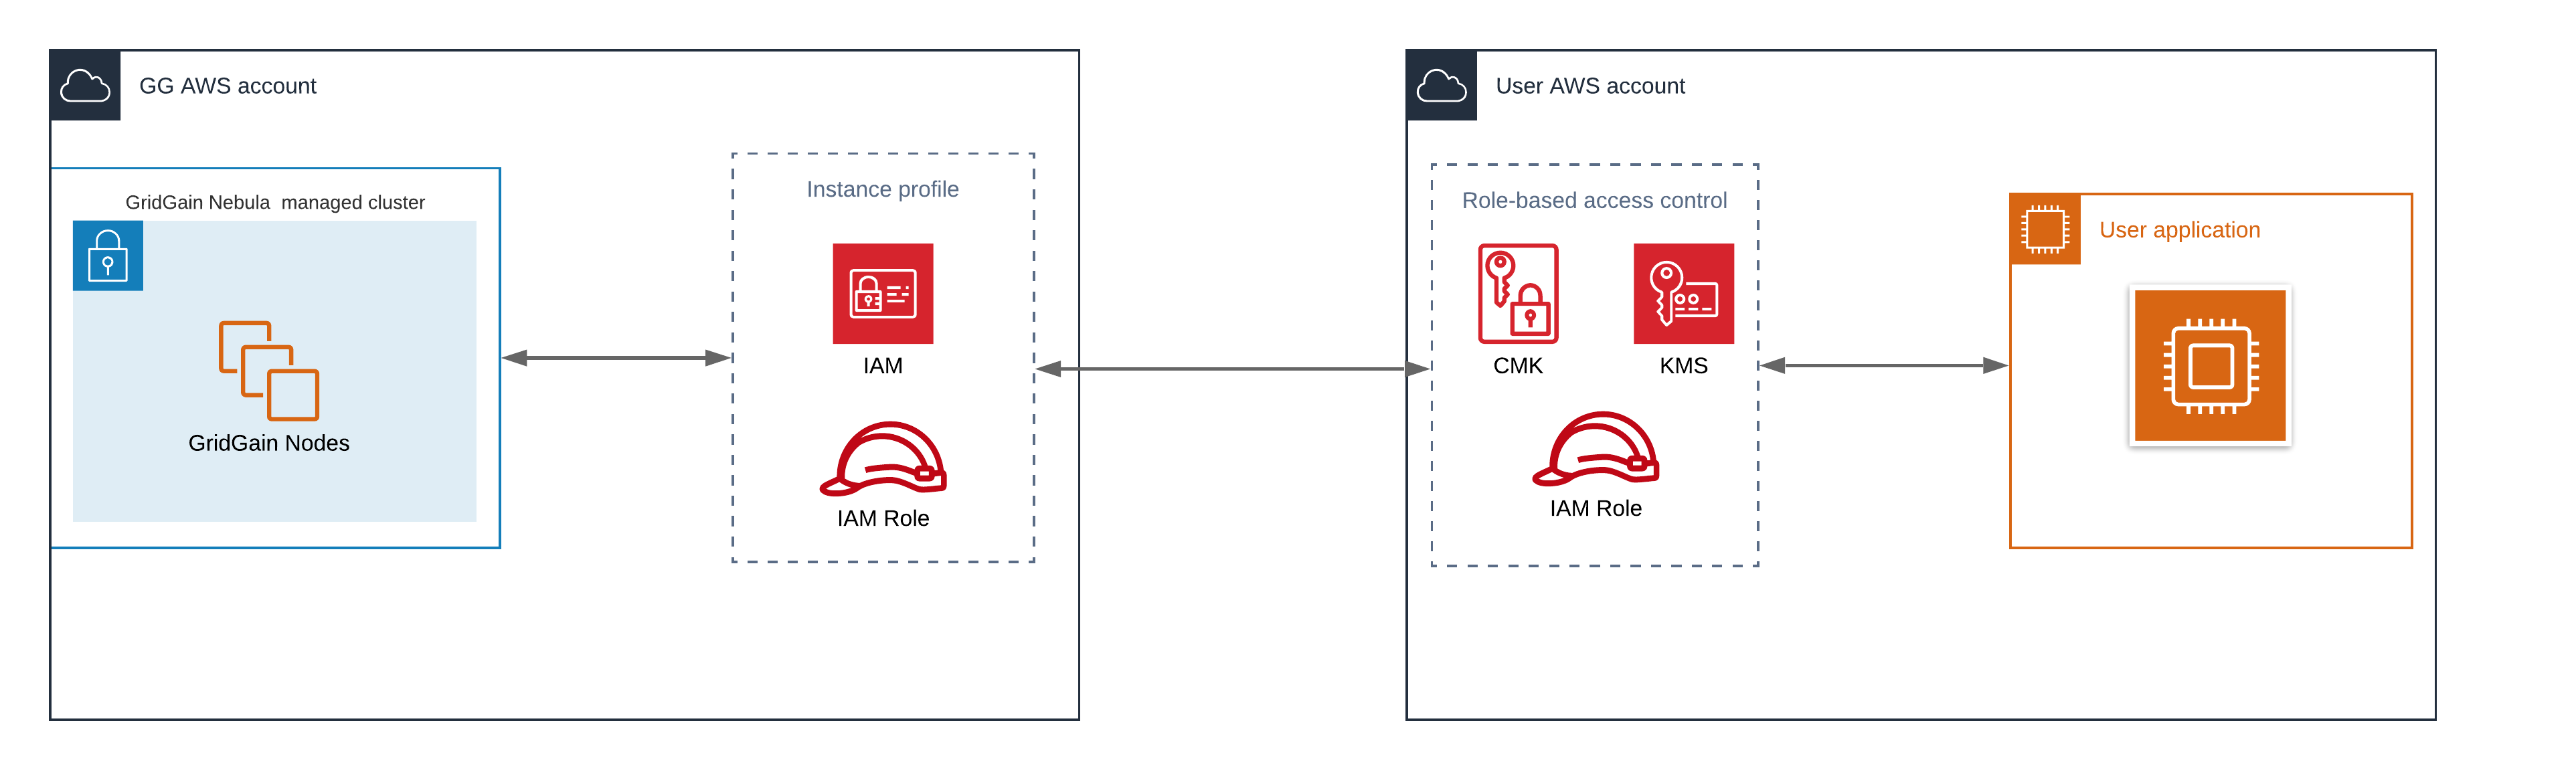
GridGain Nebula supports transparent database-level encryption that follows the envelope strategy. The key-encrypting key (a.k.a. the "main" key) is a Customer Managed Key (CMK). You fully control the CMK; GridGain Nebula cannot access this key’s cryptographic data. The CMK GridGain Nebula uses on AWS is provided by the AWS Key Management Service (KMS).
The following diagram depicts the transparent encryption solution.
This tutorial walks you through the following procedures:
-
Creating a managed cluster where data is transparently encrypted with the use of the AWS KMS - see Create a Transparently Encrypted Cluster
-
Updating encryption definitions after you have manually rotated or replaced the Customer Managed Key (CMK) - see Change Encryption Definitions
Create a Transparently Encrypted Cluster
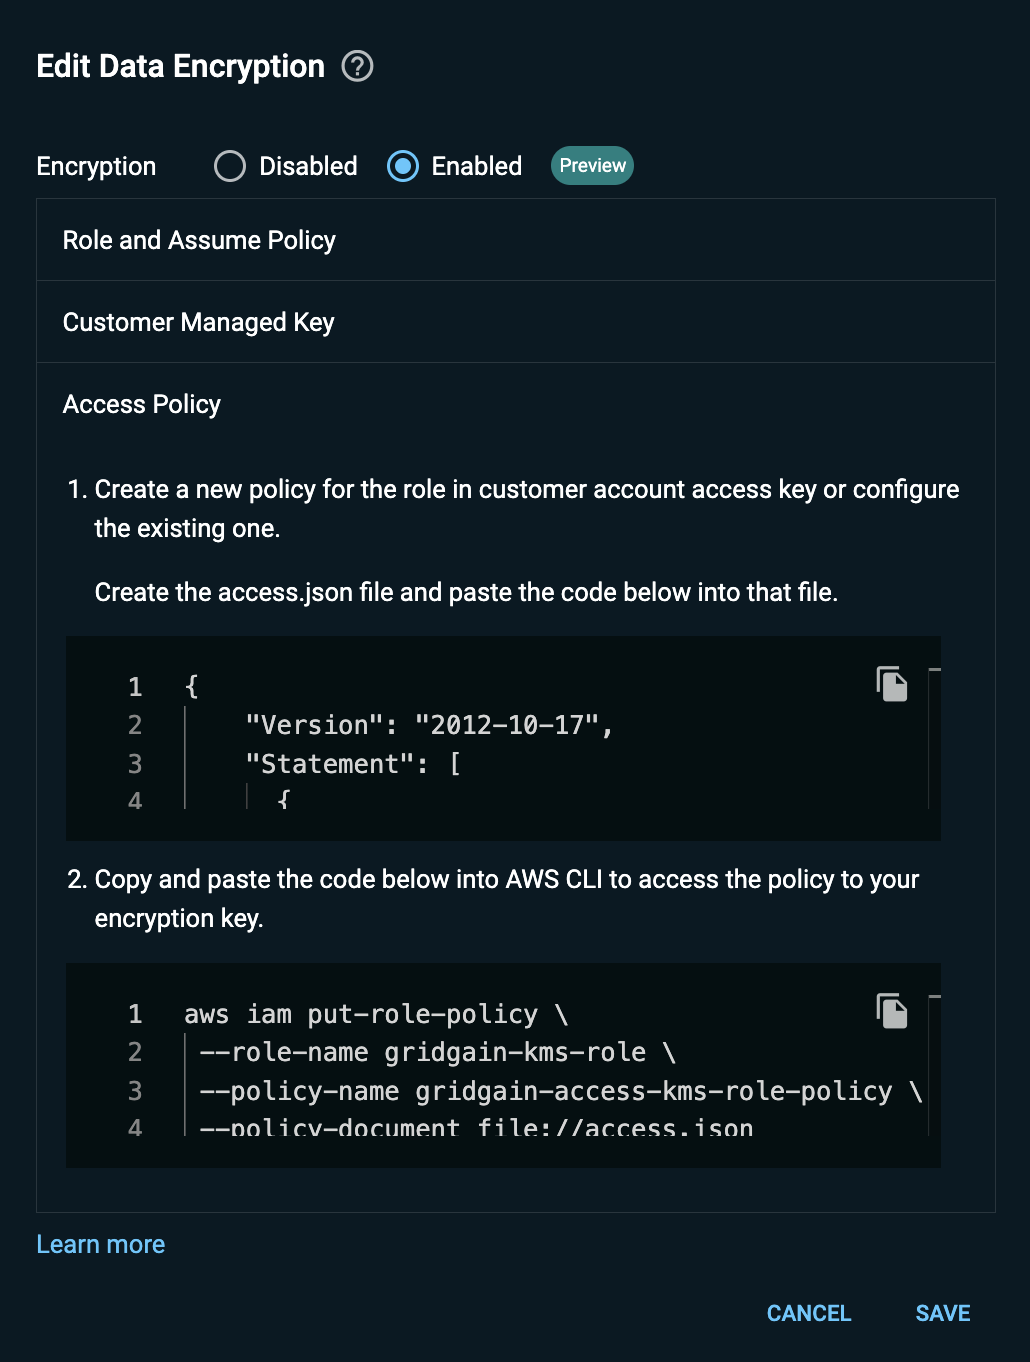
By default, the transparent data encryption is disabled. When you click Edit in the Data Encryption section of the Create Managed Cluster dialog, the Edit Data Encryption dialog appears as shown below (see Creating a Managed Cluster):
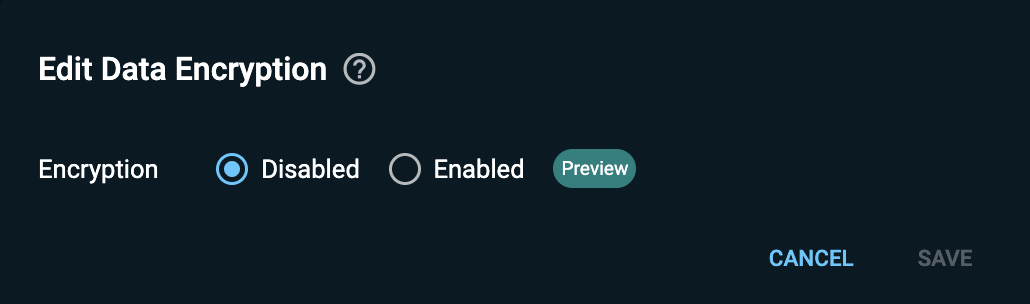
To define transparent data encryption for your managed cluster, proceed as follows.
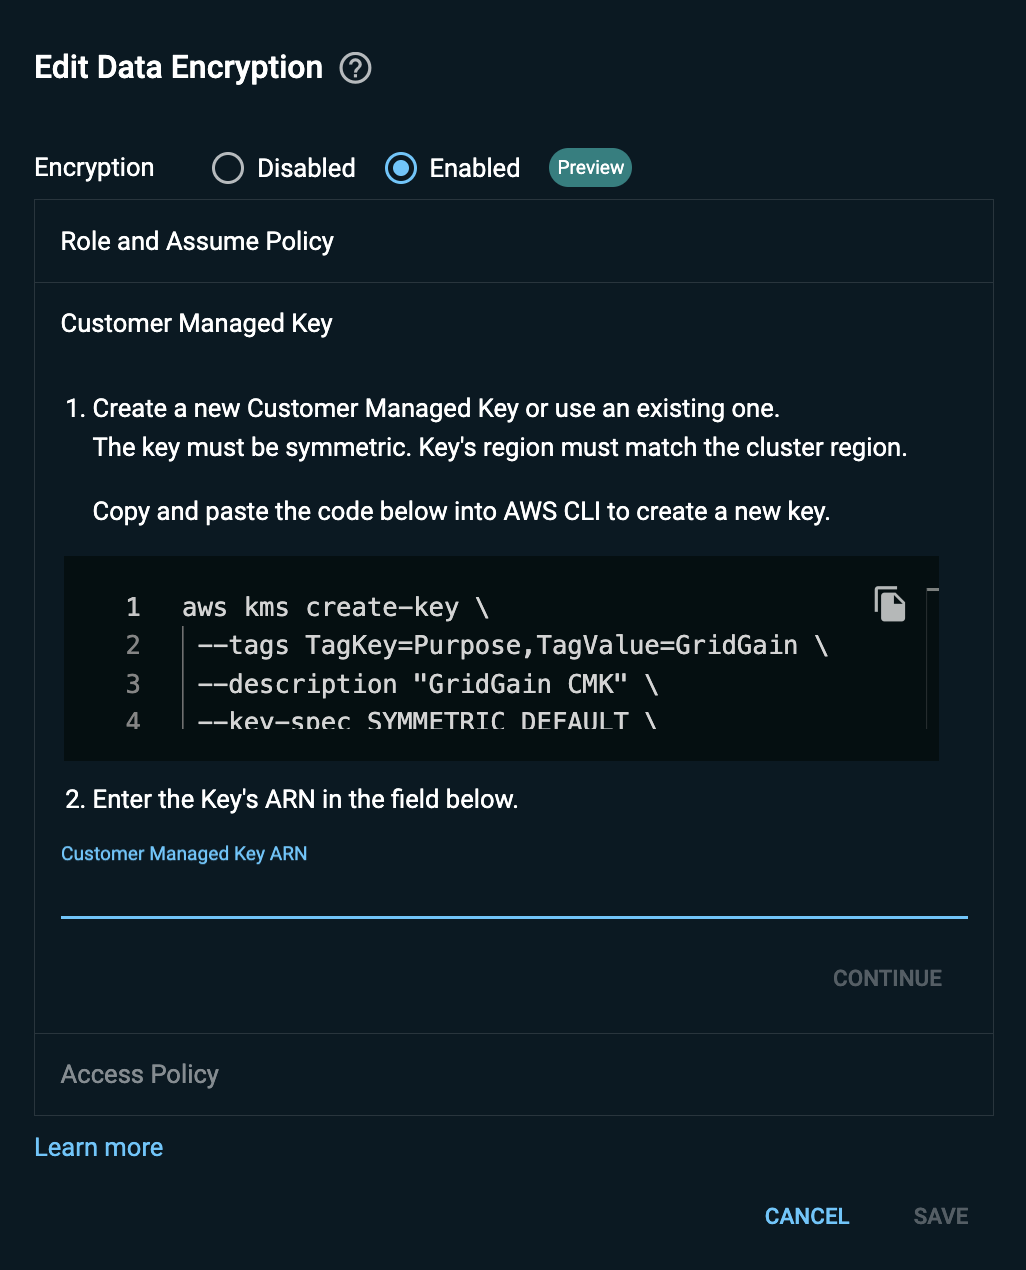
Create a Customer Managed Key (CMK)
Customer Managed Key (CMK) is a key you (as a user) create in your AWS account.
To create a CMK under your AWS account:
-
In the AWS CLI, run the following command:
aws kms create-key \ --tags TagKey=Purpose,TagValue=GridGain \ --description "GridGain CMK" \ --key-spec SYMMETRIC_DEFAULT \ --key-usage ENCRYPT_DECRYPT \ --multi-region \ --region us-west-2 -
Save the key ARN that appears in the command output.
Create a Role and an Assume Policy
In this section, you create:
-
A role for GridGain Nebula in your AWS account
-
A policy that enables the GridGain AWS account to assume the role you have created
Proceed as follows:
-
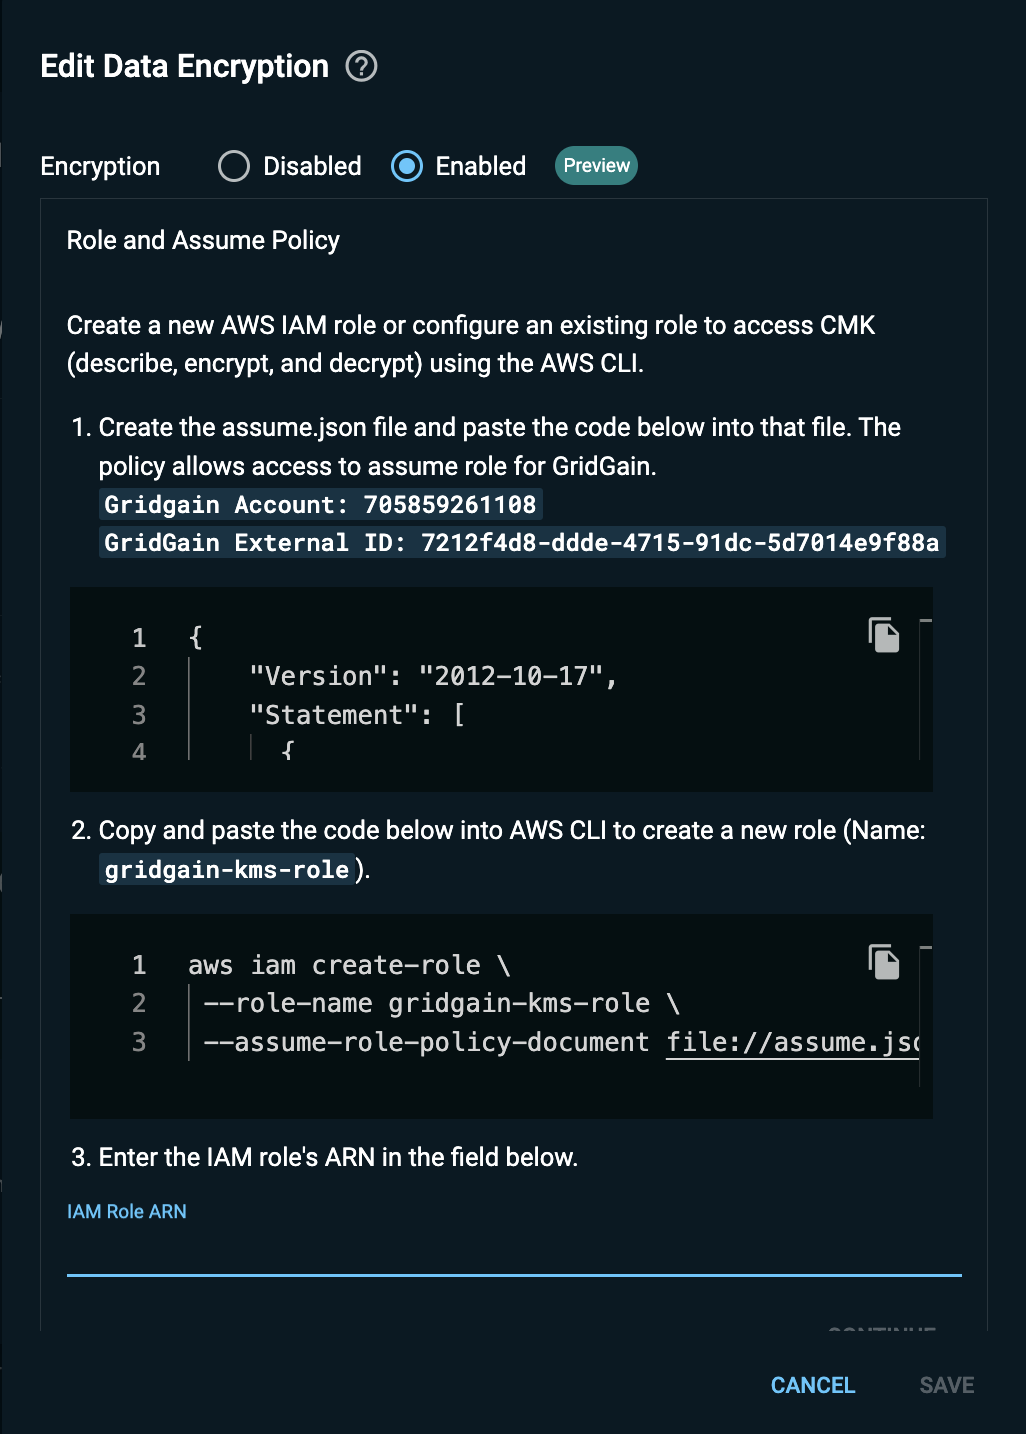
In the GridGain Nebula UI, in the Edit Data Encryption dialog, select Enabled.
-
Create a policy that will enable the GridGain account to assume the created role:
-
Copy the JSON content that appears in the top field.
-
On your machine, create the
assume.jsonfile and paste the copied content into that file. -
Upload the
assume.jsonfile to your AWS account using the Upload File option from the Actions pulldown menu in the AWS CLI window. -
Create the
gridgain-kms-roleAWS IAM role for accessing CMK (describe, encrypt, and decrypt) by running the following command in the AWS CLI:aws iam create-role \ --role-name gridgain-kms-role \ --assume-role-policy-document file://assume.json -
Save the role ARN that appears in the command output.
-
-
In the Edit Data Encryption dialog, paste the role ARN into the IAM Role ARN field. Click Continue.
-
Paste the key ARN into the Customer Managed Key ARN field that opens.
-
Click Continue.
Update the Role with an Access Policy
In this section, you add to the GridGain role (which you have created under your AWS account) a policy that enables the GridGain AWS account to access the CMK for the managed cluster.
Proceed as follows:
-
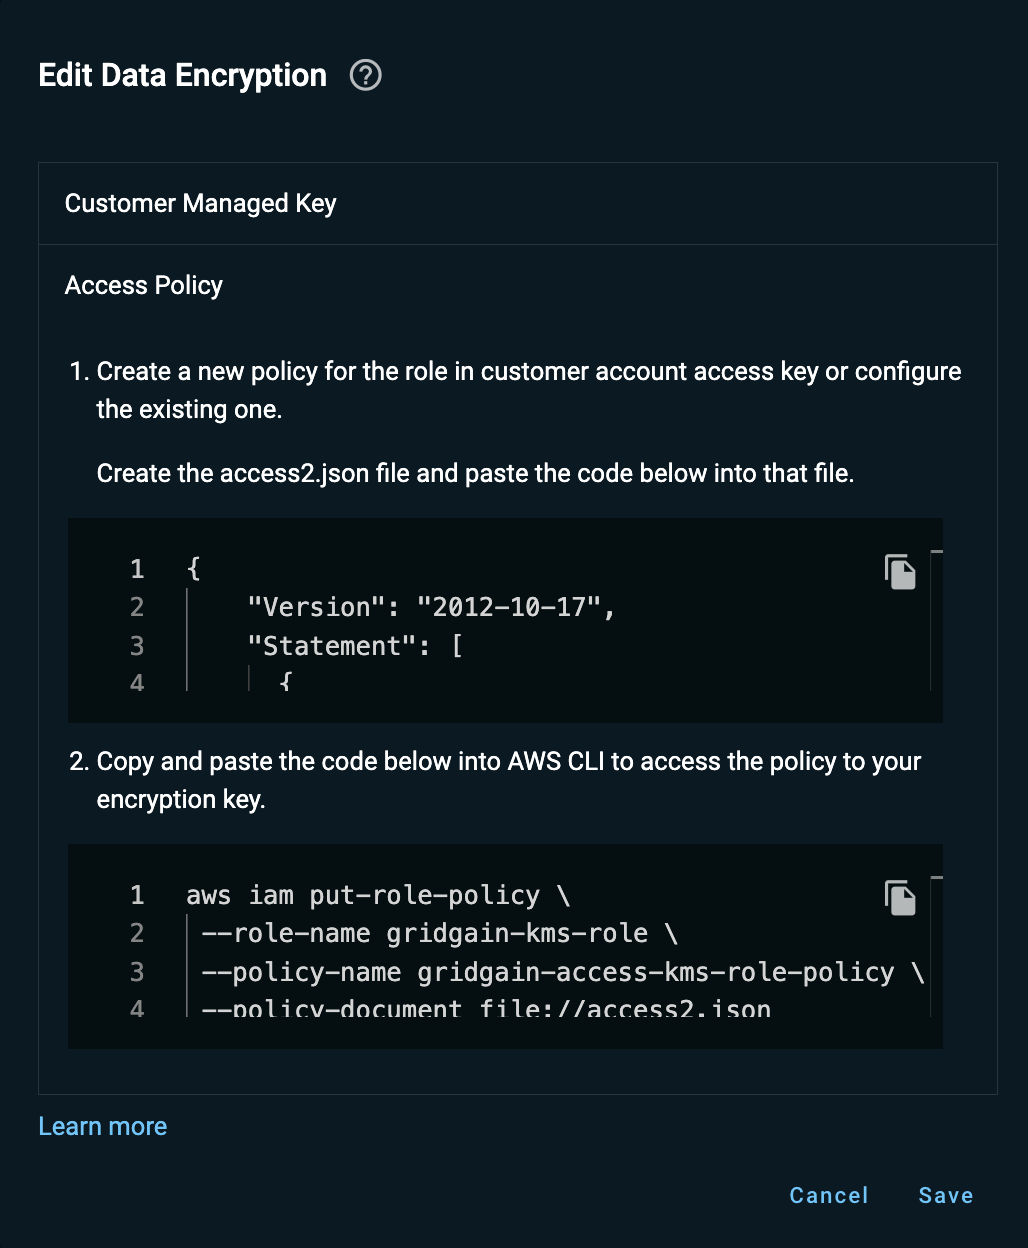
Copy the JSON content that appears in field 1 under the Update Policy section.
-
On your machine, create the
access.jsonfile and paste the copied content into that file. -
Upload the
access.jsonfile to your AWS account using the Upload File option from the Actions pulldown menu in the AWS CLI window. -
Update the previously created
gridgain-kms-roleAWS IAM role by running the following command in the AWS CLI:aws iam put-role-policy \ --role-name gridgain-kms-role \ --policy-name gridgain-access-kms-role-policy \ --policy-document file://access.json -
In the Edit Data Encryption dialog, click Save.
Change Encryption Definitions
Normally, AWS rotates CMK by itself. When that happens, GridGain Nebula automatically starts using the new CMK. However, in certain situations, you may want to change your CMK manually; for example, if the old one becomes compromised.
After manually rotating the CMK or creating a new CMK in in your AWS account, you need to update the encryption definitions (the CMK and, optionally, the Access policy) in your cluster. You can initiate this update in the Cluster Management screen or the My Cluster screen.
To change the encryption definitions:
-
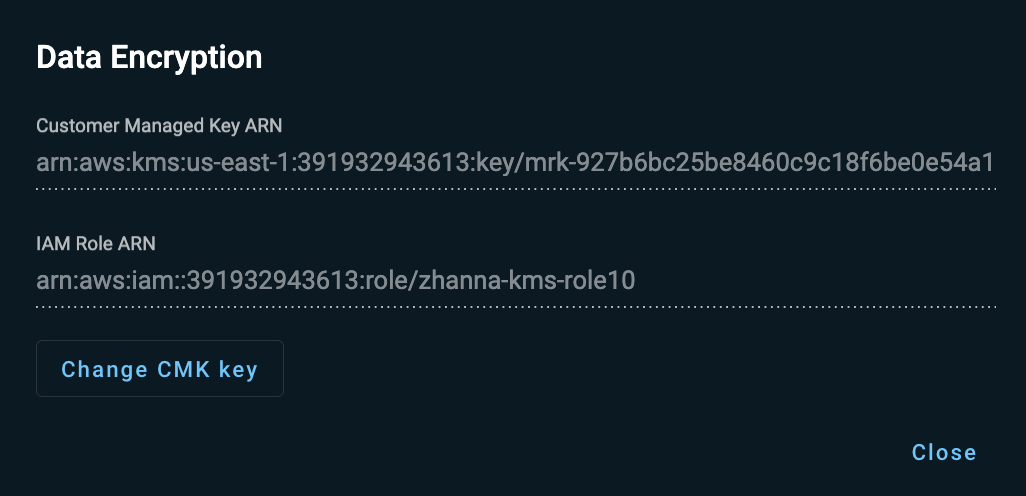
From the cluster’s context menu, select Data Encryption.
-
In the Data Encryption dialog that opens, click Change CMK Key.
-
In the Edit Data Encryption dialog that opens, replace the current Customer Manage Key ARN with the new KMS ARN value, then click Continue.
-
Optionally, follow instructions in Step 2 to update the access policy, then click Save.
Learn More
Now that you have created a managed cluster with KMS encryption, you can connect to this cluster via a thin client.
© 2026 GridGain Systems, Inc. All Rights Reserved. Privacy Policy | Legal Notices. GridGain® is a registered trademark of GridGain Systems, Inc.
Apache, Apache Ignite, the Apache feather and the Apache Ignite logo are either registered trademarks or trademarks of The Apache Software Foundation.