
Creating GridGain Cluster Backups
Before you go into production with GridGain, you need to decide on a cluster backup and recovery strategy. The disk that stores your records does not last forever. A new version of an application might have a bug that corrupts the data. The data center that is running your GridGain-based solution might fail and become unreachable. These examples are just a few of the many problems that can lead to data corruption or make your primary cluster unavailable. You can’t eliminate all such events, but if you back up GridGain regularly, you can restore a cluster after a data-loss incident.
In this part of the tutorial, you use the Snapshots screen to create a cluster backup and later use it to resolve a data-corruption incident.
Pause the Application
GridGain can create hot cluster snapshots while applications keep updating records and, later, use the snapshots and WALs to recover to any point in time. In this tutorial, you simulate a data-loss incident by deleting all of a table’s records, then confirm that restoring the cluster brings the record count back to normal. First, stop the tutorial application:
docker compose -f docker/ignite-streaming-app.yaml stopCreate a Cluster Snapshot
After you pause the application, navigate to the Snapshots screen and create a cluster snapshot:
-
Click
Create snapshot. In the dialog, keep the defaultFullsnapshot type, then clickCreate: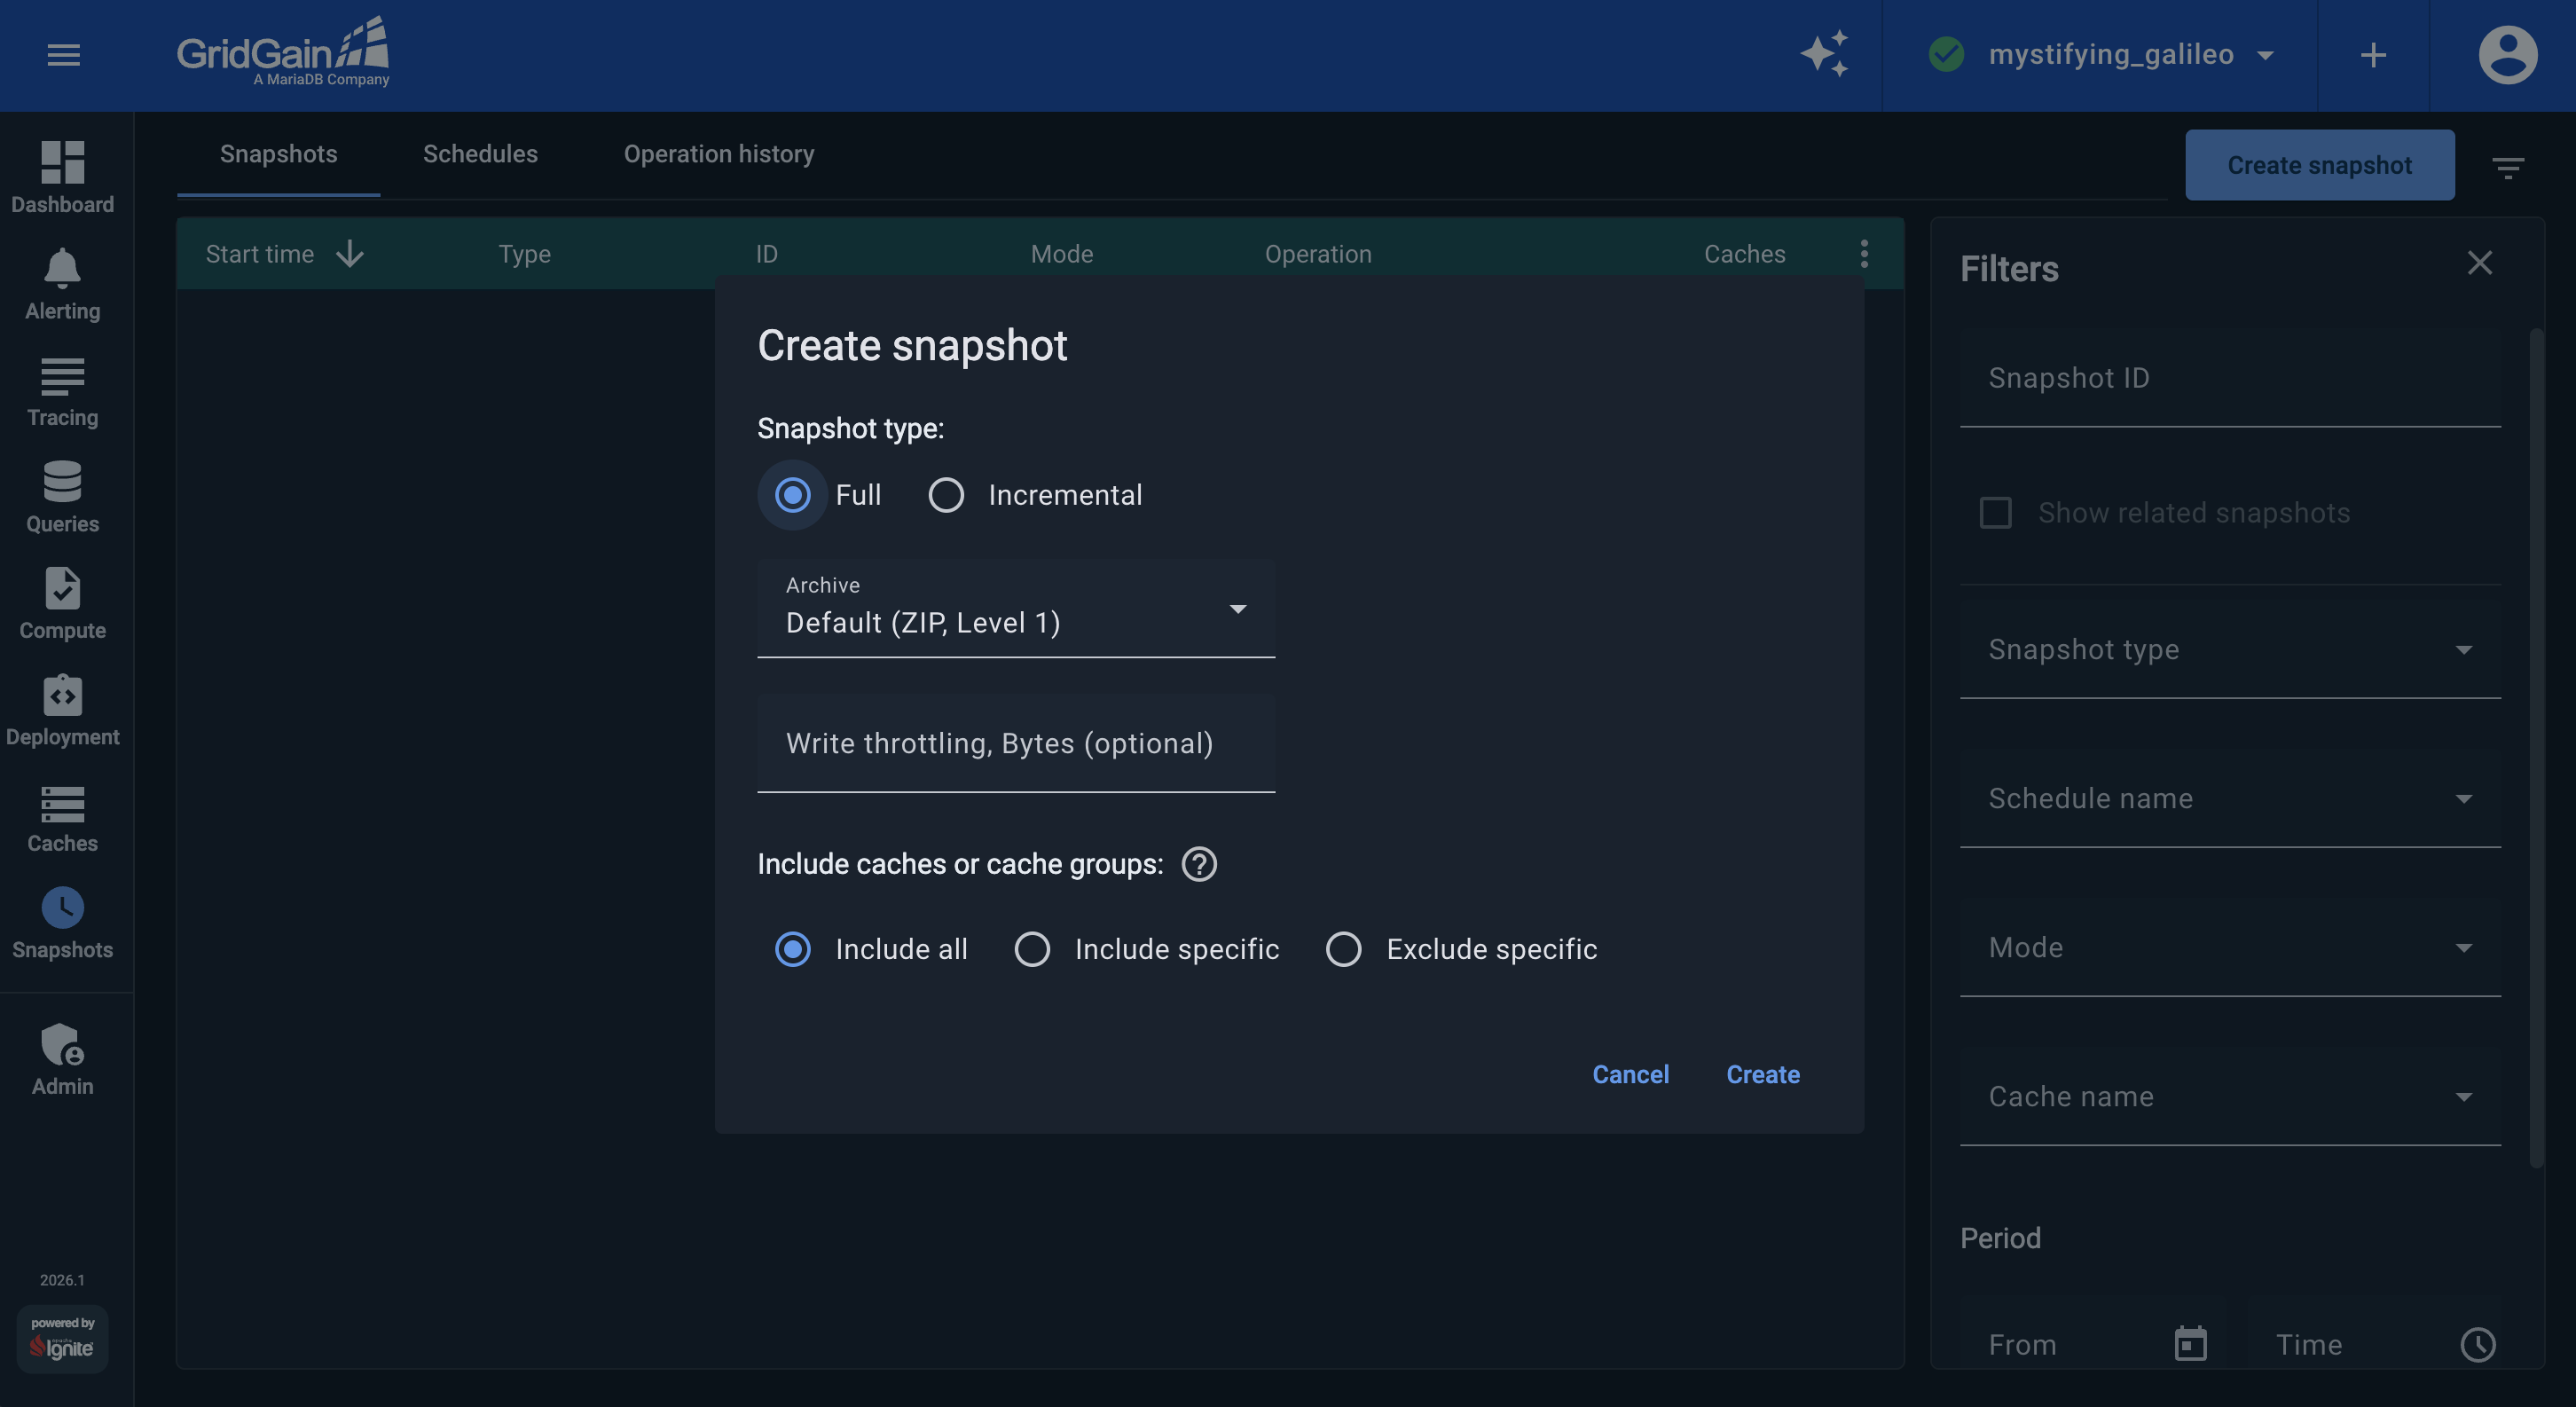
-
The new snapshot appears in the
Snapshotslist: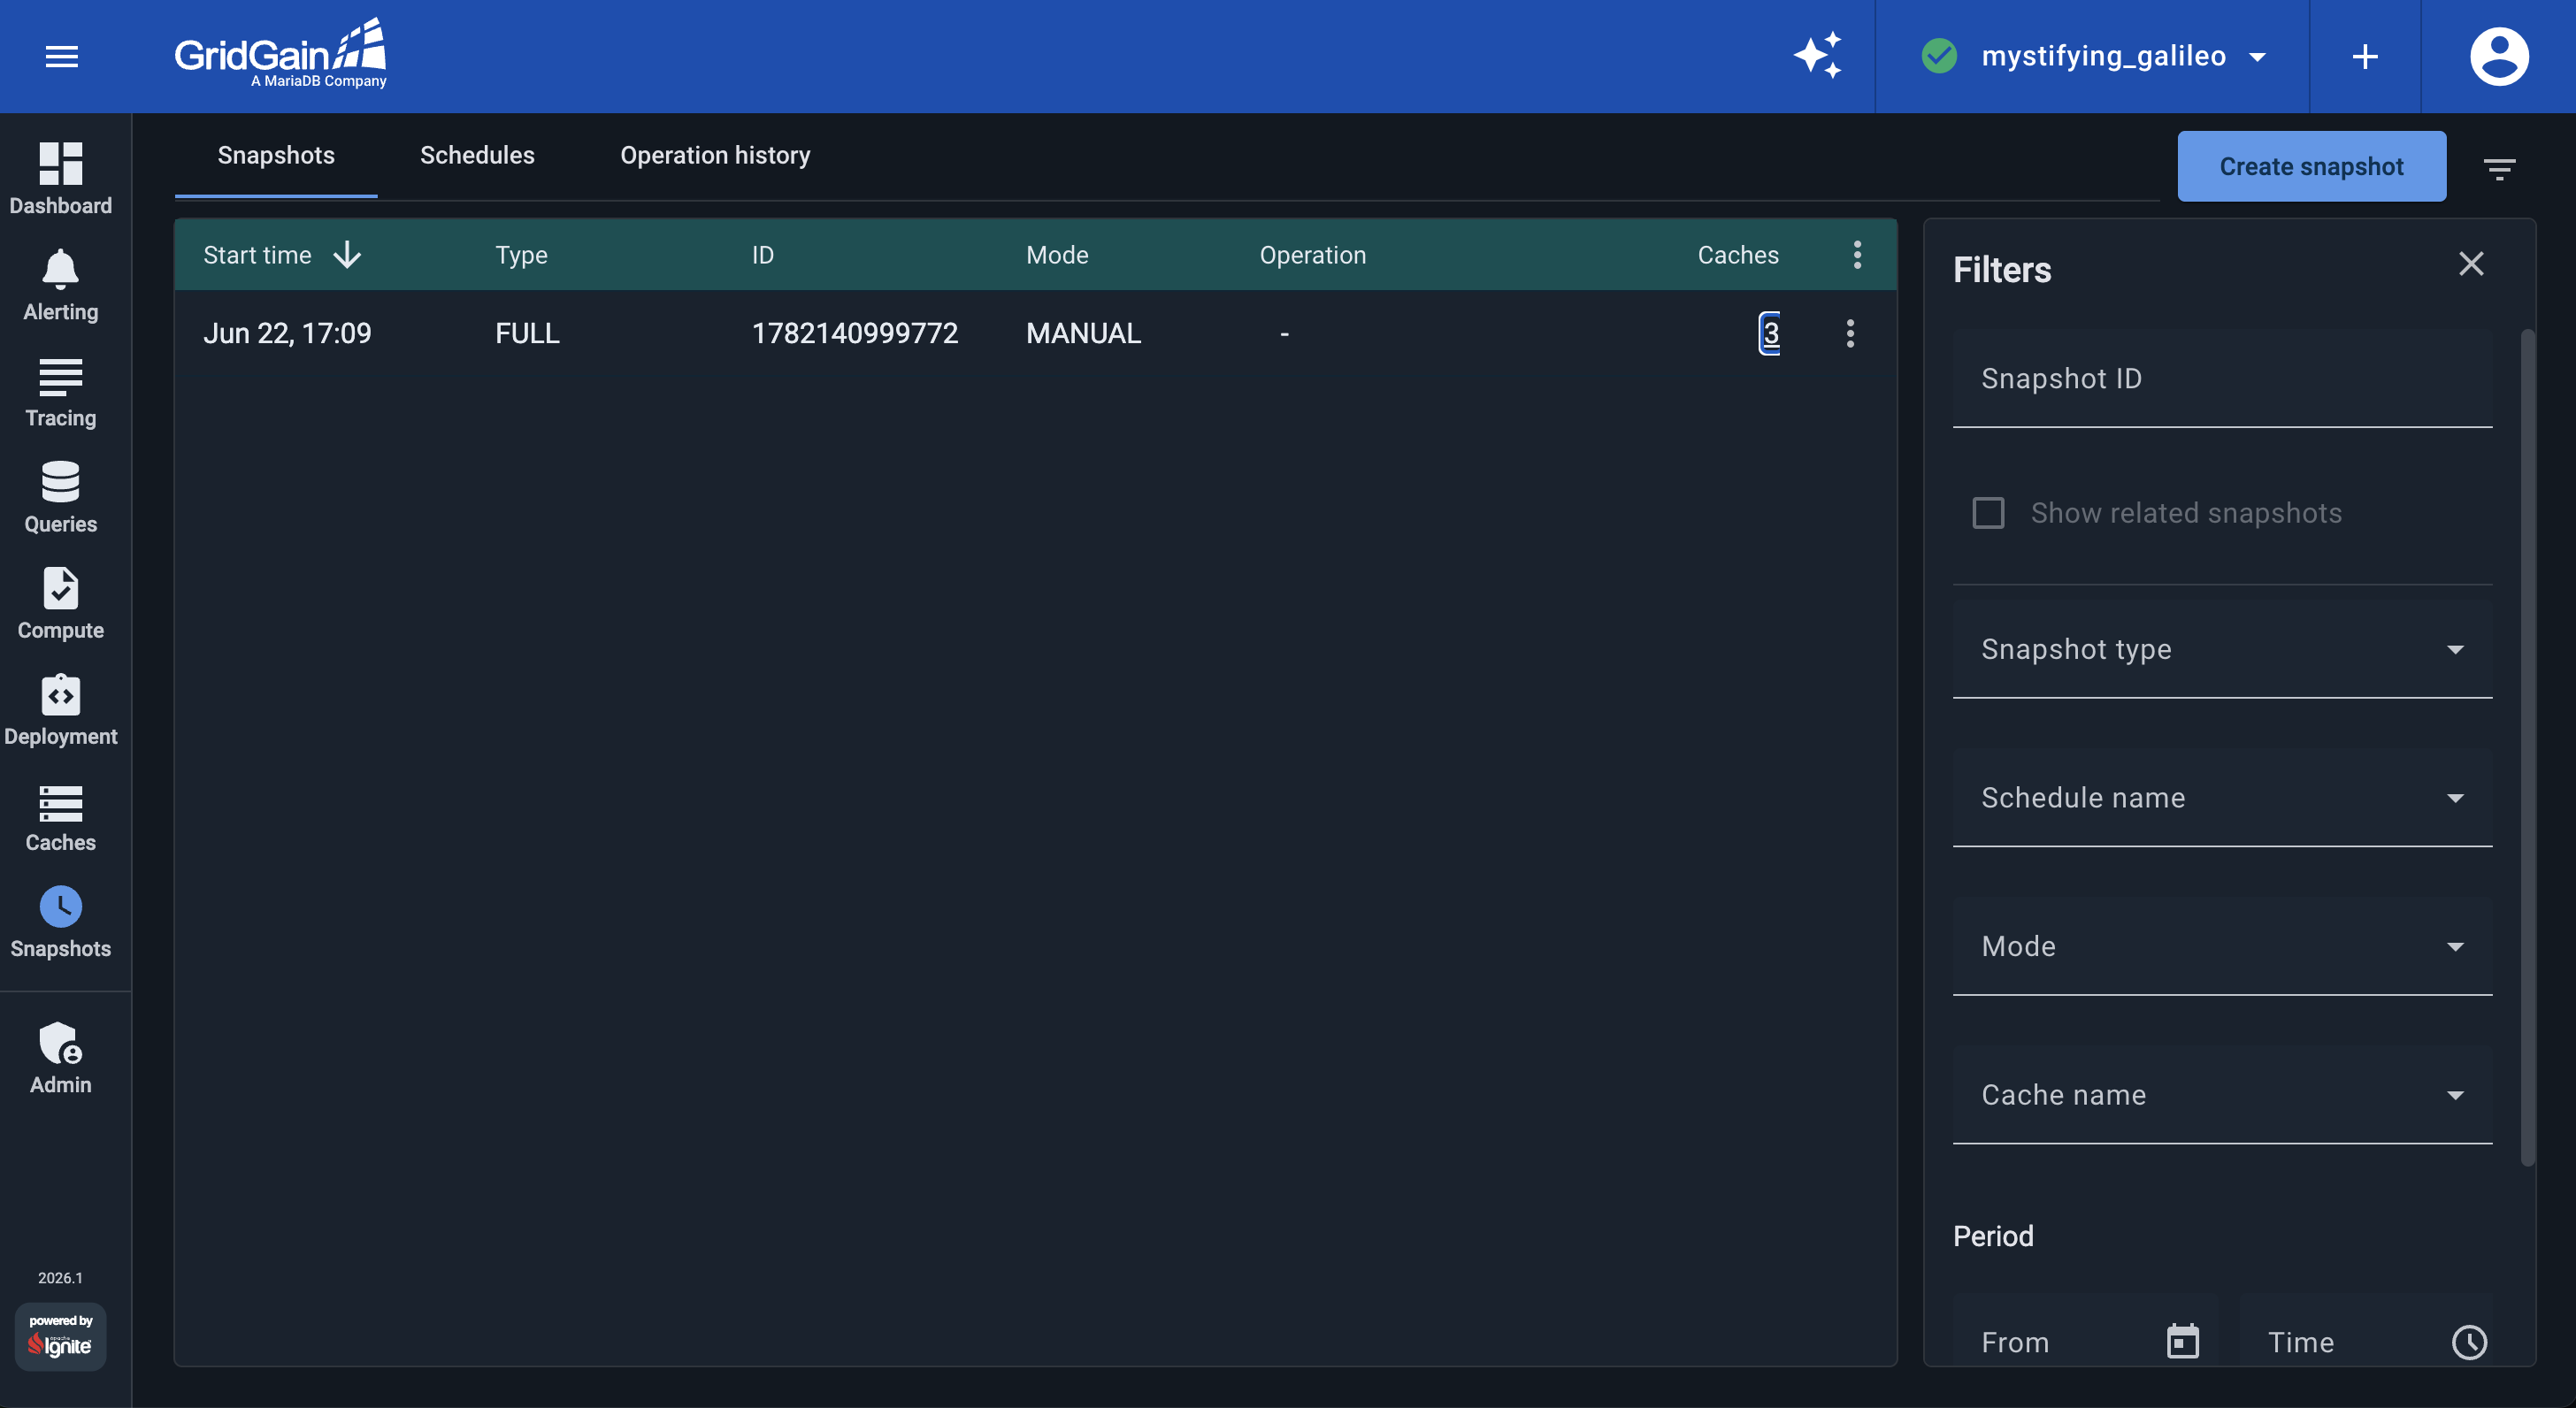


Corrupt a Cluster Table
After you create a cluster snapshot, open the Queries screen
and simulate a data-loss incident by removing records from the Trade table:
-
Check the number of trades in your cluster by executing the
SELECT count(*) FROM Tradequery. Your record count might not match the number in the following screenshot, because the application may have been running for a different amount of time in your environment.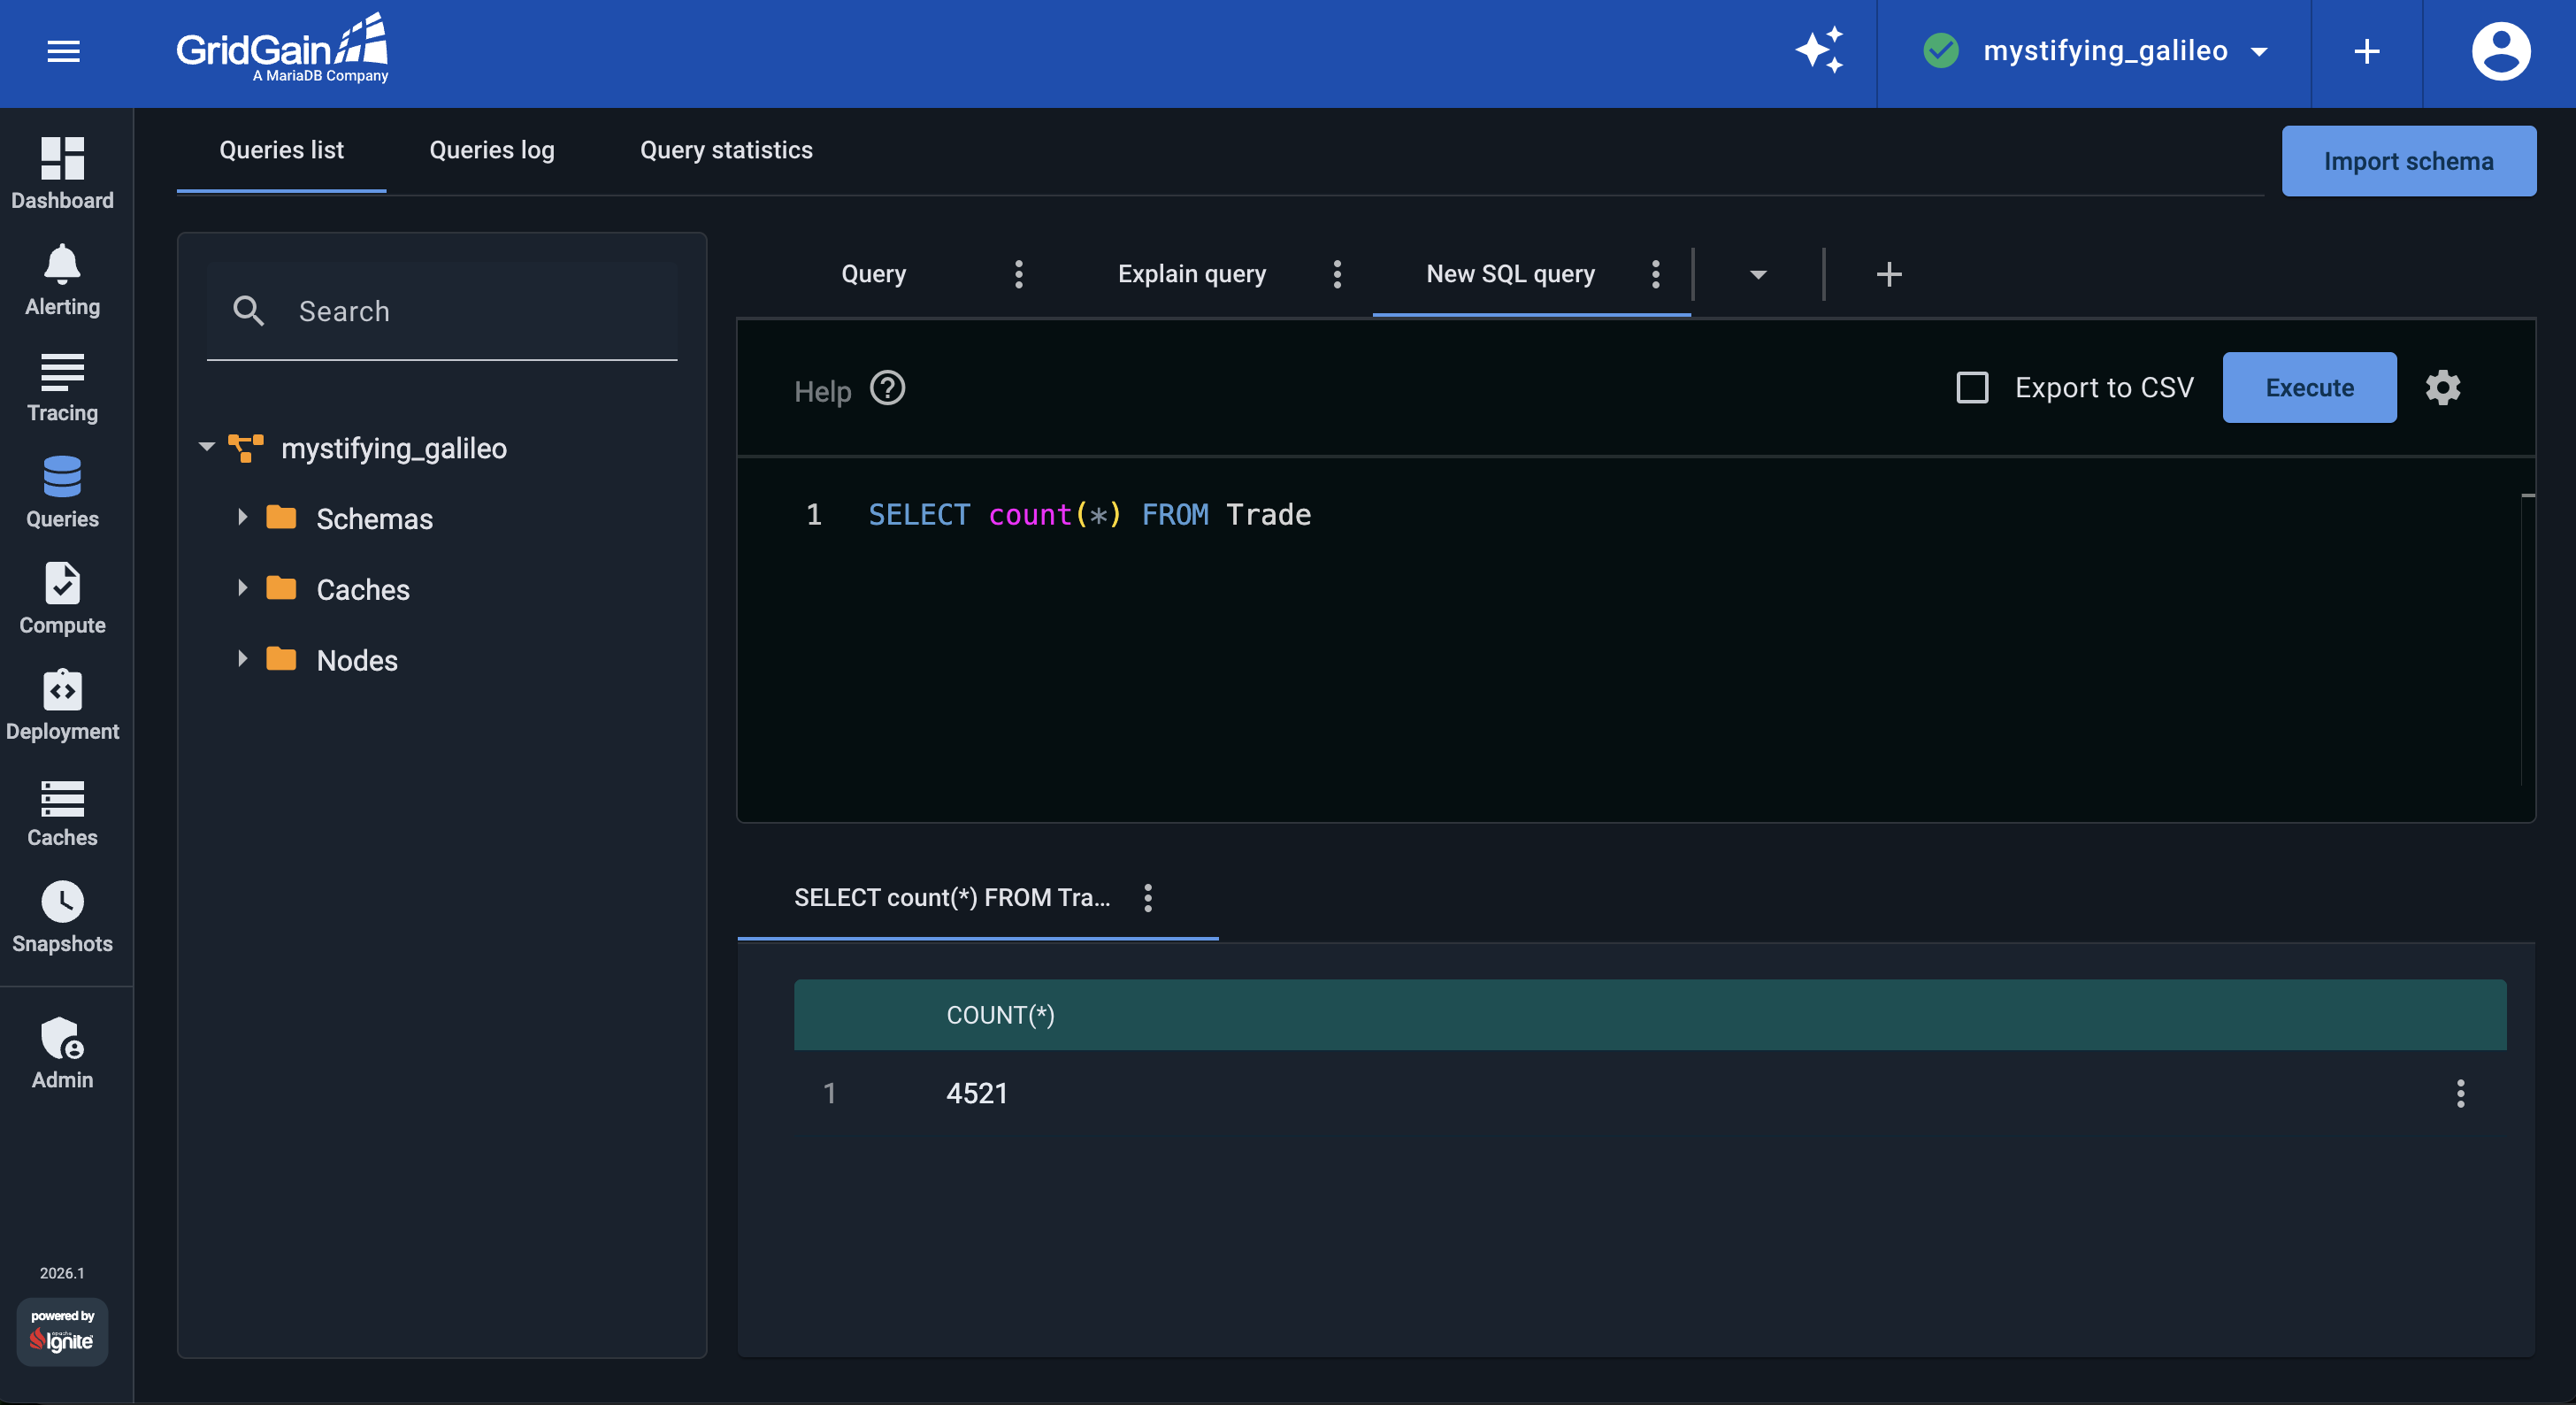
-
Use the
DELETE FROM Tradequery to remove all the trades. -
Confirm that the table is empty by running the
SELECT count(*) FROM Tradequery again.

Restore from the Snapshot
You removed records only from the Trade table, so restore just that cache instead of the whole snapshot:
-
On the
Snapshotsscreen, click the⋮icon in the snapshot’s row and selectRestore from snapshot. -
In the Restore snapshot dialog, select Include specific, choose the
Tradecache from the Caches drop-down, and clickRestore: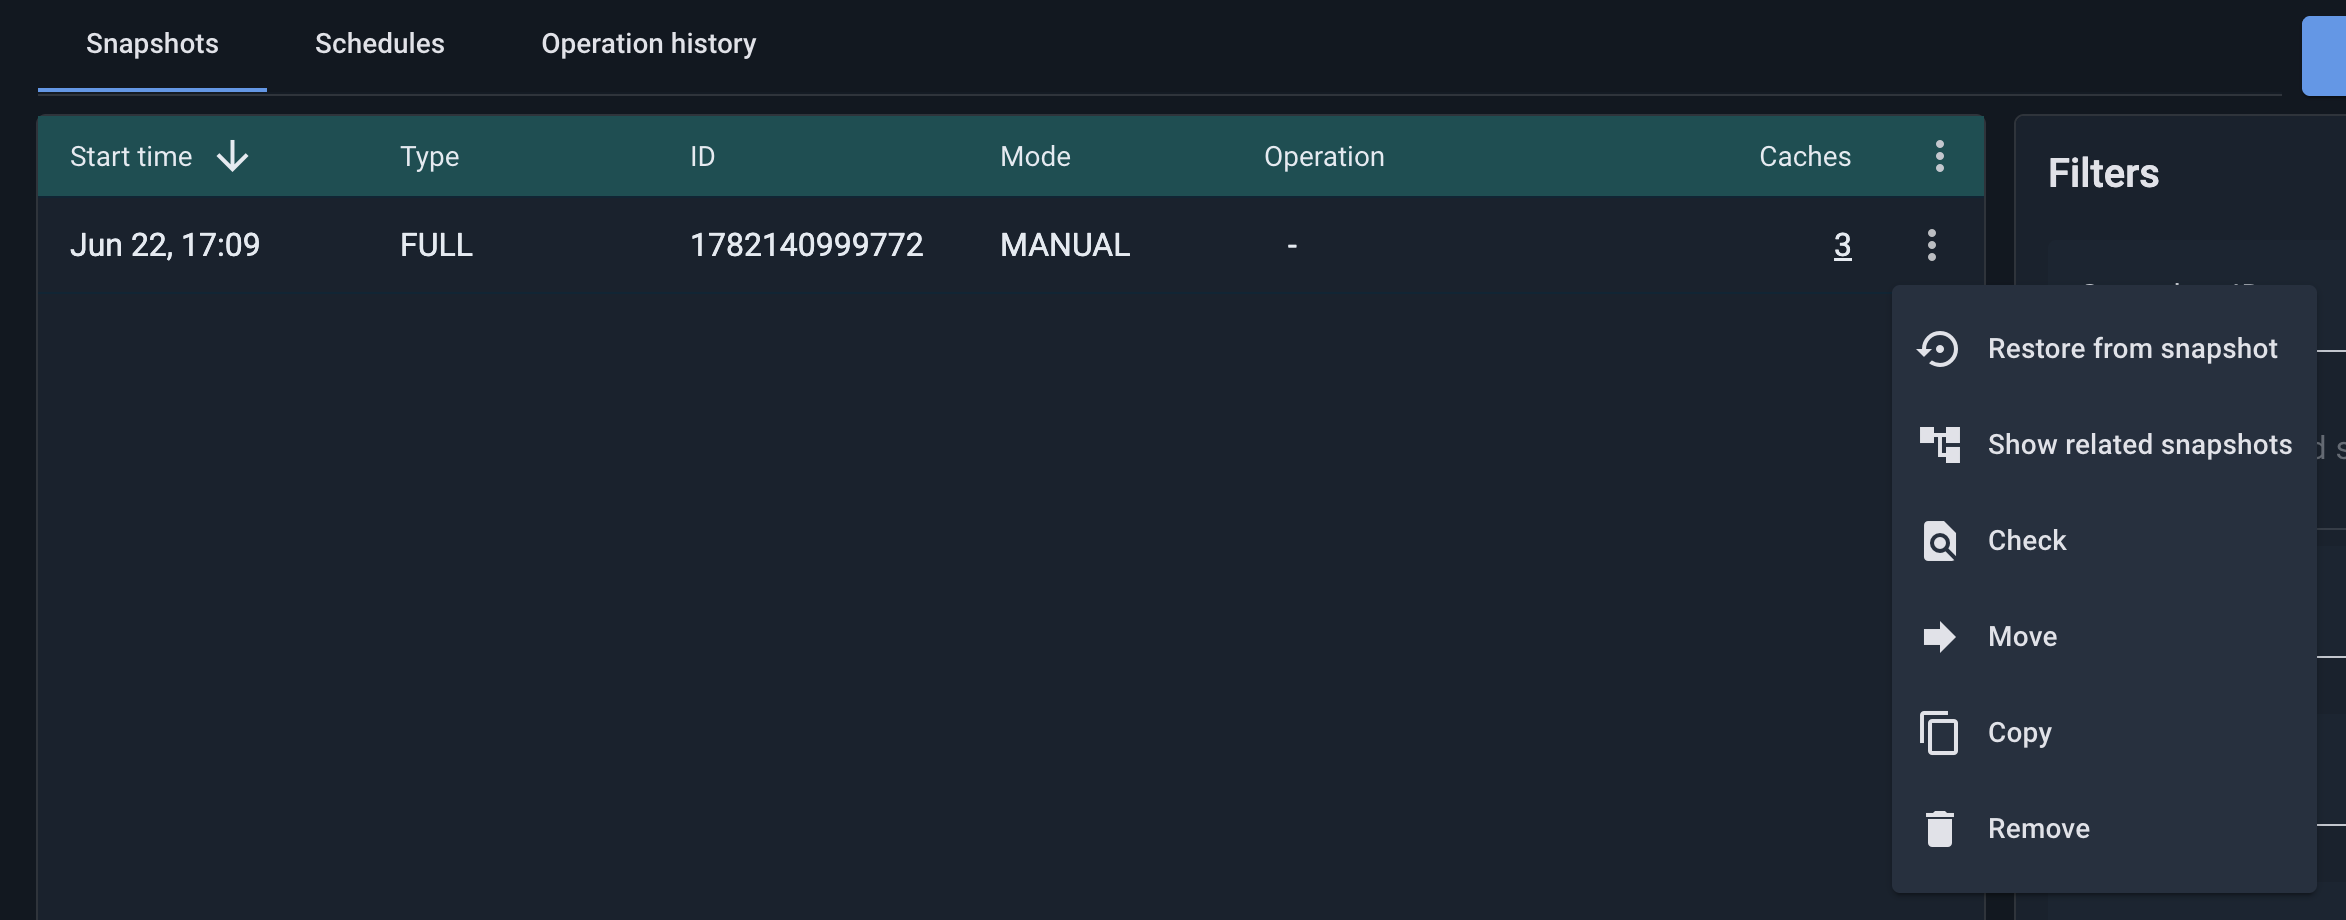
Restoring the full snapshot instead (the default All scope) replaces every cache in the cluster and is meant for full disaster recovery on a healthy cluster, not for recovering a single table.
-
After the restore procedure is complete, return to the Queries screen and execute the
SELECT count(*) FROM Tradequery. Confirm that all the records were recovered:

What’s Next
Congratulations! You’ve finished all the steps of the tutorial. Now you can stop the demo:
© 2026 GridGain Systems, Inc. All Rights Reserved. Privacy Policy | Legal Notices. GridGain® is a registered trademark of GridGain Systems, Inc.
Apache, Apache Ignite, the Apache feather and the Apache Ignite logo are either registered trademarks or trademarks of The Apache Software Foundation.