Snapshots Screen
GridGain 9 Ultimate Edition users can manage snapshots via the Snapshots screen.
The Snapshots screen allows you to create, restore and delete snapshots. In addition to the snapshots created in Nebula, the list of snapshots contains those that were created by using GridGain9 REST API and via the CLI. See Snapshots and Recovery for more details.
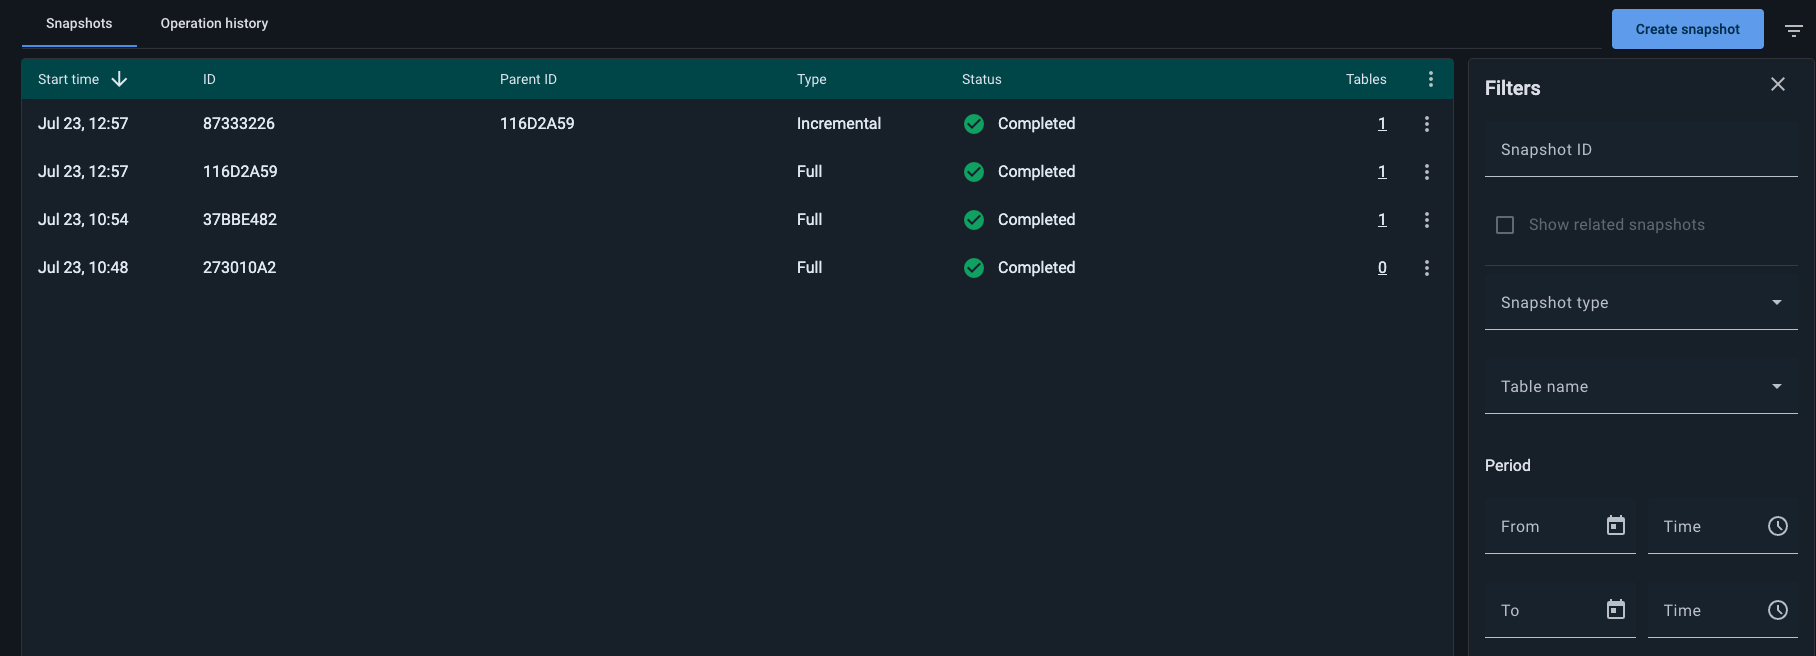
The Snapshots screen displays the following information about each snapshot:
| Column | Description |
|---|---|
Start Time |
Timestamp of when the snapshot creation started |
Type |
Type of the snapshot: Full or incremental |
ID |
Unique ID of the snapshot |
Parent ID |
ID of the parent snapshot (for incremental snapshots) |
Status |
Status of the snapshot operation. Possible values:
|
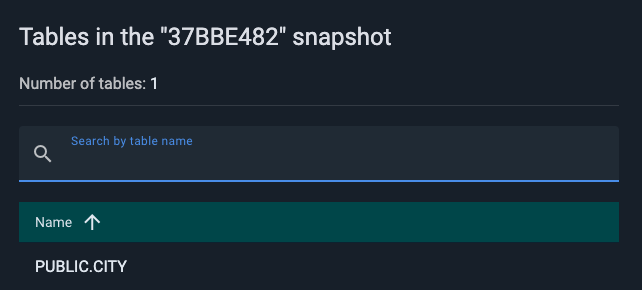
Tables |
Number of tables included in the snapshot. Click on the number to view the table names |
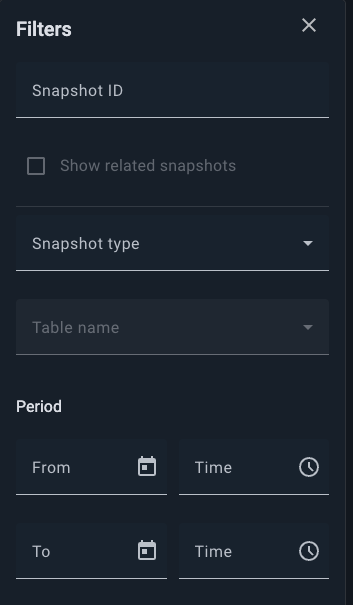
You can filter snapshots by the following criteria:
| Column | Description |
|---|---|
Snapshot ID |
ID of the snapshot. |
Type |
Snapshot type: Full or Incremental. |
Table Name |
Name of the table that belongs to the snapshot you search for. |
Period |
Interval in time when the operation started. |
Creating Snapshots
For more details on managing snapshots, see Snapshots and Recovery documentation.
To create a snapshot:
-
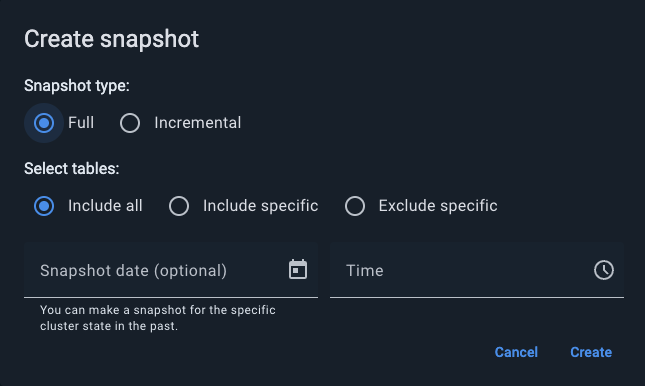
Click Create snapshot.
The Create snapshot dialog opens.
-
Select the snapshot type: Full (default) or Incremental.
-
Optionally, select tables you want to include or exclude from this snapshot:
-
Include specific to add only the specified tables;
-
Exclude specific to add all tables except the ones specified;
-
-
If one of these options is chosen, select tables to include or exclude (based on your choice above) from the Tables drop-down list.
-
Optionally, specify a past Date and Time to create a snapshot of the cluster state at that point.
-
-
Click Create.
Snapshots are stored in each node’s snapshot folder. Each node saves its portion of the data. See the documentation on configuring snapshot folder for more details.
Managing Snapshots
If you click the ⋮ icon in the row corresponding to the snapshot you want to manage, the following options are available: Restore, Delete, and Show related snapshots.

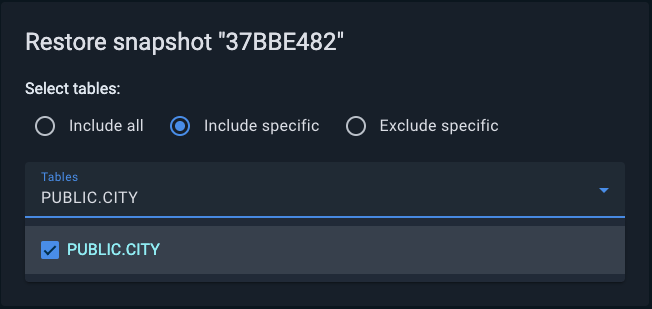
Restoring Snapshots
To restore a snapshot:
-
Click the ⋮ icon in the snapshot’s row.
-
Select Restore from snapshot from the menu.
-
Optionally, specify which tables to include or exclude during restoration.
Deleting Snapshots
To delete a snapshot:
-
Click the ⋮ icon in the snapshot’s row.
-
Select Remove from the menu.

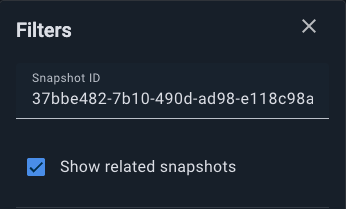
Filtering by Related Snapshots
To view snapshots related to a given snapshot:
-
Click the ⋮ icon in the snapshot’s row.
-
Select Show related snapshots.
The table will be filtered to show the selected snapshot and any snapshots incrementally created from it.
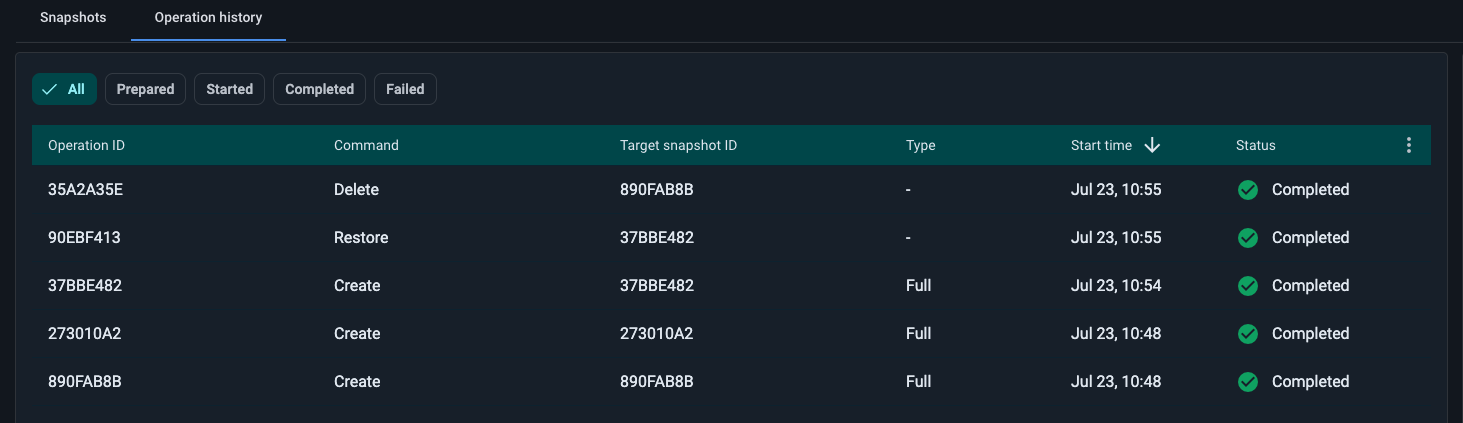
The Operation History tab displays all snapshot operations, including creation, restoration, and deletion.
The table shows:
| Column | Description |
|---|---|
Operation ID |
ID of an executed operation. |
Command |
Type of operation:
|
Target Snapshot ID |
ID of the snapshot affected by the operation. |
Type |
Snapshot type: Full or Incremental. |
Start Time |
Timestamp of when the snapshot creation started |
Status |
Status of the snapshot operation. Possible values:
|
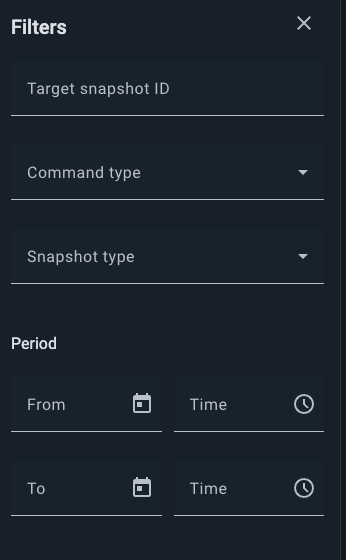
You can filter the operations by the following criteria:
| Column | Description |
|---|---|
Target Snapshot ID |
ID of the snapshot affected by the operation. |
Command Type |
Type of operation:
|
Type |
Snapshot type: Full or Incremental. |
Period |
Interval in time when the operation started. |
© 2026 GridGain Systems, Inc. All Rights Reserved. Privacy Policy | Legal Notices. GridGain® is a registered trademark of GridGain Systems, Inc.
Apache, Apache Ignite, the Apache feather and the Apache Ignite logo are either registered trademarks or trademarks of The Apache Software Foundation.