
Introduction
In the first article in this series, we installed Node.js, the Node.js Thin Client package for Ignite and tested an example application. In this article, let's look at a particular scenario where Ignite can really help when working with existing data from another source, such as a Relational Database System.
Often in industry, there are systems that have great business value. These have to be cared-for, maintained and enhanced. Greenfield developments are rare. Apache® Ignite™ can be used with legacy or heritage systems in an organization to add value and provide new possibilities, such as cluster computing with horizontal scalability, significant in-memory performance benefits and new applications using machine and deep learning.
Let's look at an example where we have existing data in a Relational Database System and how Ignite can cache that data into memory, perform SQL operations on that in-memory data and propagate changes back to the Relational Database System. We'll use some Node.js code to access Ignite and run some example SQL queries.
Existing Database System
For this article, we'll use MySQL with the World Database already loaded and ready.
The structure of the World Database is three Relational Tables, as follows:
- country: countries of the world (239 rows)
- city: information about some cities in countries (4079 rows)
- countrylanguage: languages spoken in countries (984 rows)
Next, let's ensure that our MySQL Server is up and running and ready to accept connections.
Web Console and Web Agent
In order to access MySQL Database Schema information, we'll use Web Console. For this article, we'll use the service hosted by GridGain, although Web Console sources can be downloaded and it can be built locally and run behind a corporate firewall. Please refer to the documentation.
We also need the Web Agent and the option to download this is available from the Web Console, as shown in Figure 1.

Figure 1. Download Web Agent.
Once the Web Agent zip file has been downloaded, we need to unpack the files, and the directory structure should be similar to Figure 2.
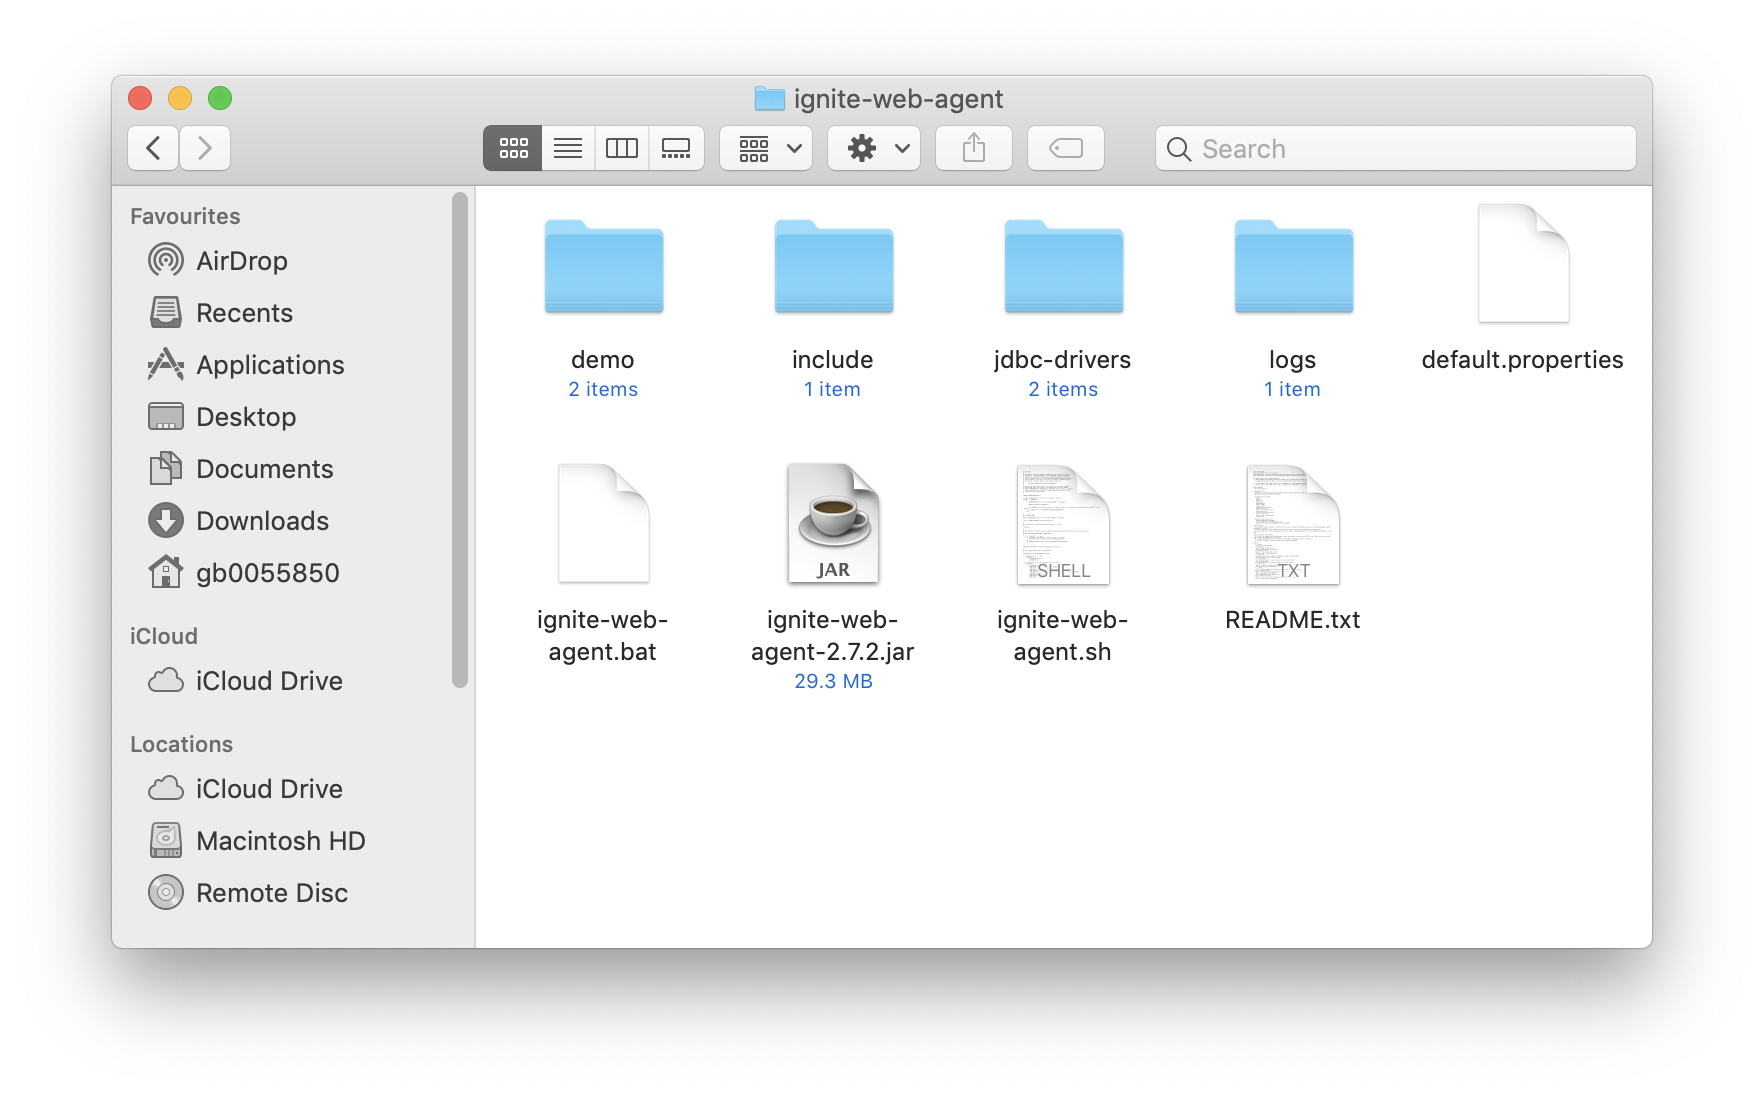
Figure 2. Web Agent Directory Structure.
Notice that there is a folder called jdbc-drivers. Since we are going to be working with MySQL, we'll download the MySQL JDBC driver and copy the jar file into this directory as shown in Figure 3.
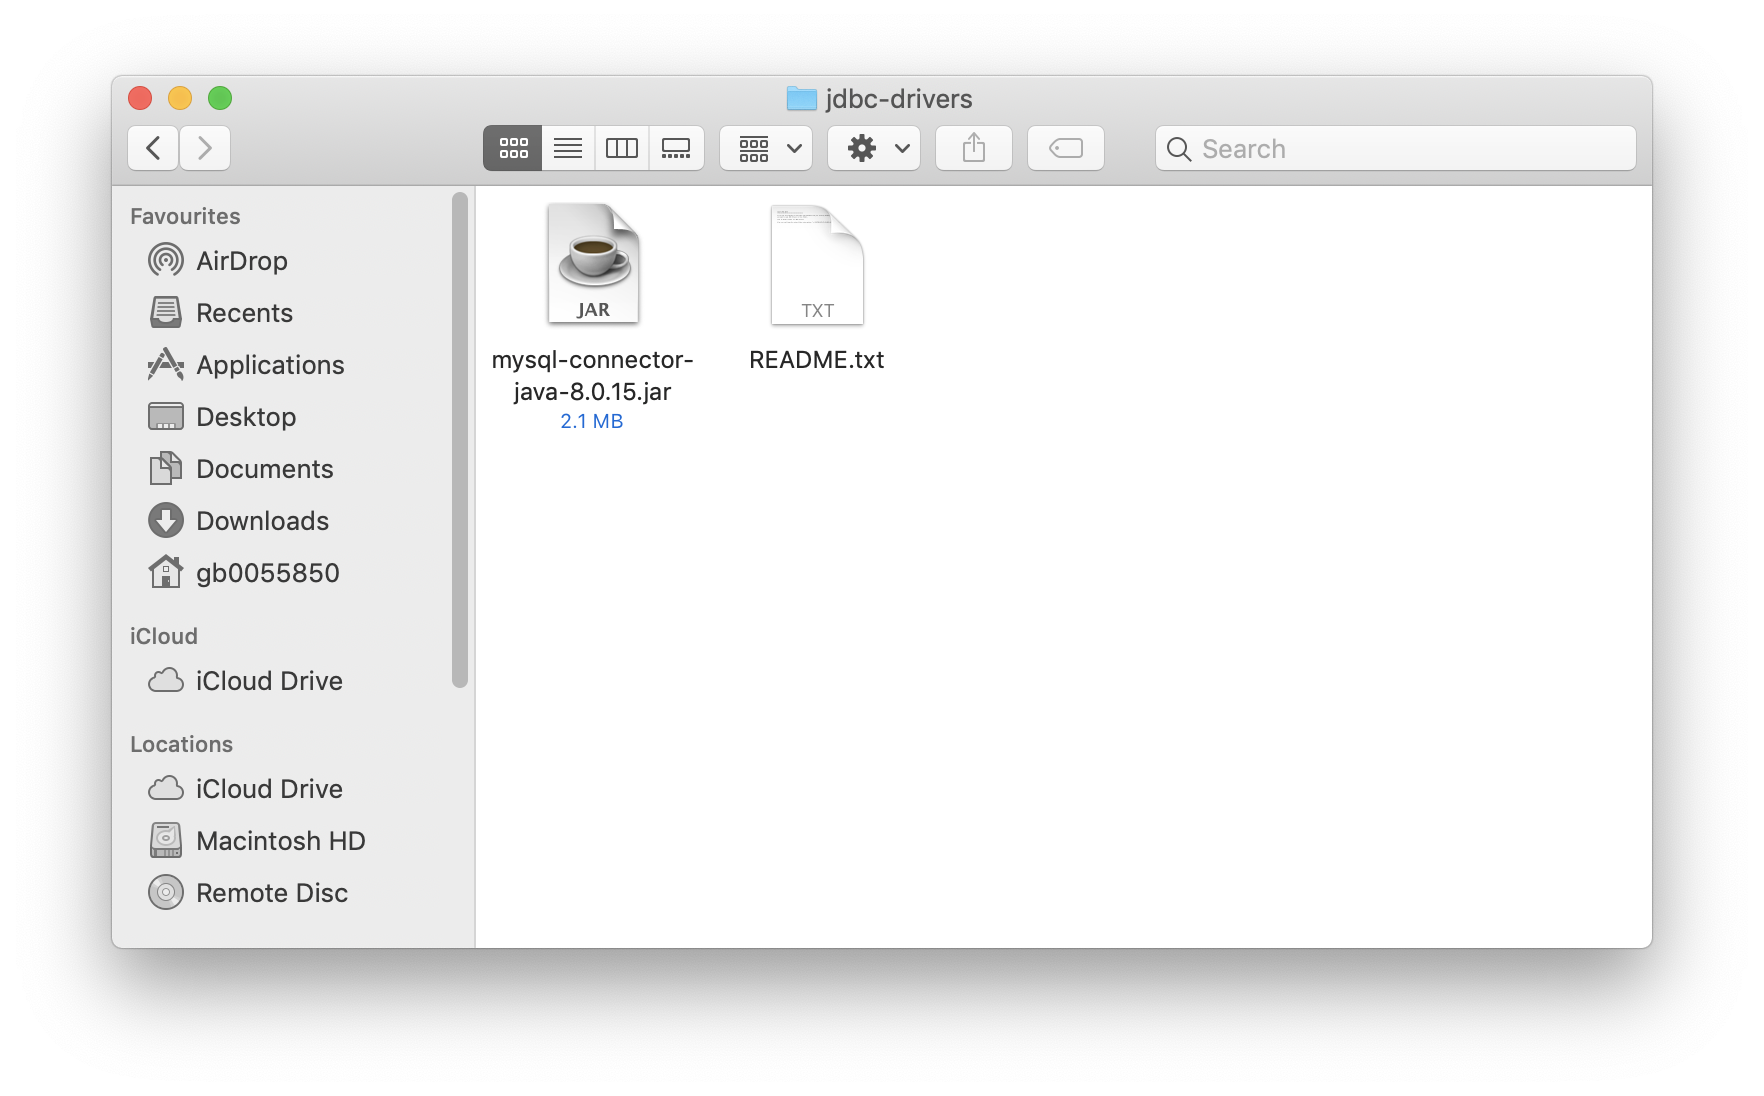
Figure 3. MySQL JDBC Driver.
Let's start the Web Agent from a terminal window, as follows:
./ignite-web-agent.sh
The output should be similar to Figure 4.
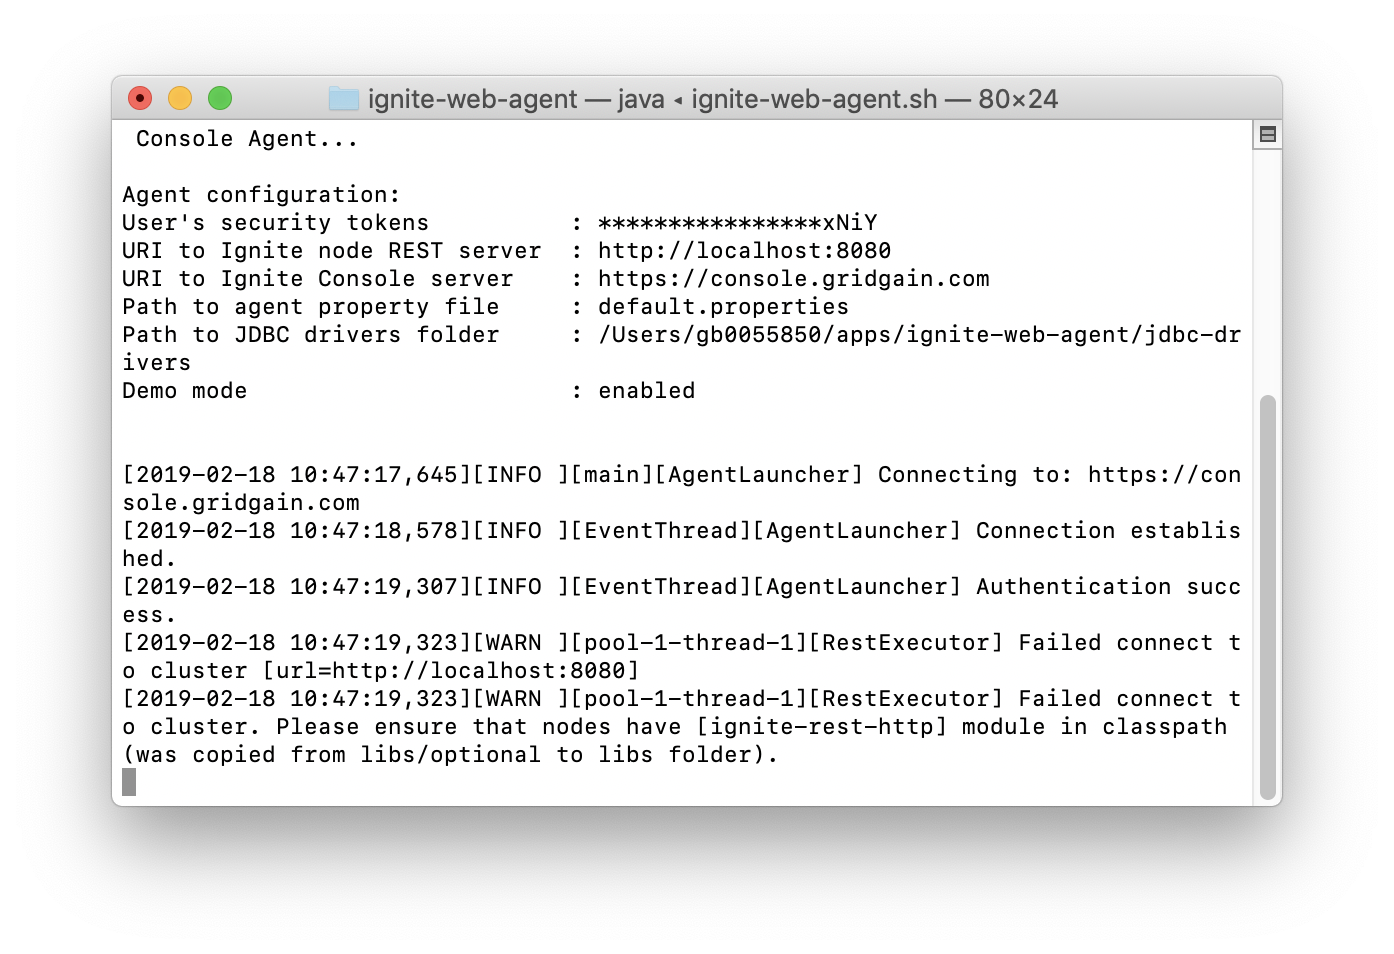
Figure 4. Start Web Agent.
Import Schema from MySQL
We are now ready to import schema information. From the Configuration page on Web Console, there is an Import from Database button on the top right-hand side, as shown in Figure 5.
Figure 5. Import from Database.
Let's click this button and the output should be similar to Figure 6.
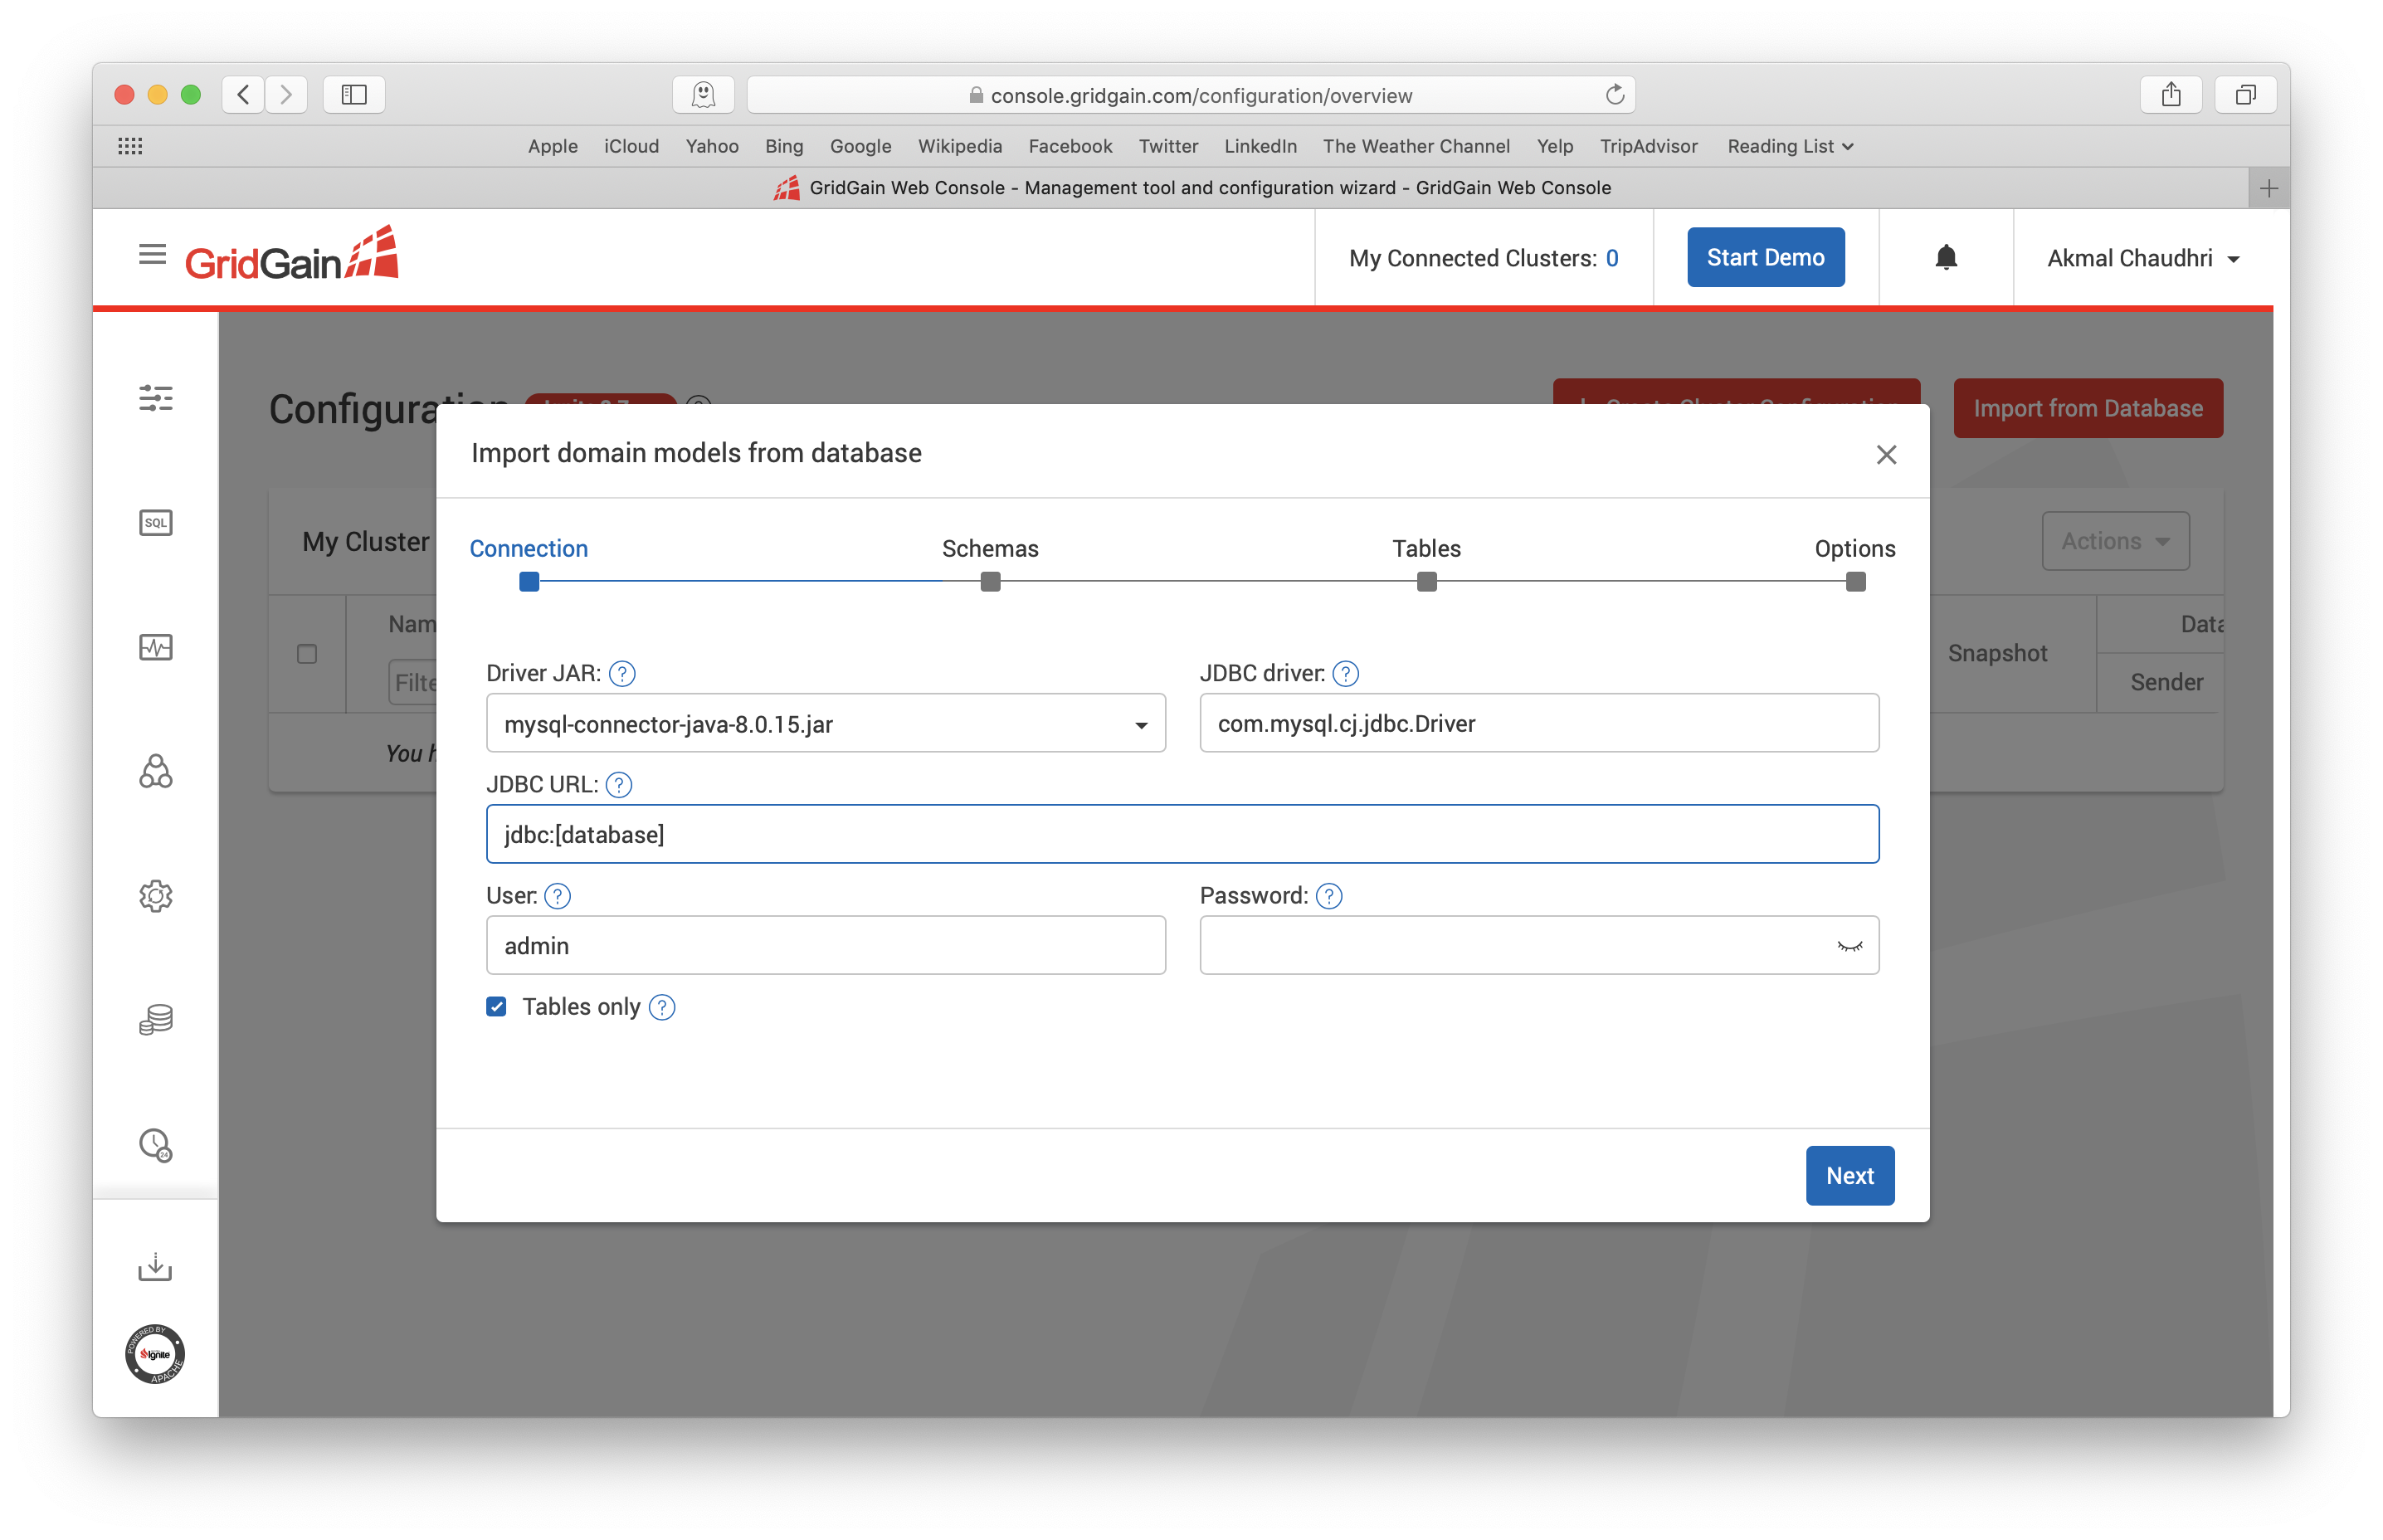
Figure 6. Import from Database.
On this screen we just need to enter the JDBC URL and the User and Password for the MySQL Server. I have entered these details for my environment, as shown in Figure 7.
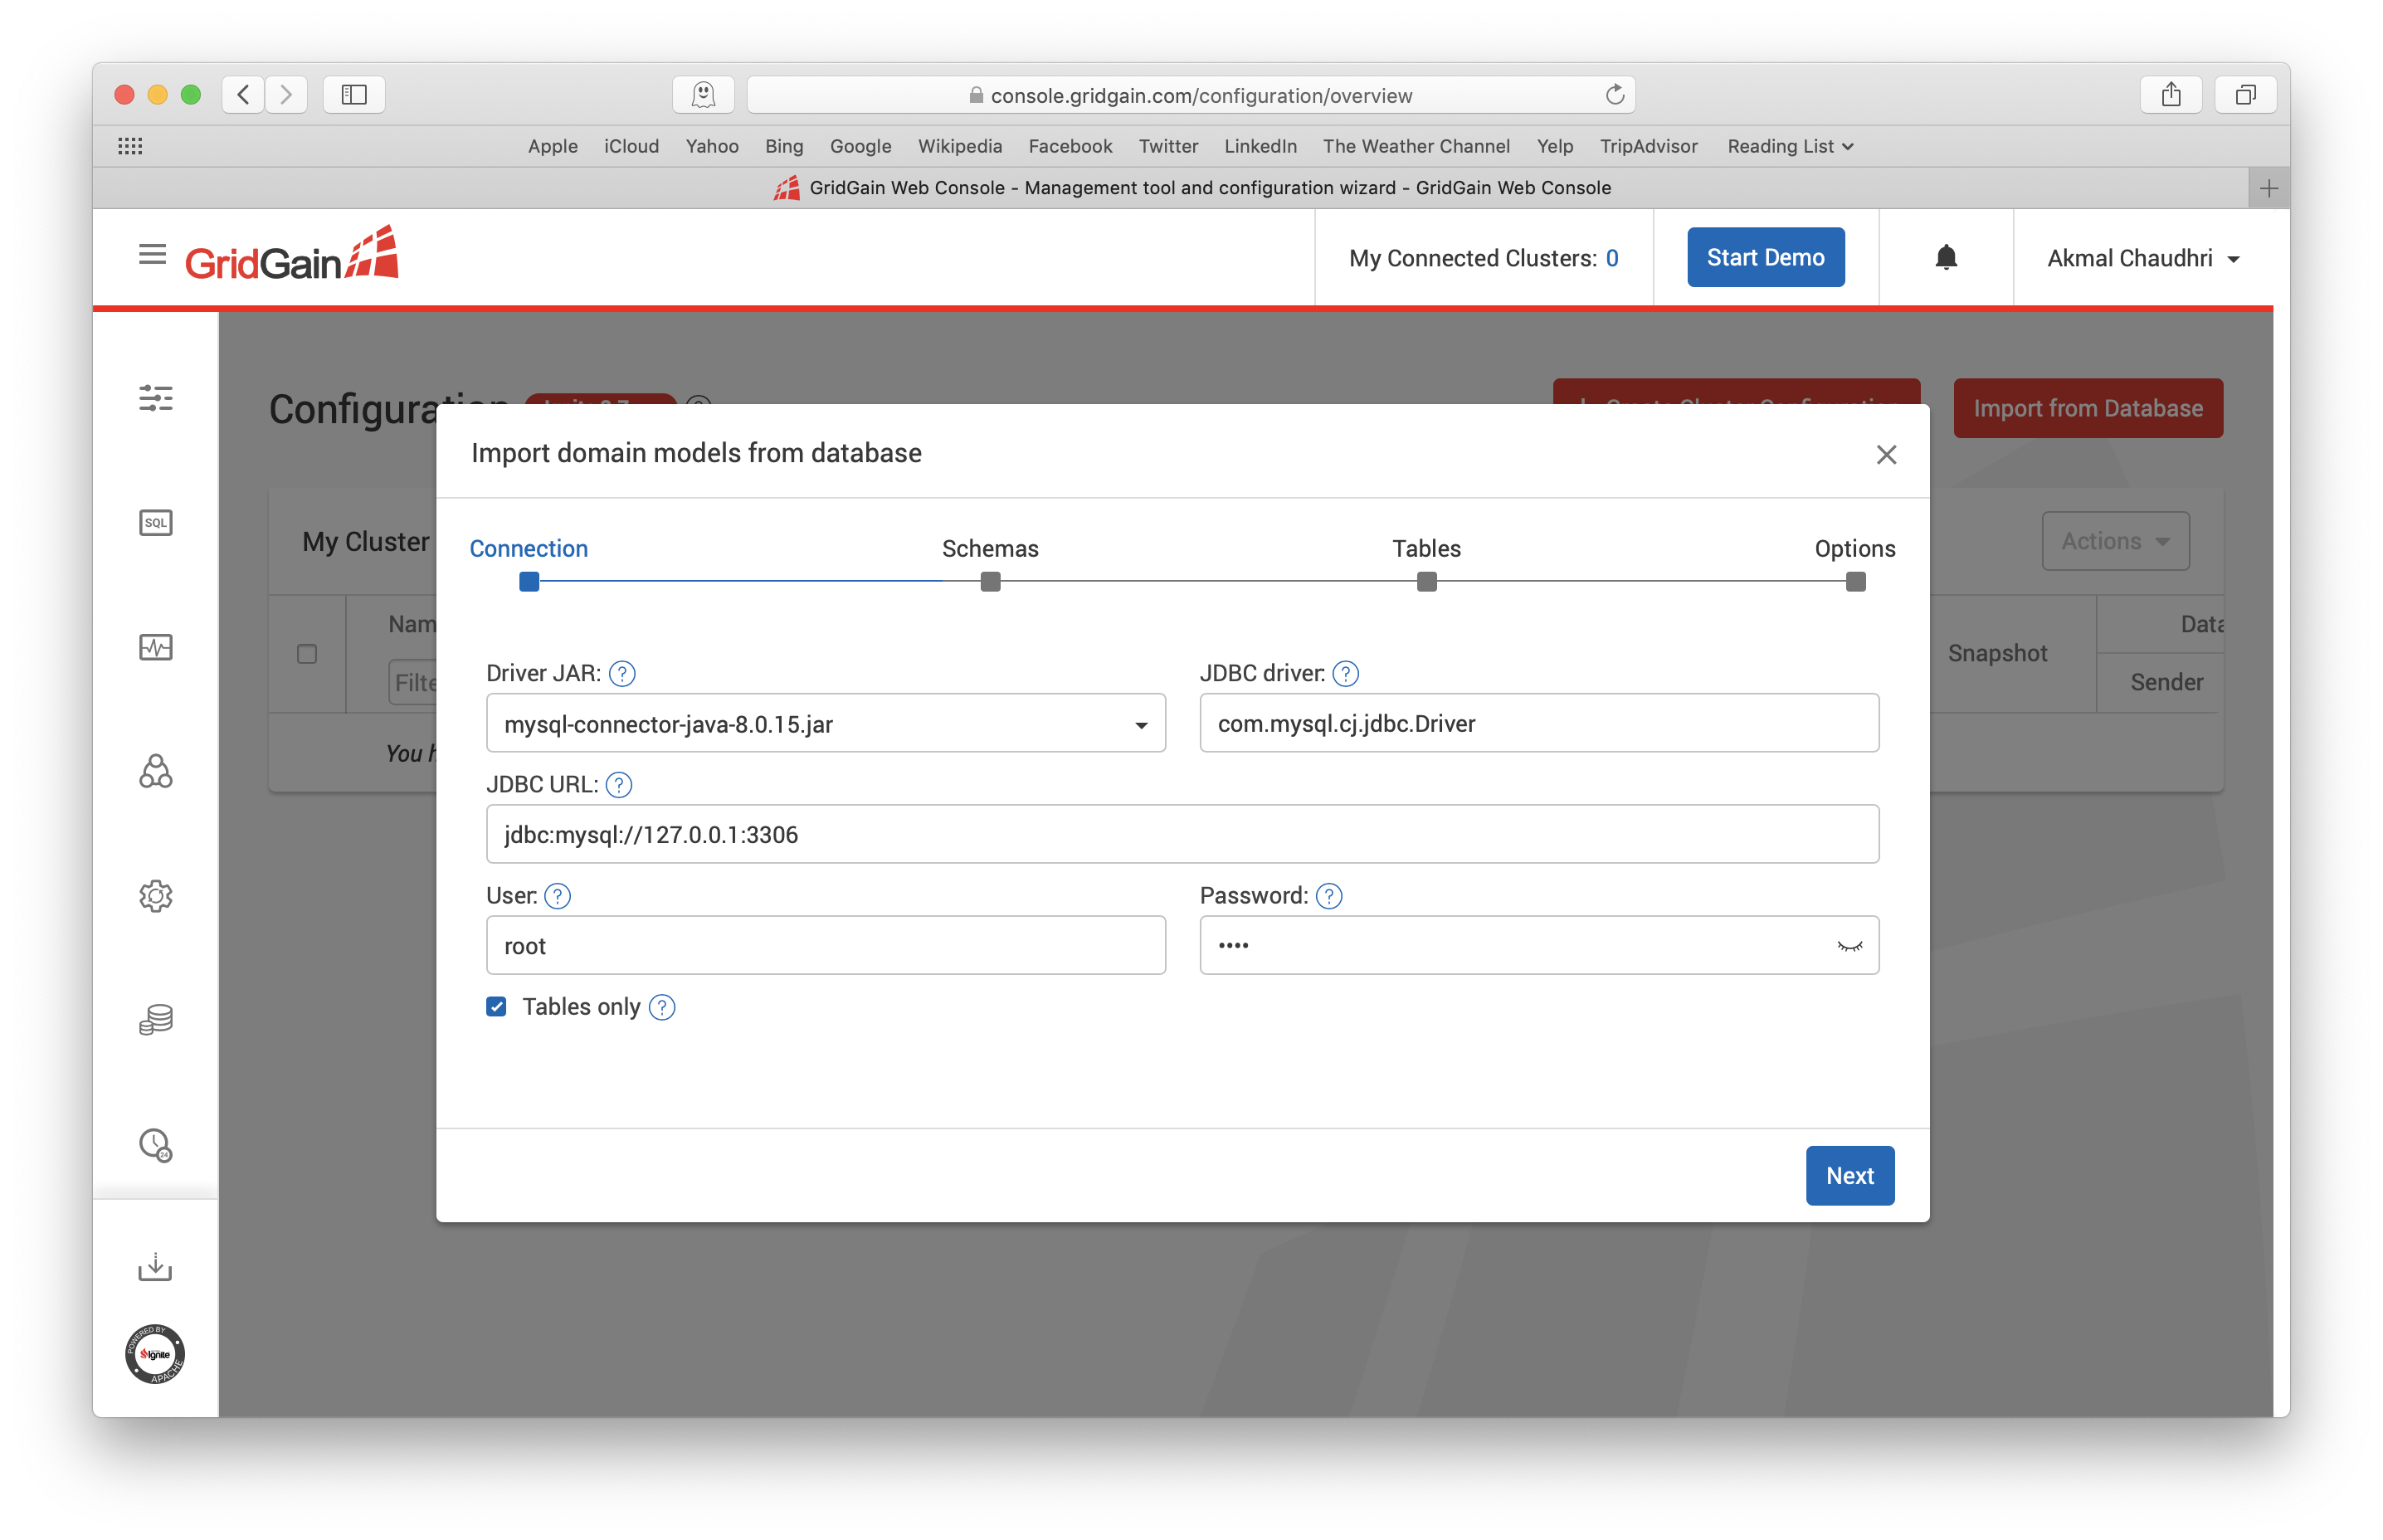
Figure 7. Import from Database.
When we are ready, we can click Next. We may now be presented with various database schemas and will de-select all but the World Schema, as shown in Figure 8.
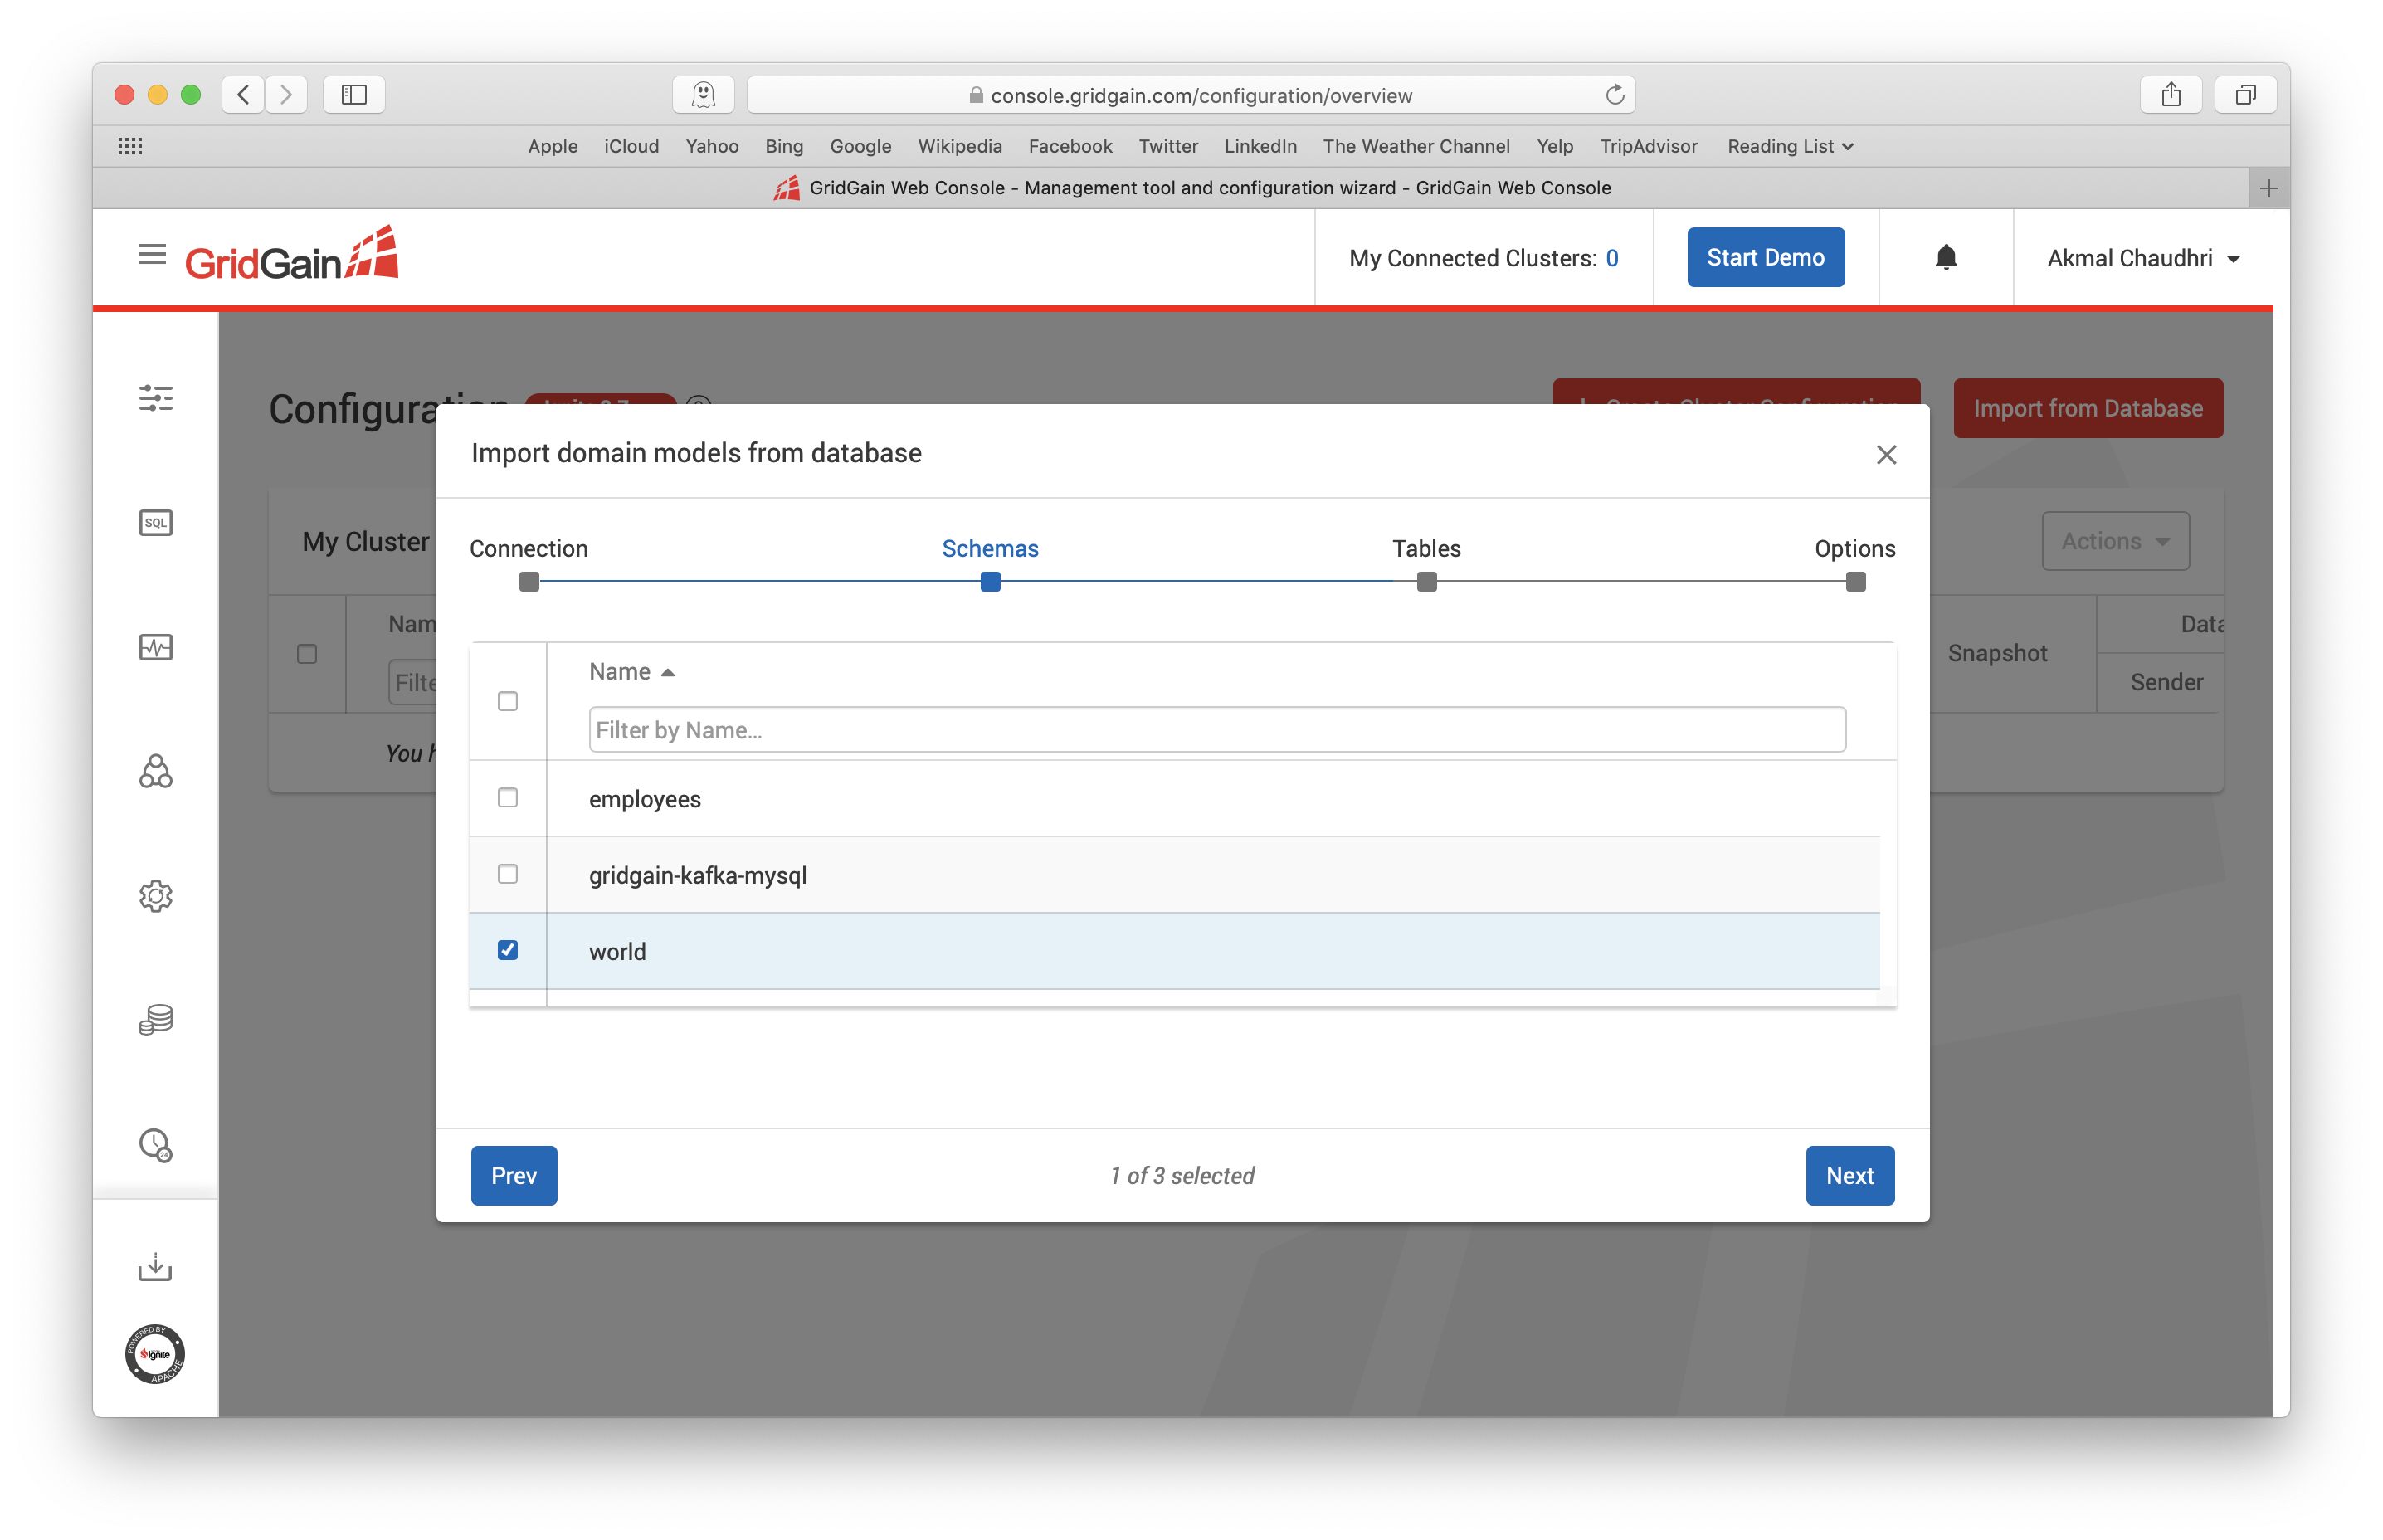
Figure 8. Import from Database.
When we are ready, we can click Next. We can now see the three tables, as shown in Figure 9.
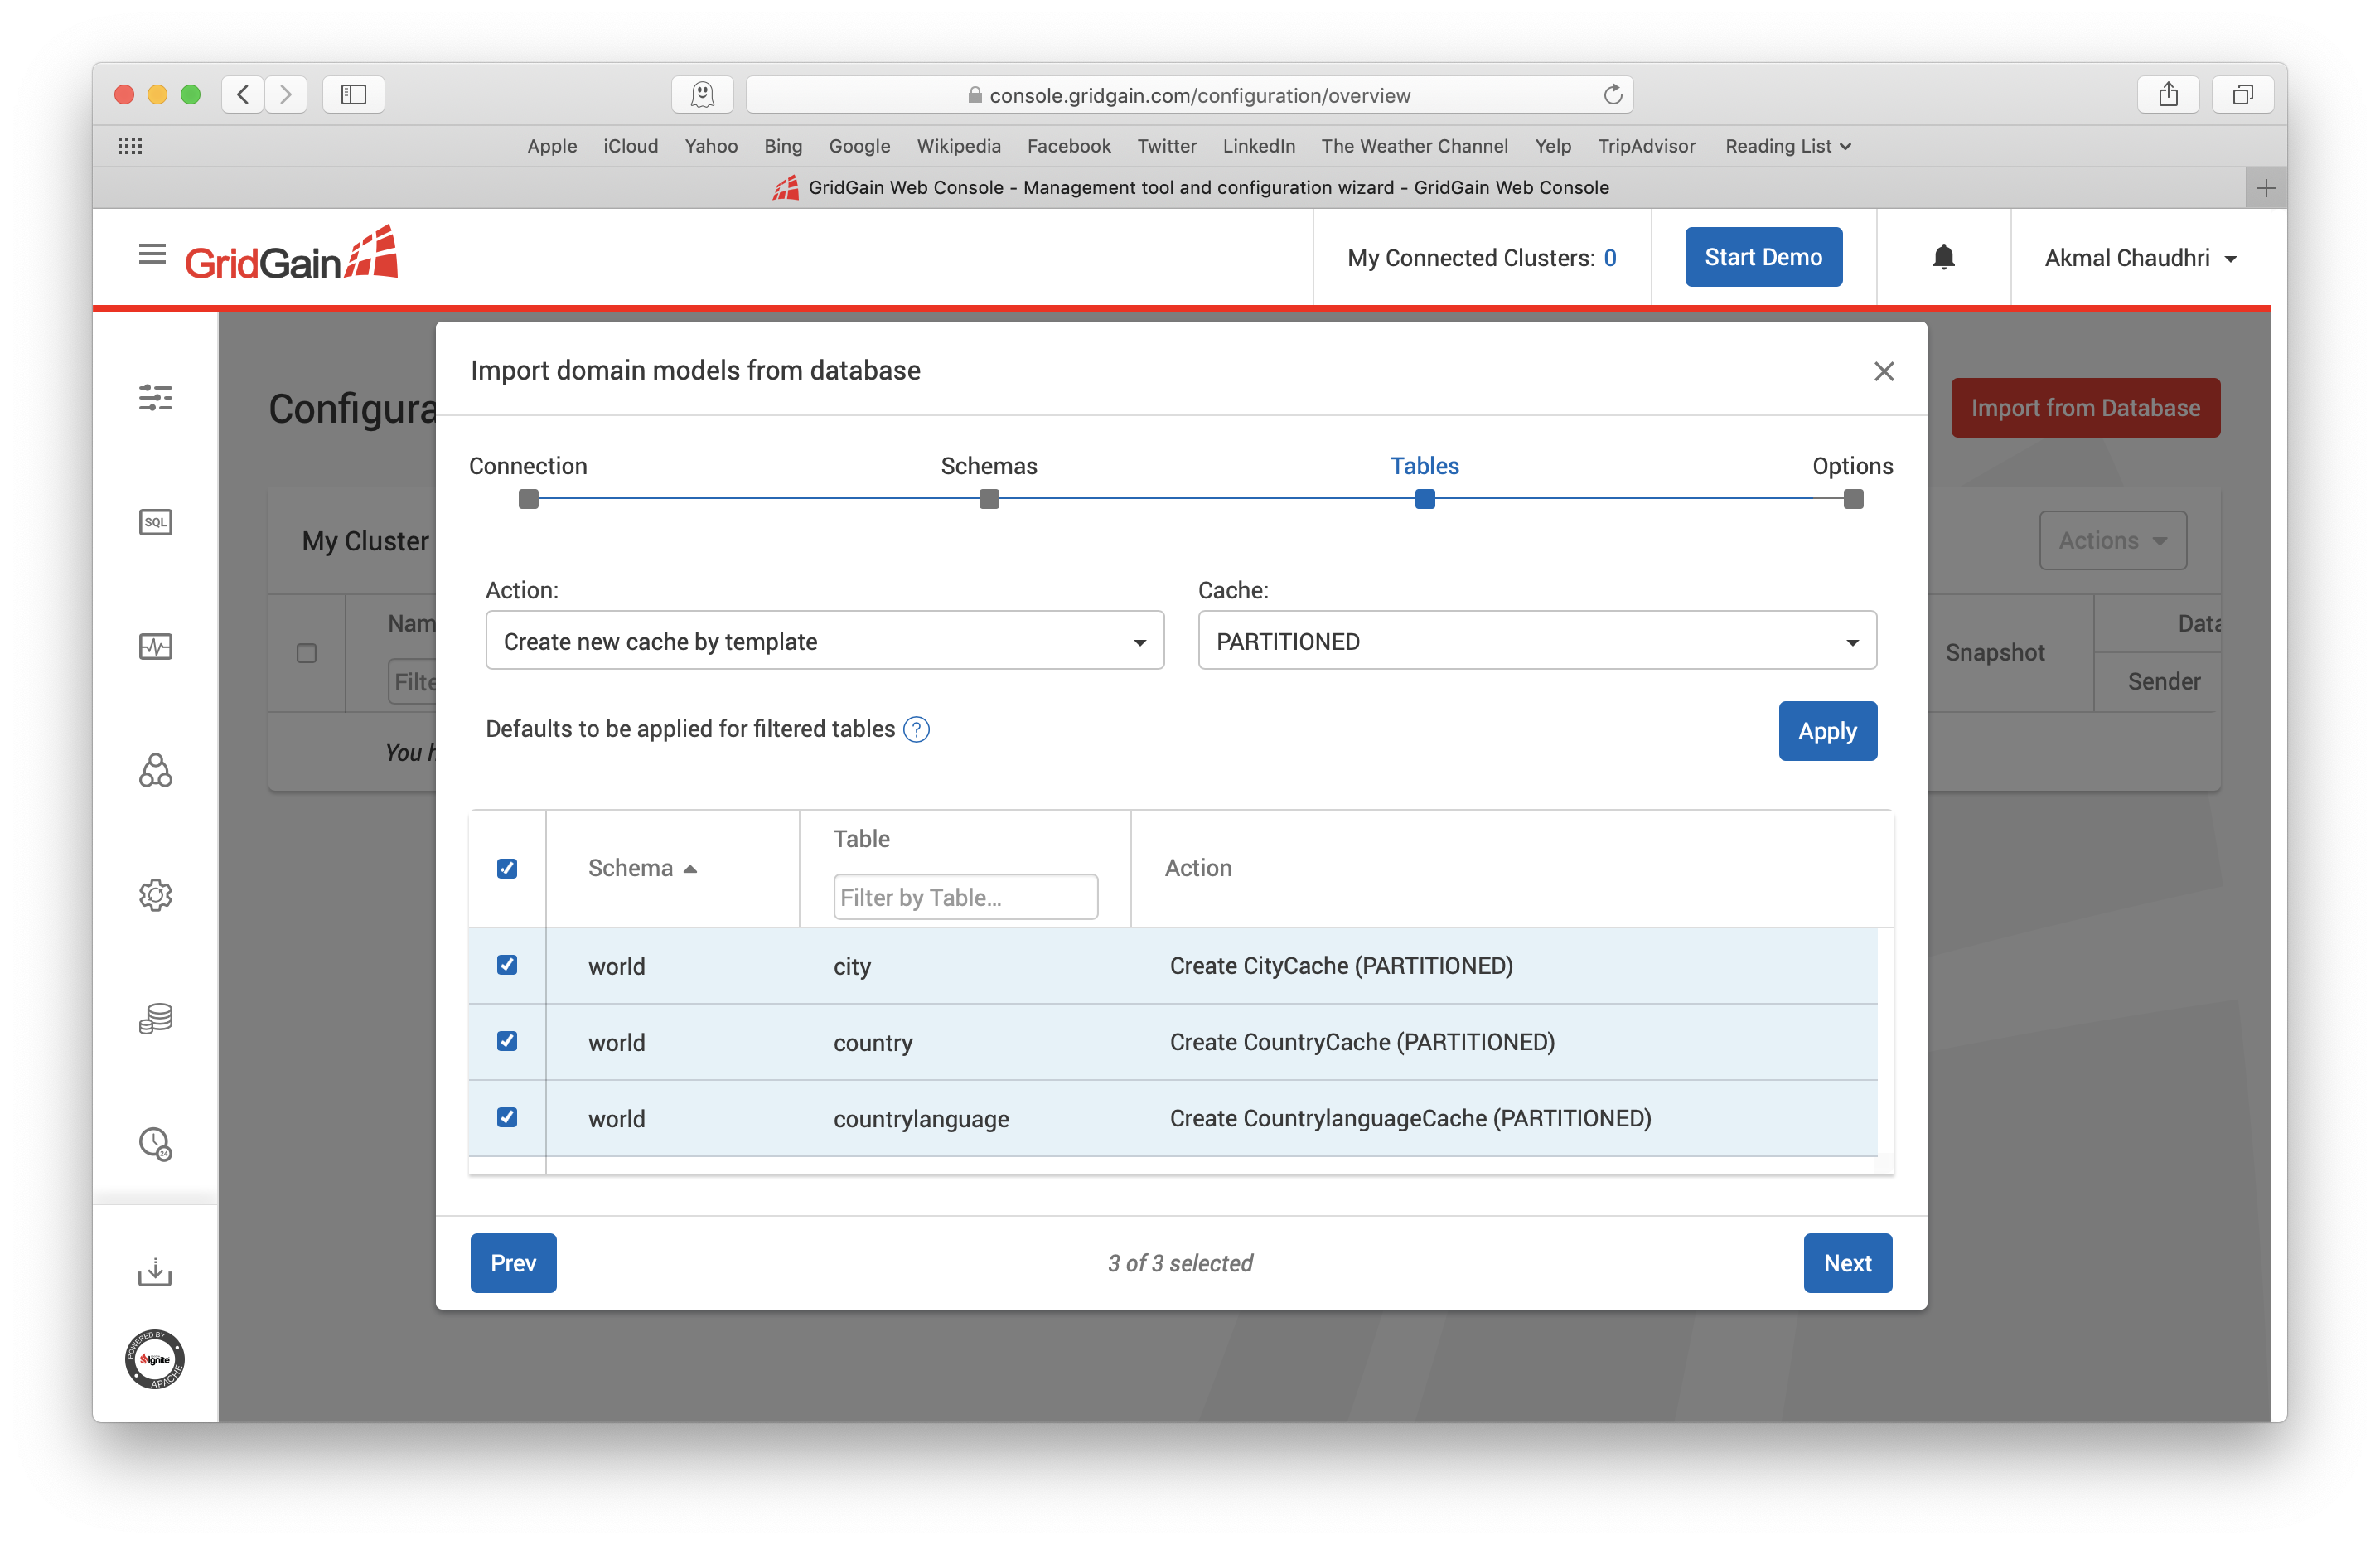
Figure 9. Import from Database.
For this article, the defaults on this page are fine and when we are ready, we can click Next. This now brings us to the screen shown in Figure 10.
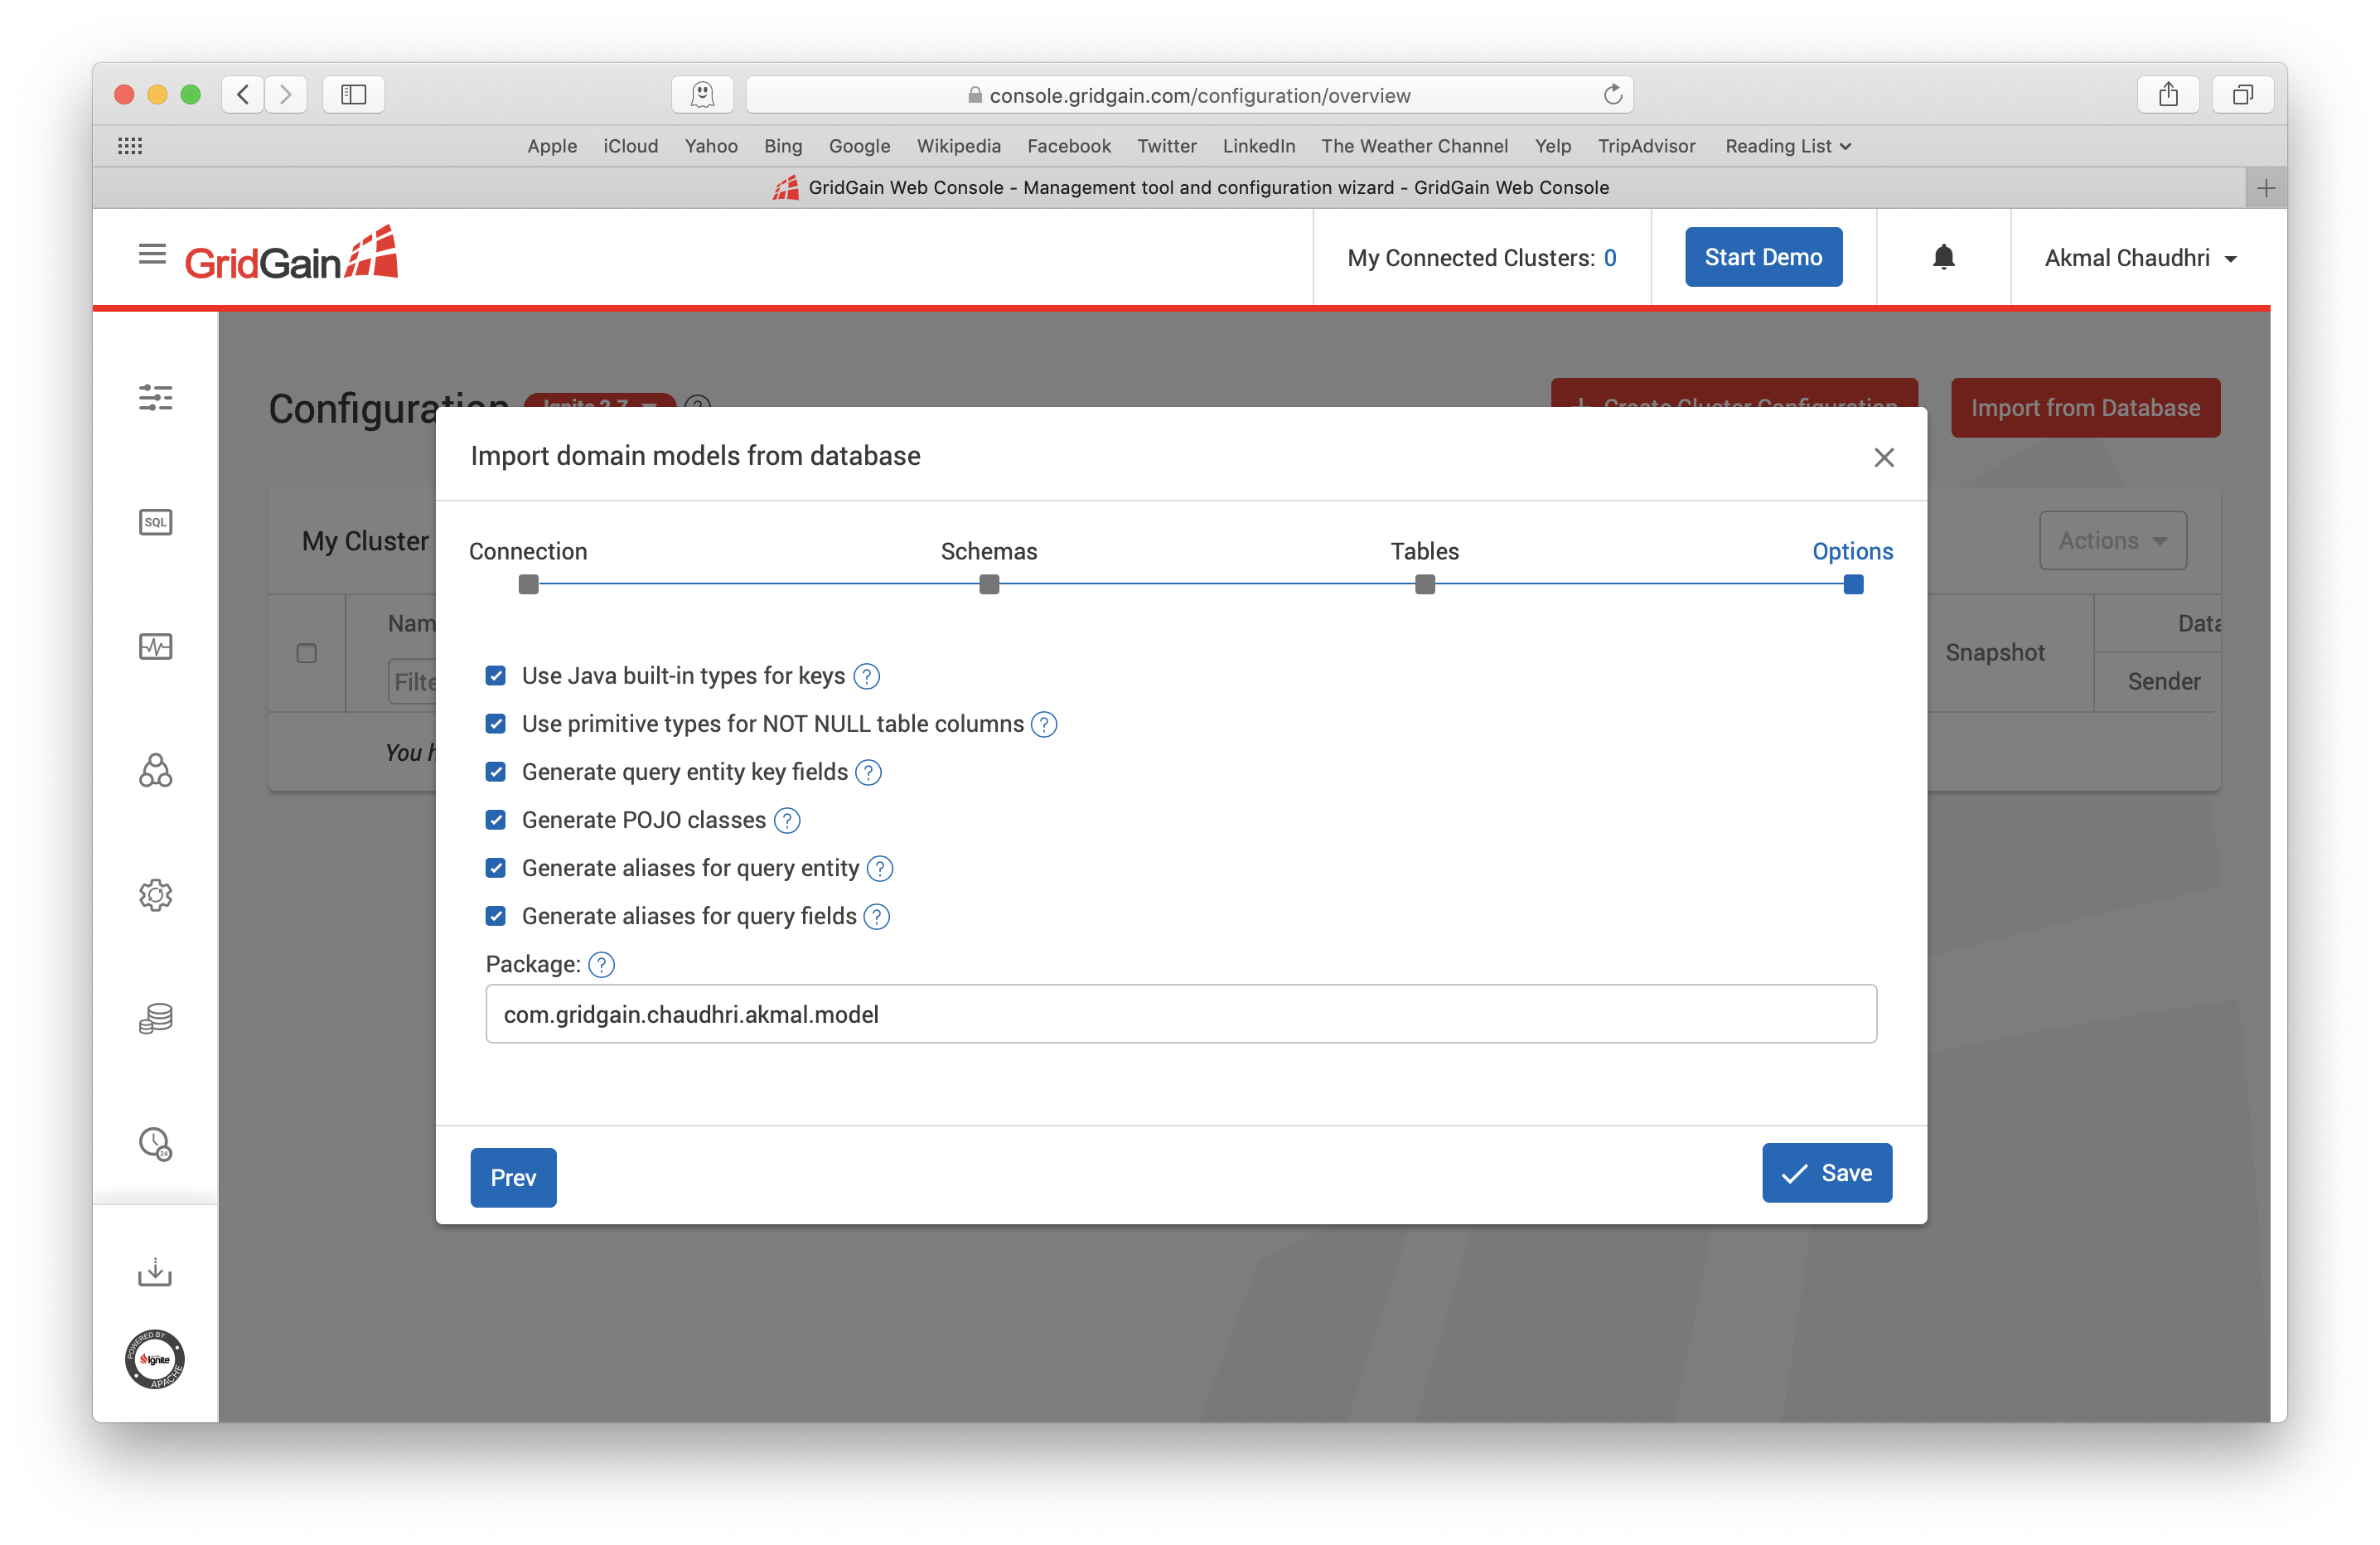
Figure 10. Import from Database.
For this article, these options will be fine and we can click Save.
Next, on the Configuration page, we can see a new configuration listed, called ImportedCluster, as shown in Figure 11.

Figure 11. ImportedCluster.
We'll now modify this configuration to suit our needs.
Modify Configuration
If we click on the ImportedCluster name, we are presented with the screen shown in Figure 12.
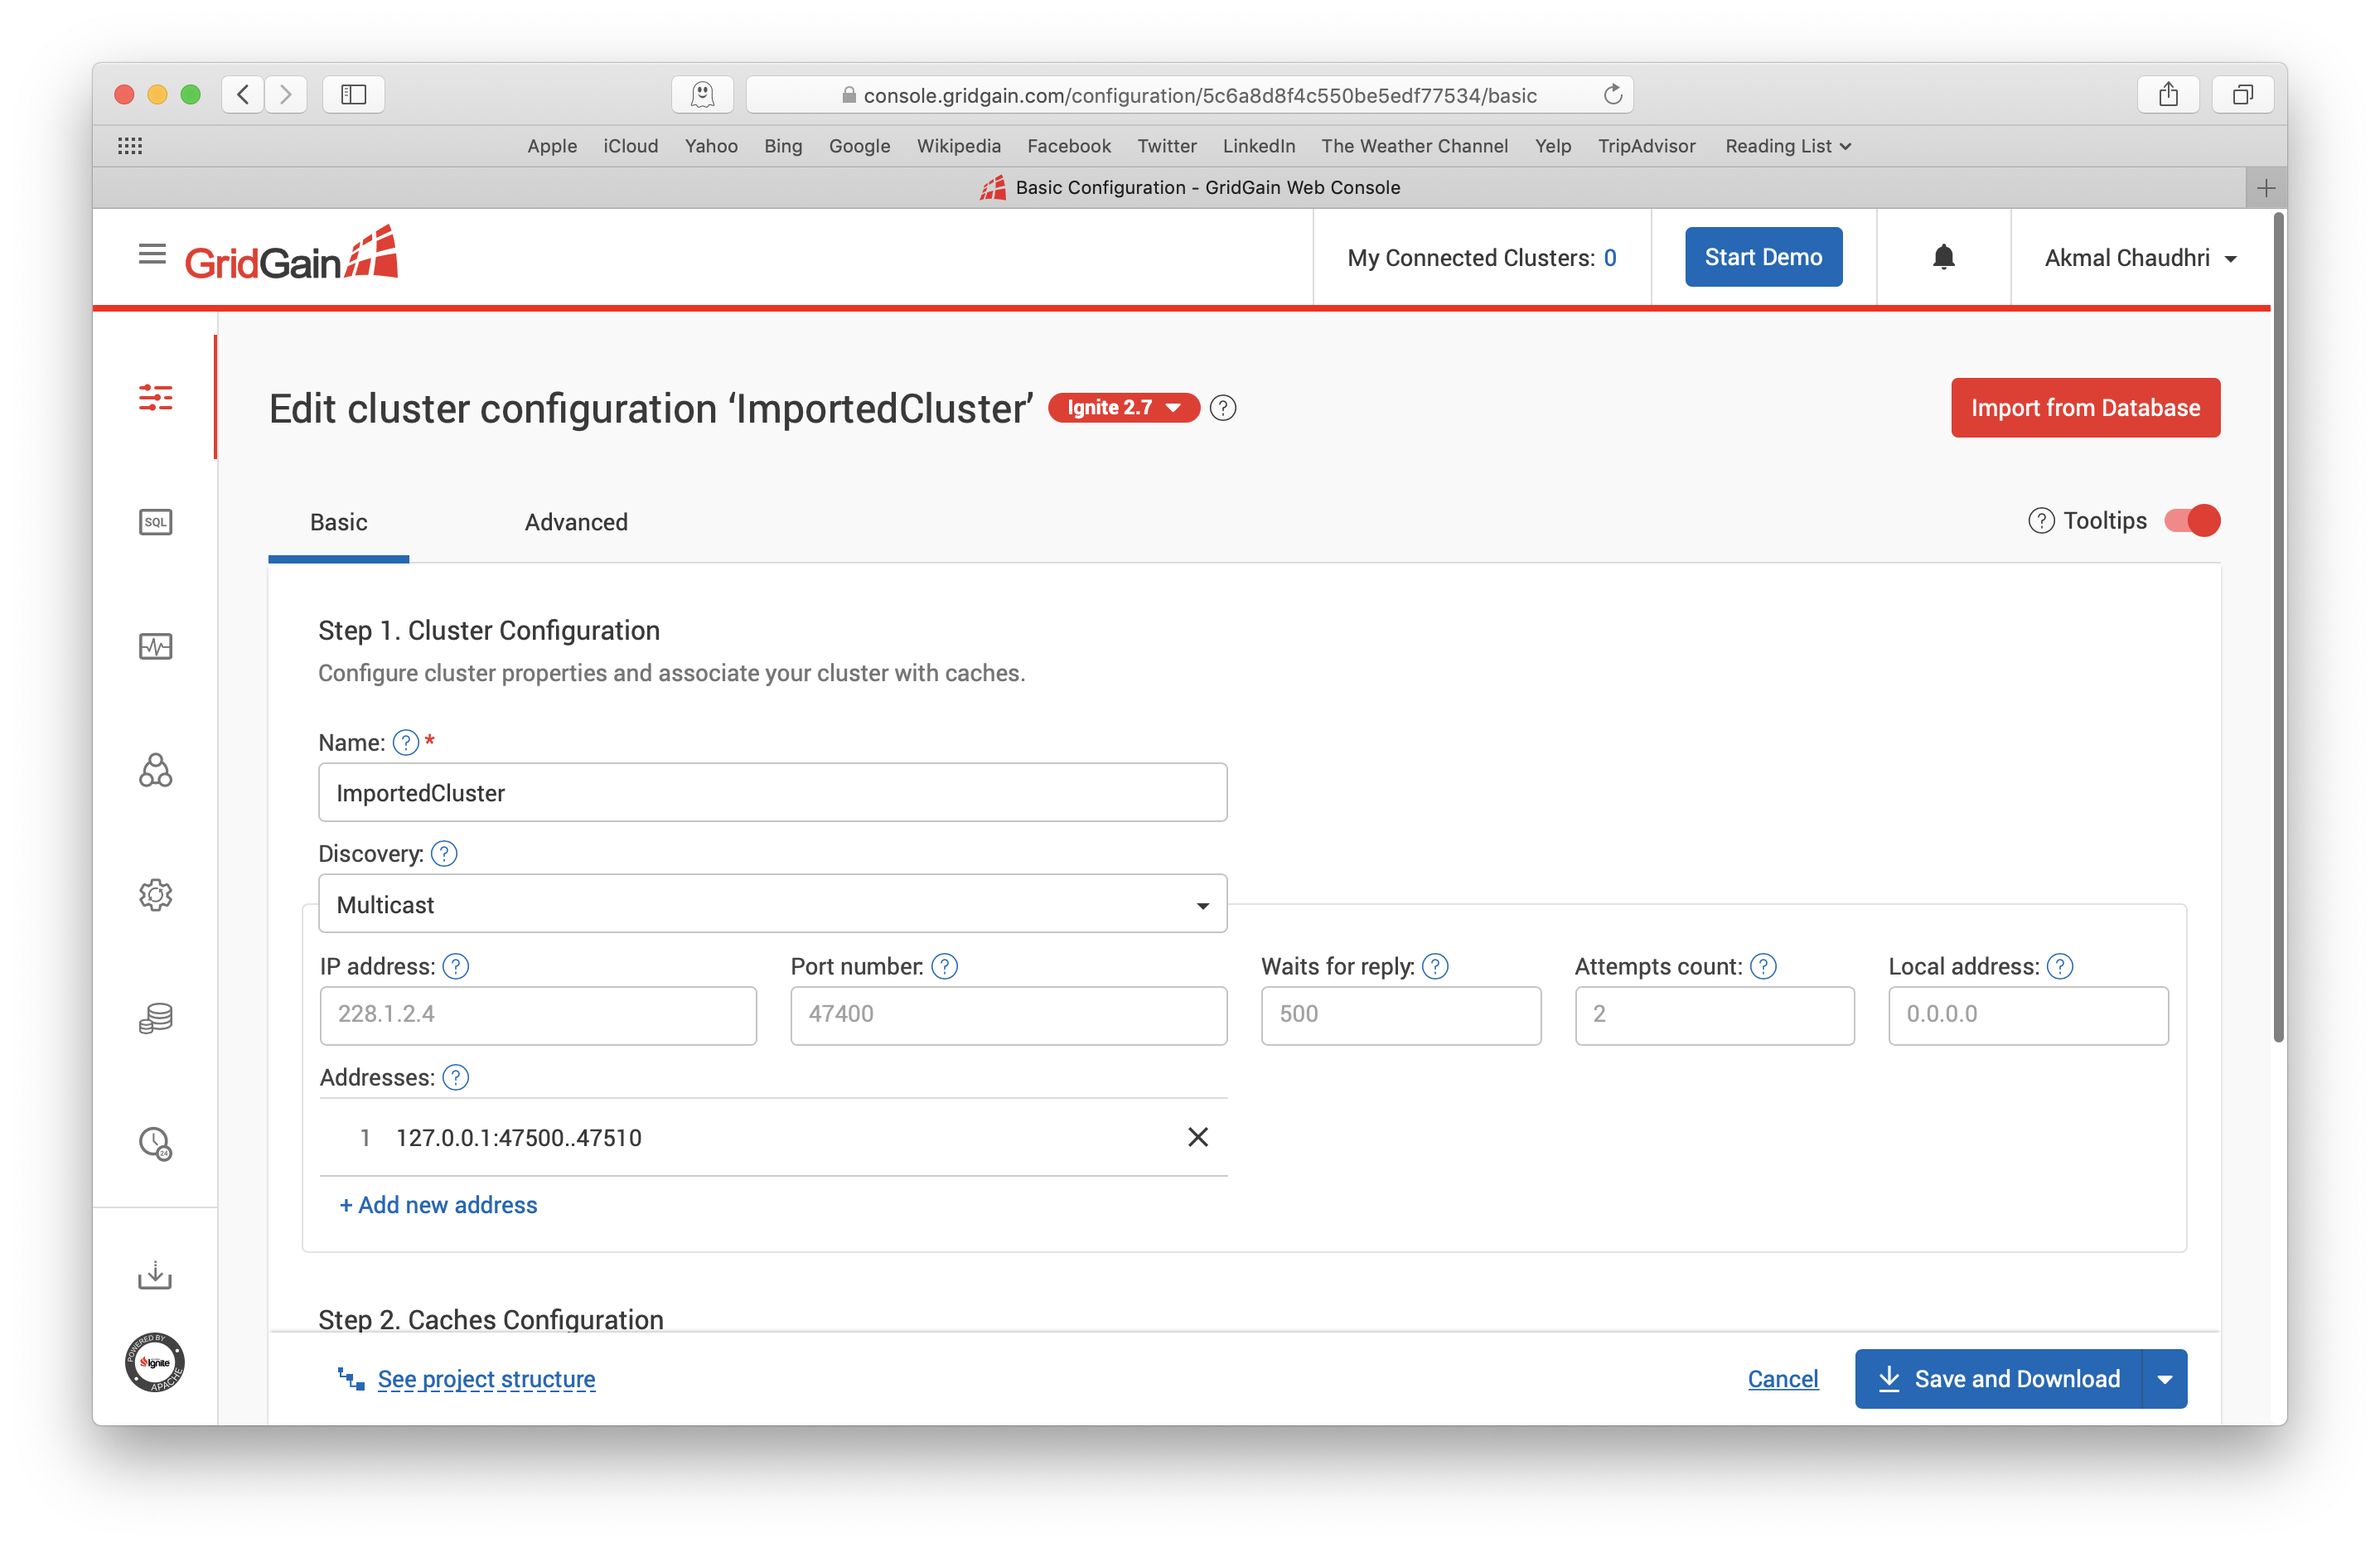
Figure 12. Basic Cluster Configuration.
On this screen we have two tabs -- Basic and Advanced.
On the Basic tab, we can change the cluster configuration name (Step 1) and, if we scroll-down, the names of the Ignite Storage (Step 2), as well as various other parameters. For our example, we'll keep the defaults on this page.
On the Advanced tab there are additional sub-tabs -- Cluster, SQL Scheme, Caches, IGFS and GridGain, as shown in Figure 13. Here, we have the opportunity to undertake a great deal of fine tuning, if required.

Figure 13. Advanced Cluster Configuration.
Let's select the SQL Scheme tab. With the first row selected for City, as shown in Figure 14, let's scroll-down and expand the section Domain model for SQL query.
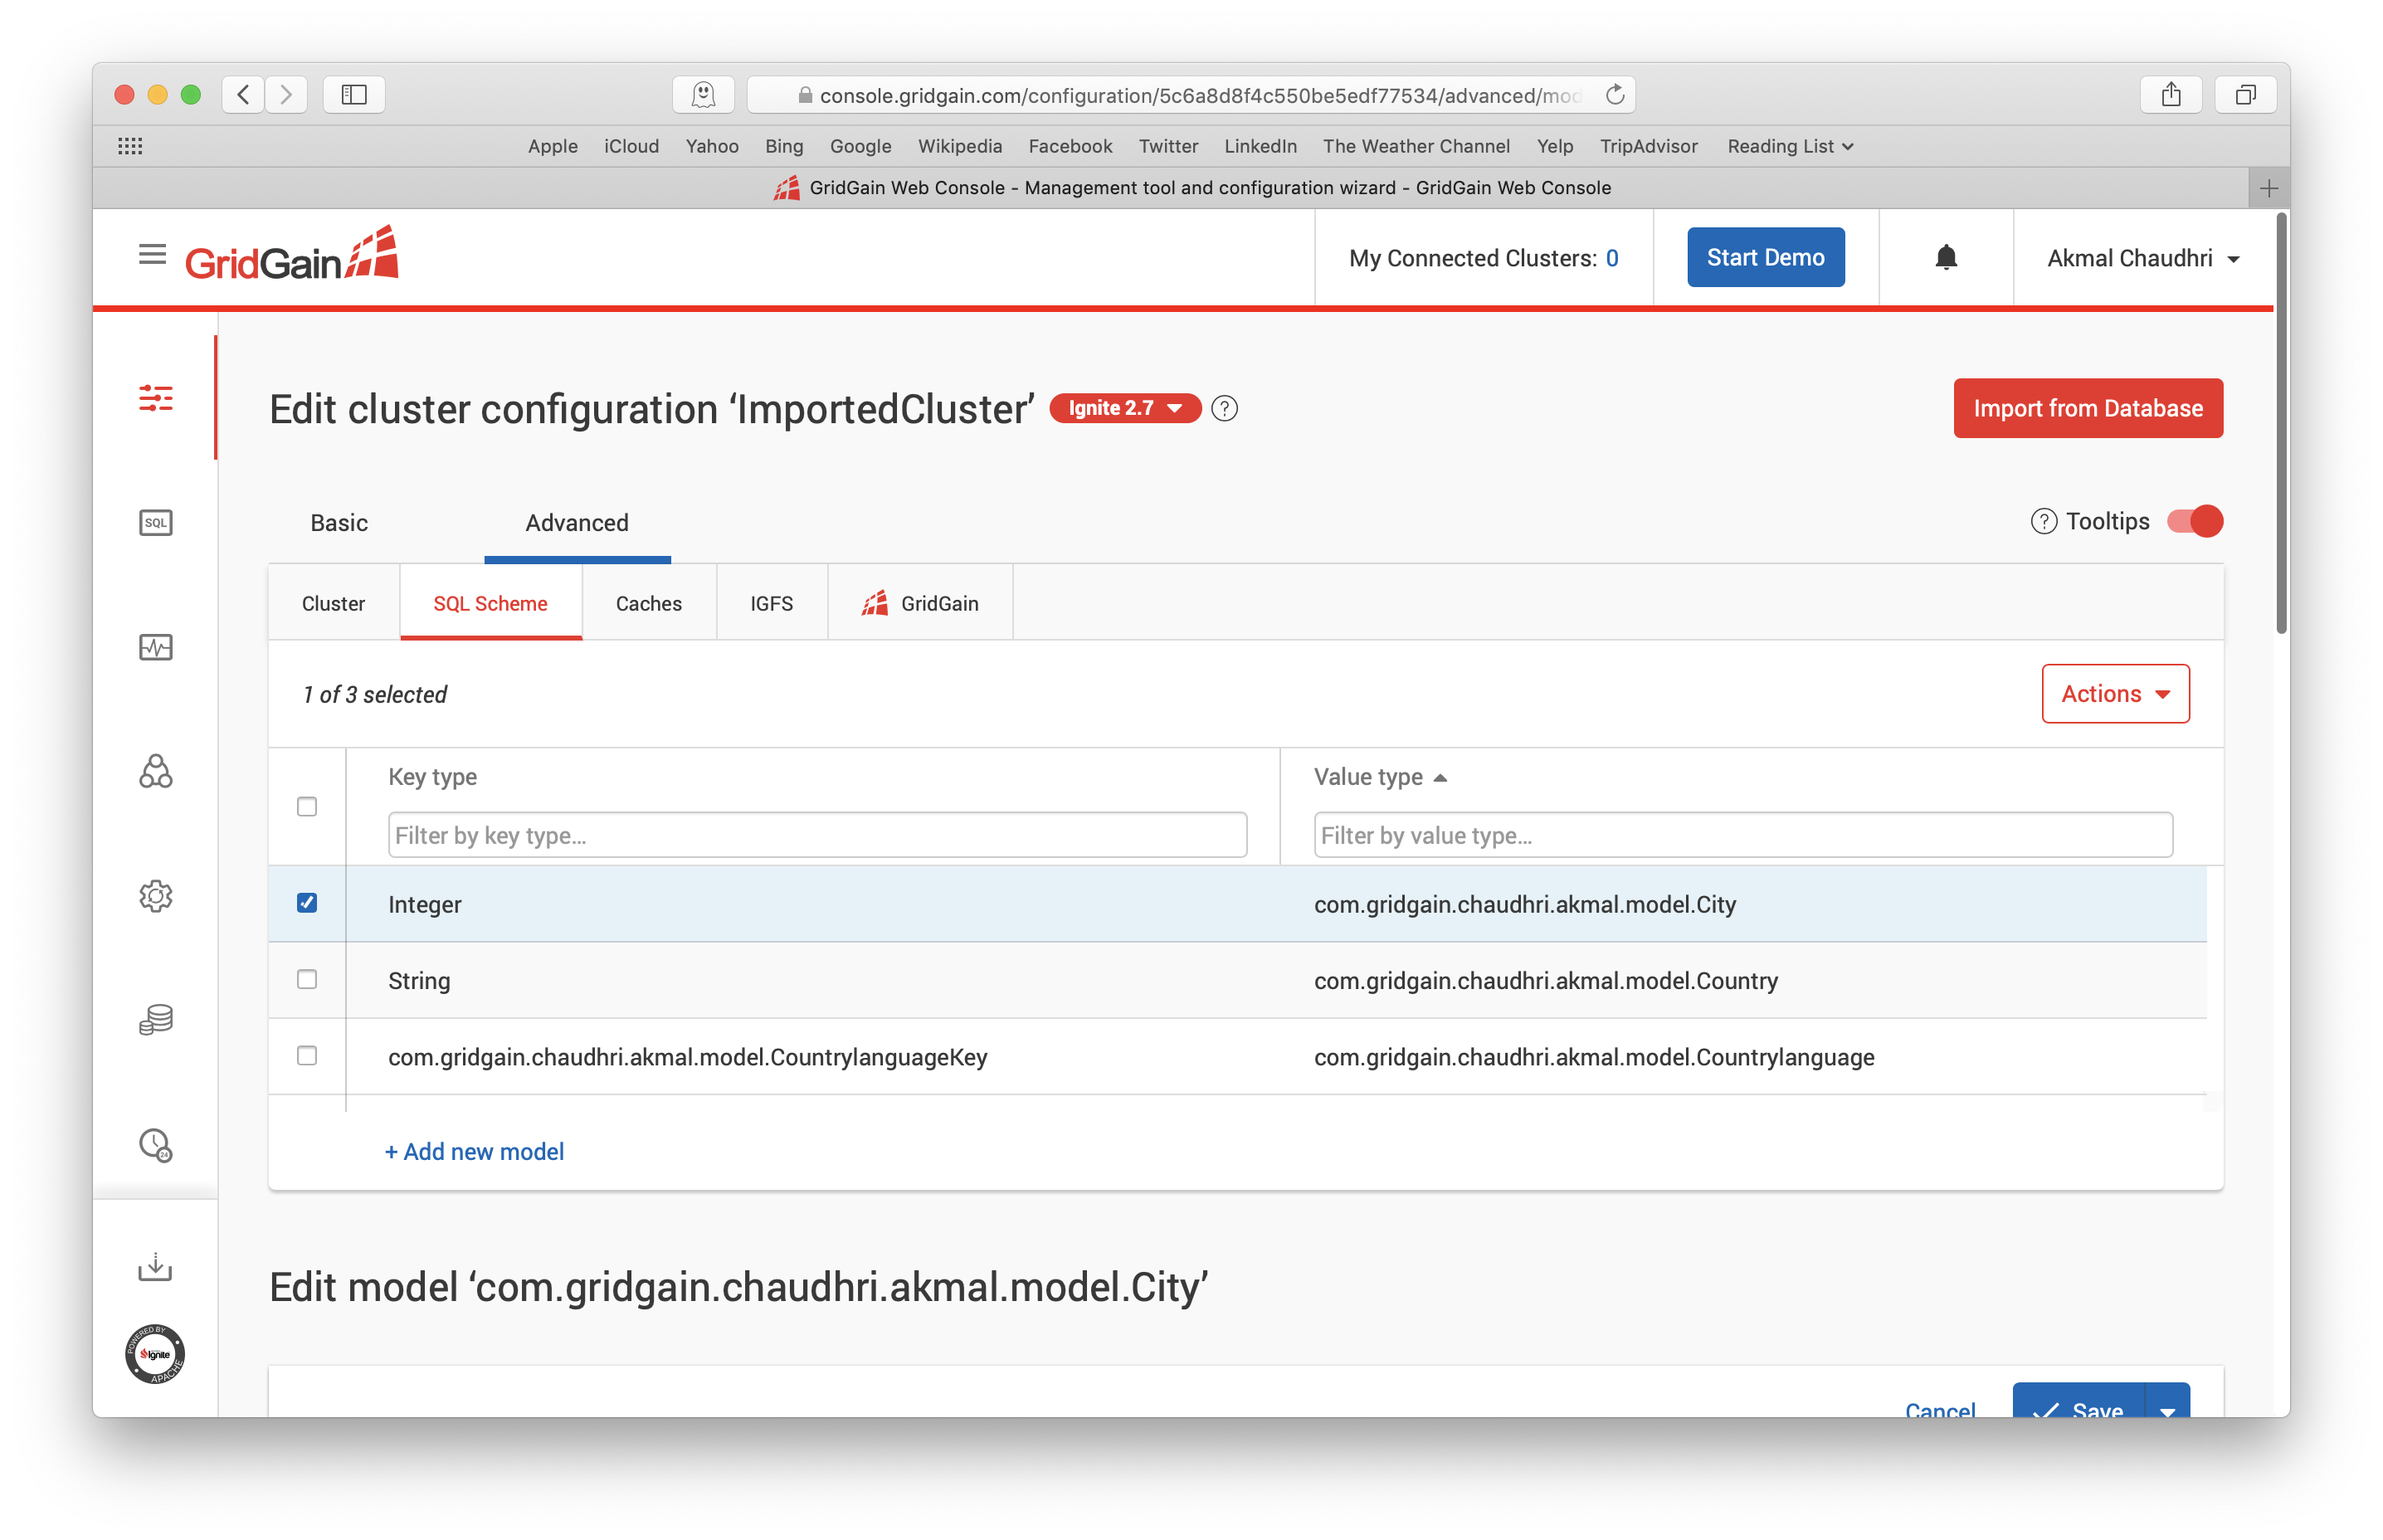
Figure 14. SQL Scheme.
We have an indexes sub-section with the value CountryCode and if we click on this, we can modify the value as shown in Figure 15.
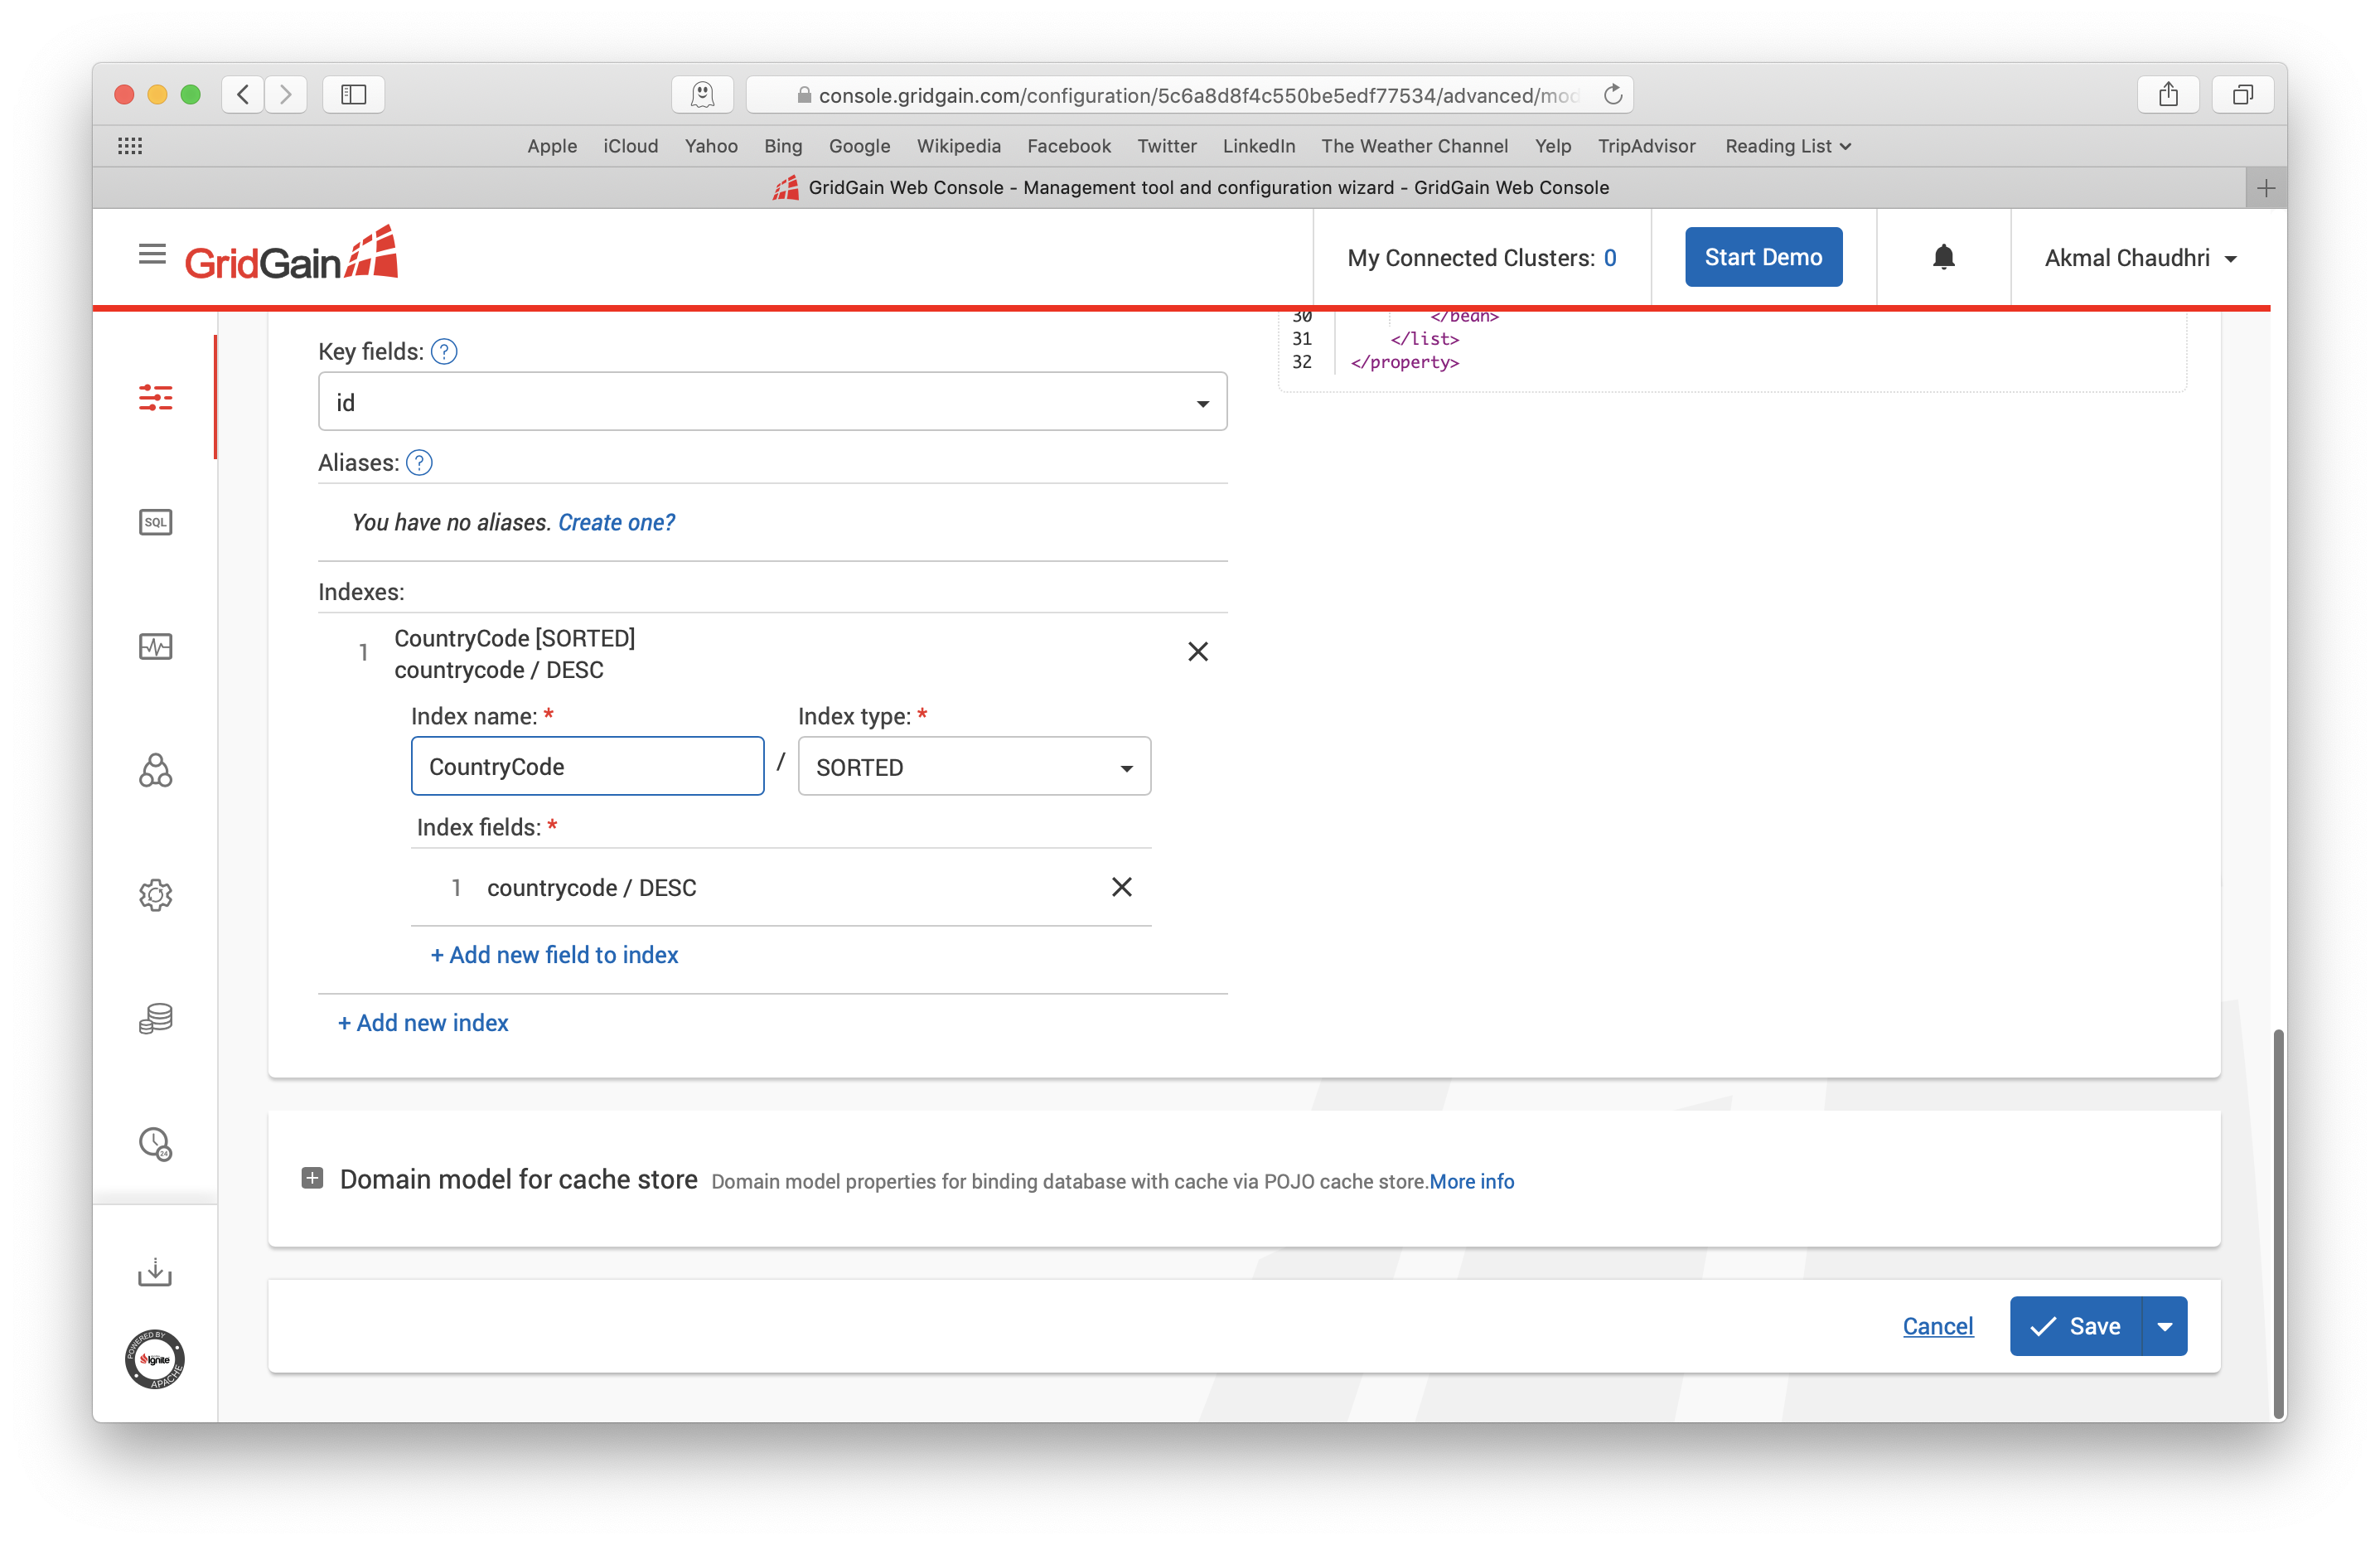
Figure 15. CountryCode Index.
We'll change the index name to idx_country_code and click the Save button. Next, we'll repeat the process shown in Figures 14 and 15 for Countrylanguage and change the index name to idx_lang_country_code and again save our changes. Making these modifications ensures that index names are unique in our Ignite schema.
Let's now select the Caches tab. With the first row selected for CityCache, as shown in Figure 16, let's scroll down and expand the section Queries & Indexing.
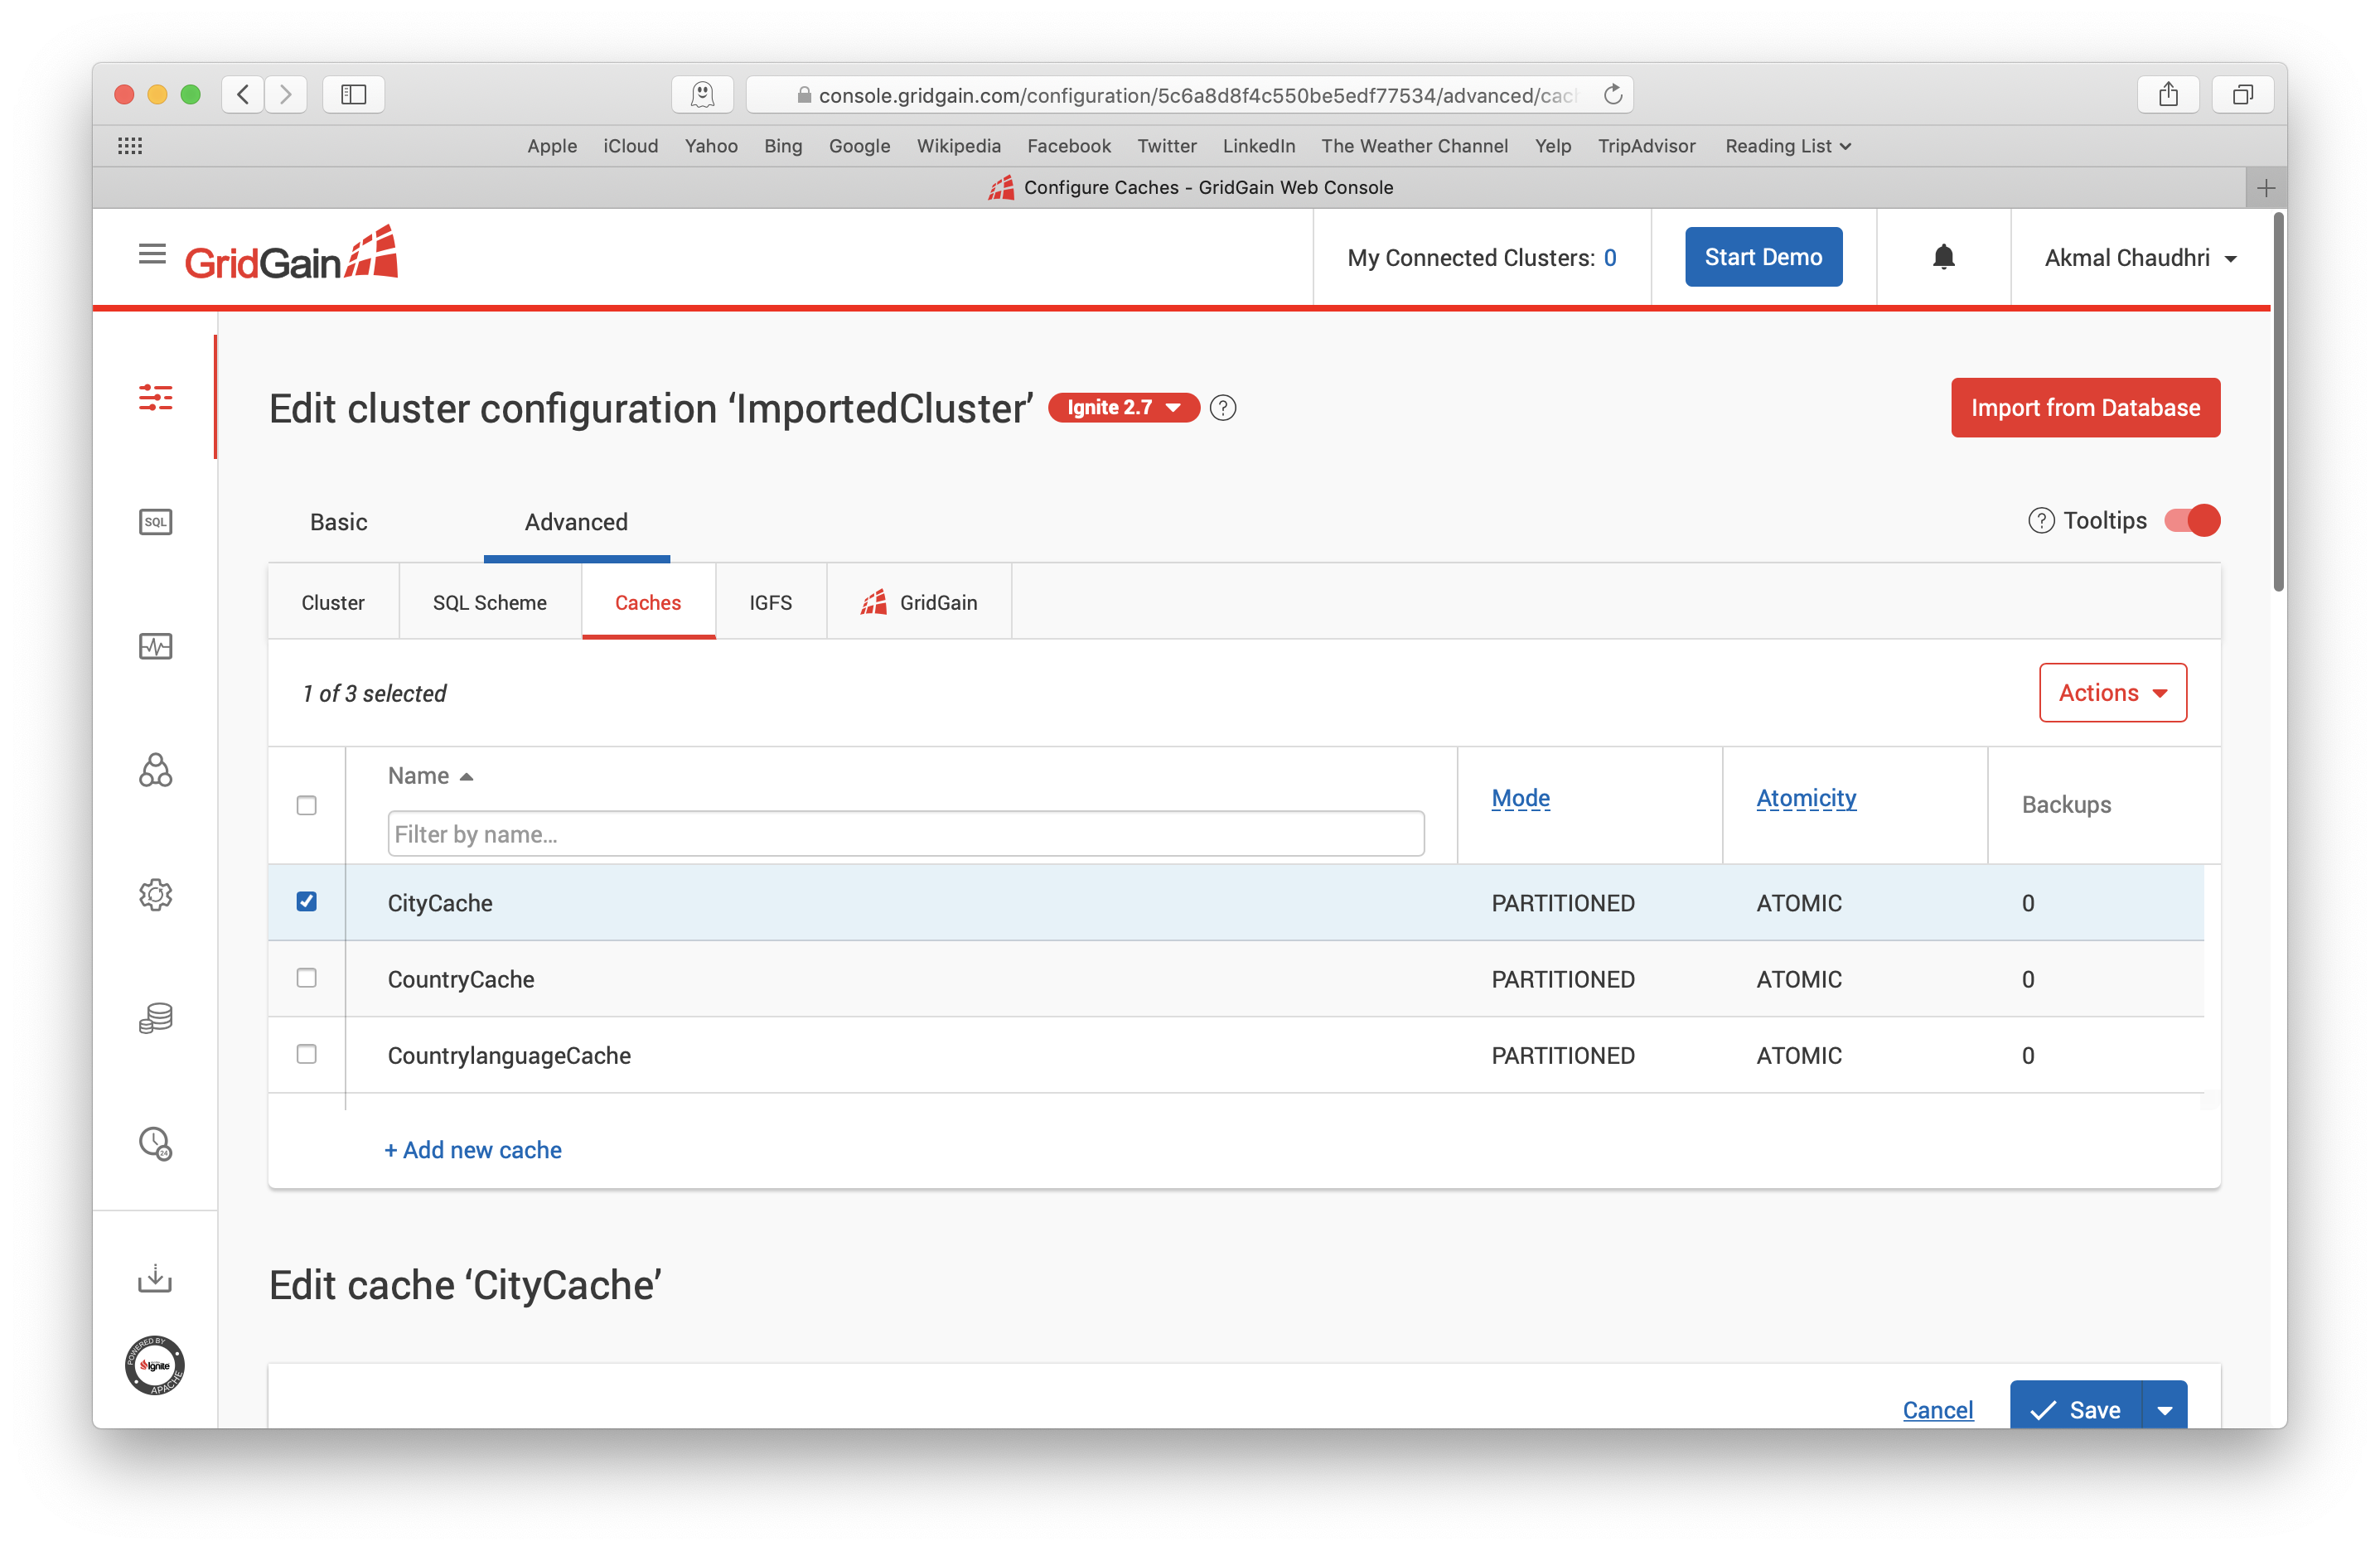
Figure 16. Caches.
In the Queries & Indexing section, we have a field called SQL schema name that is currently empty. Let's enter the value PUBLIC into this and save our changes. We'll repeat this process for CountryCache and CountrylanguageCache.
Finally, let's return to the Configuration page, select ImportedCluster and download the project using the Actions drop-down, as shown in Figure 17.
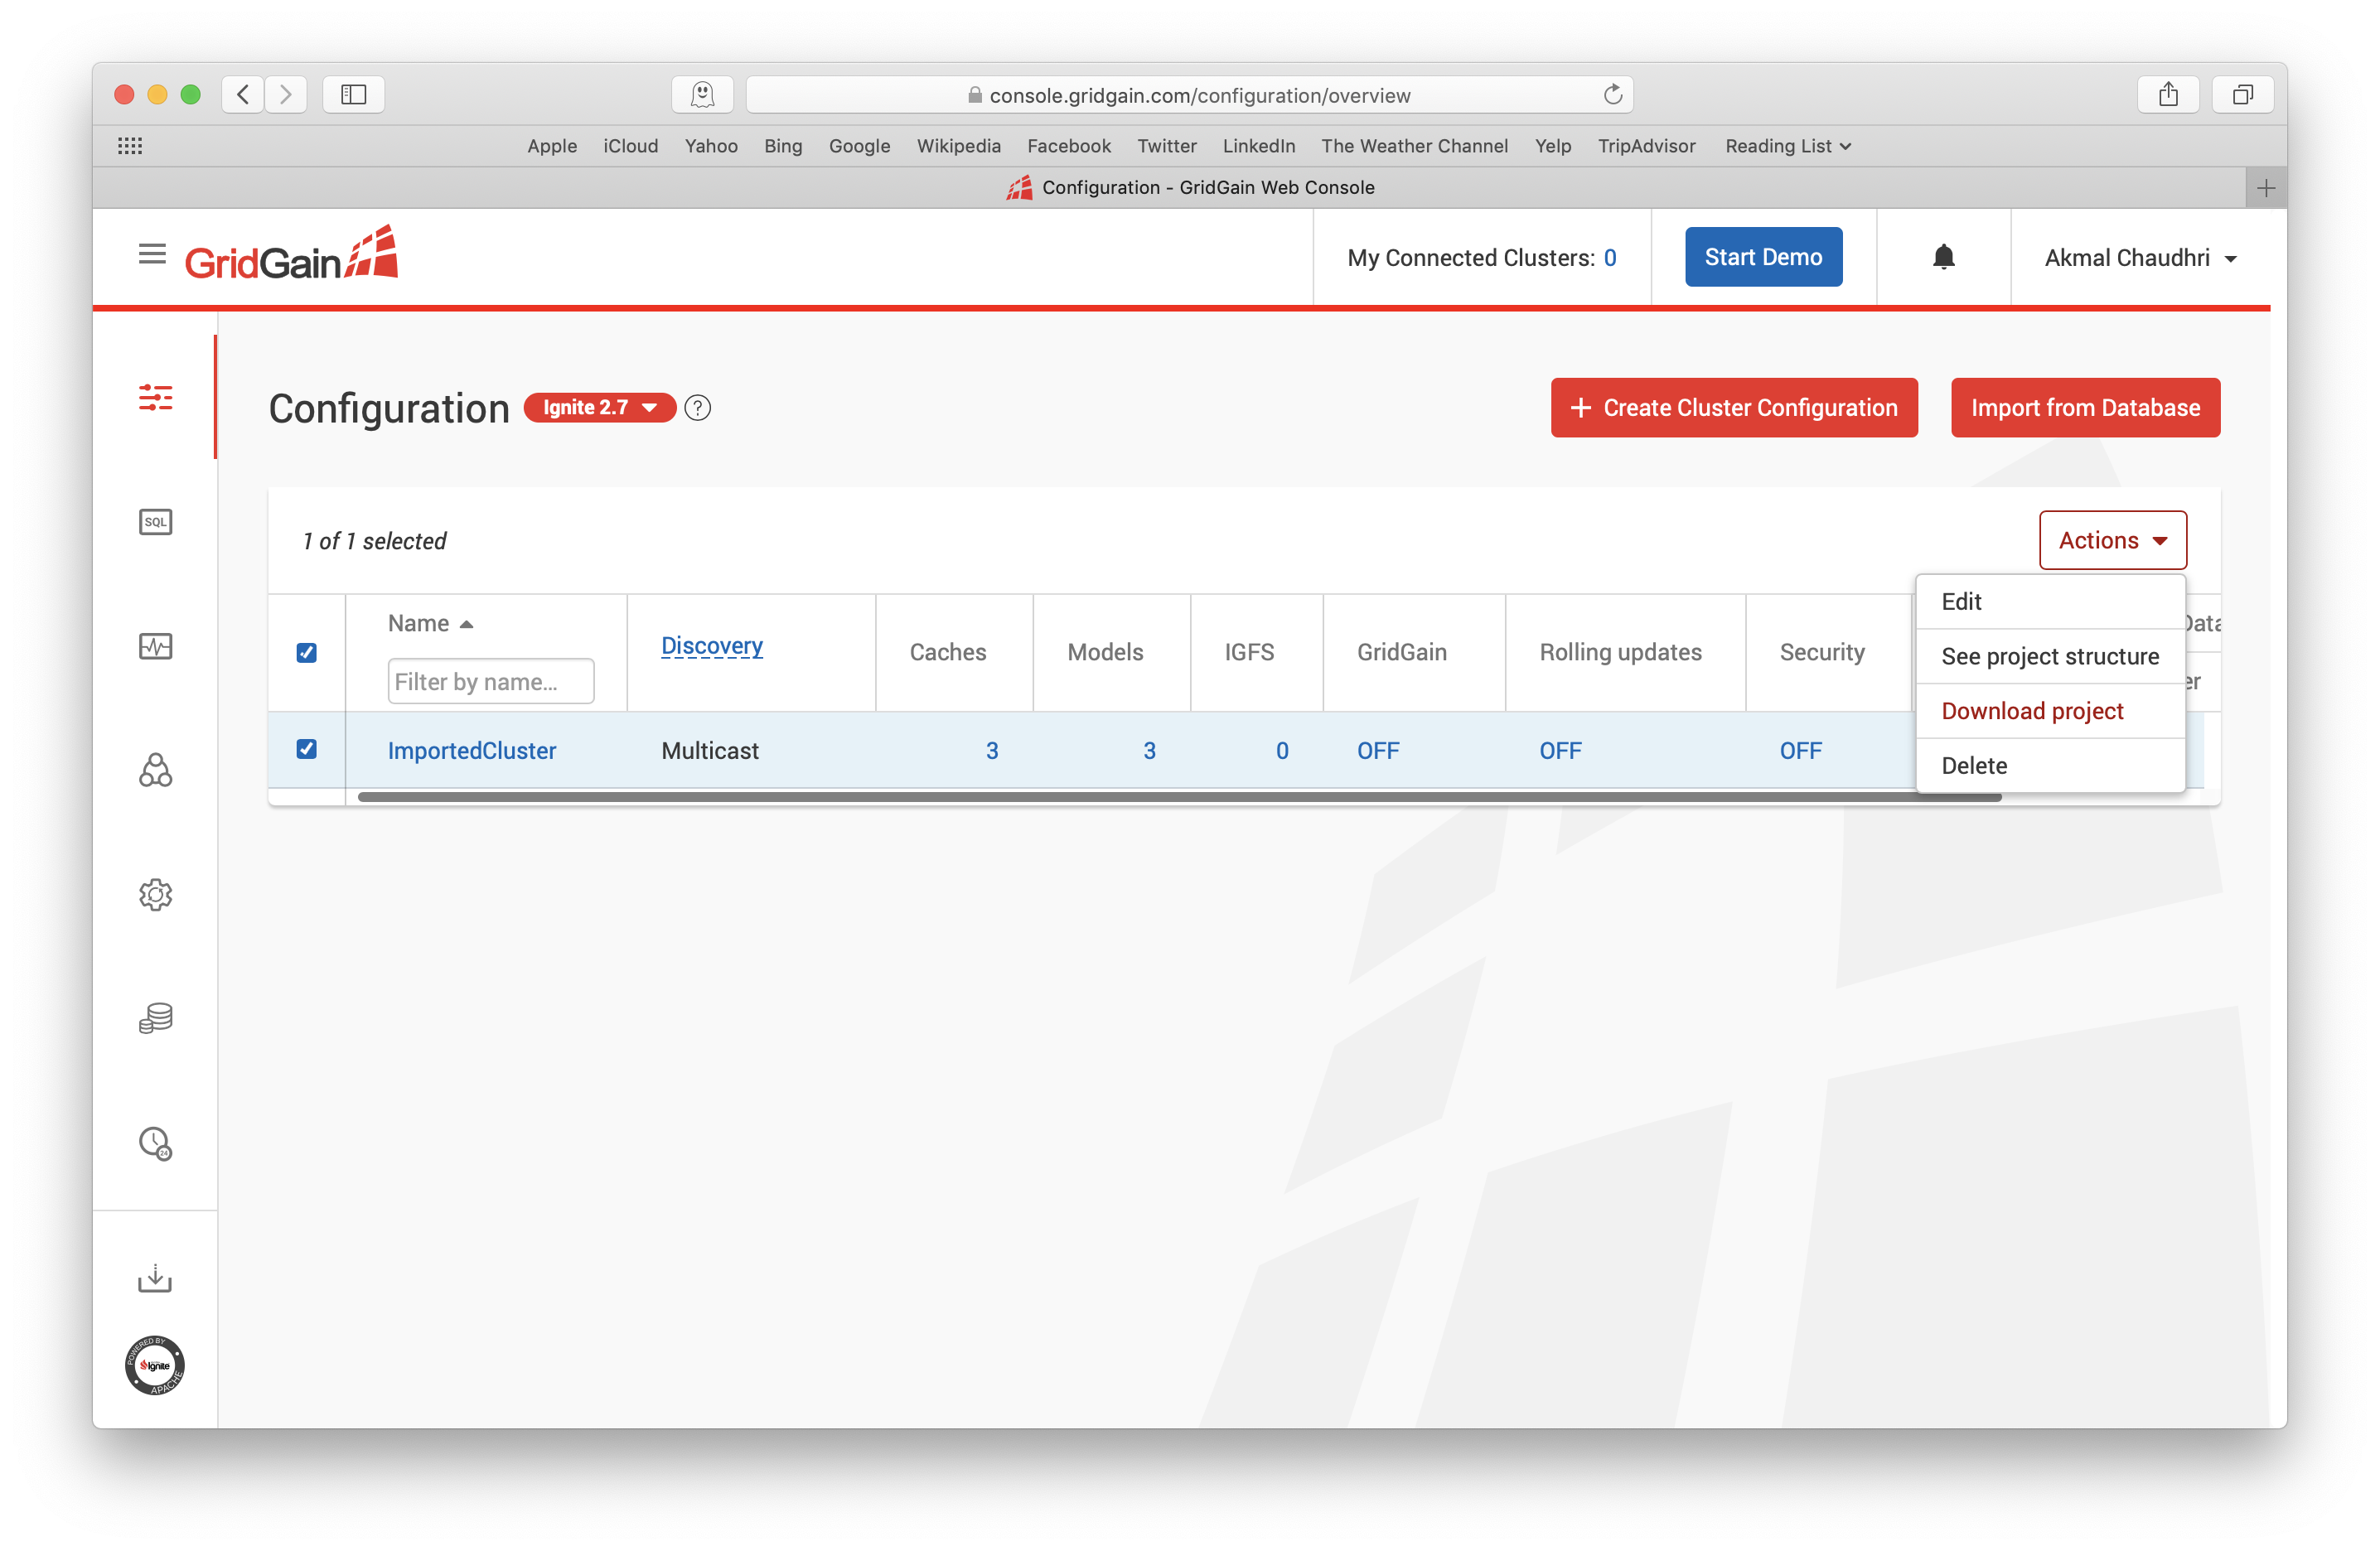
Figure 17. Download Project.
A file called ImportedCluster-project.zip will be saved. We'll unpack this file and create a new project in an IDE by reading-in the pom.xml file, as shown in Figure 18.
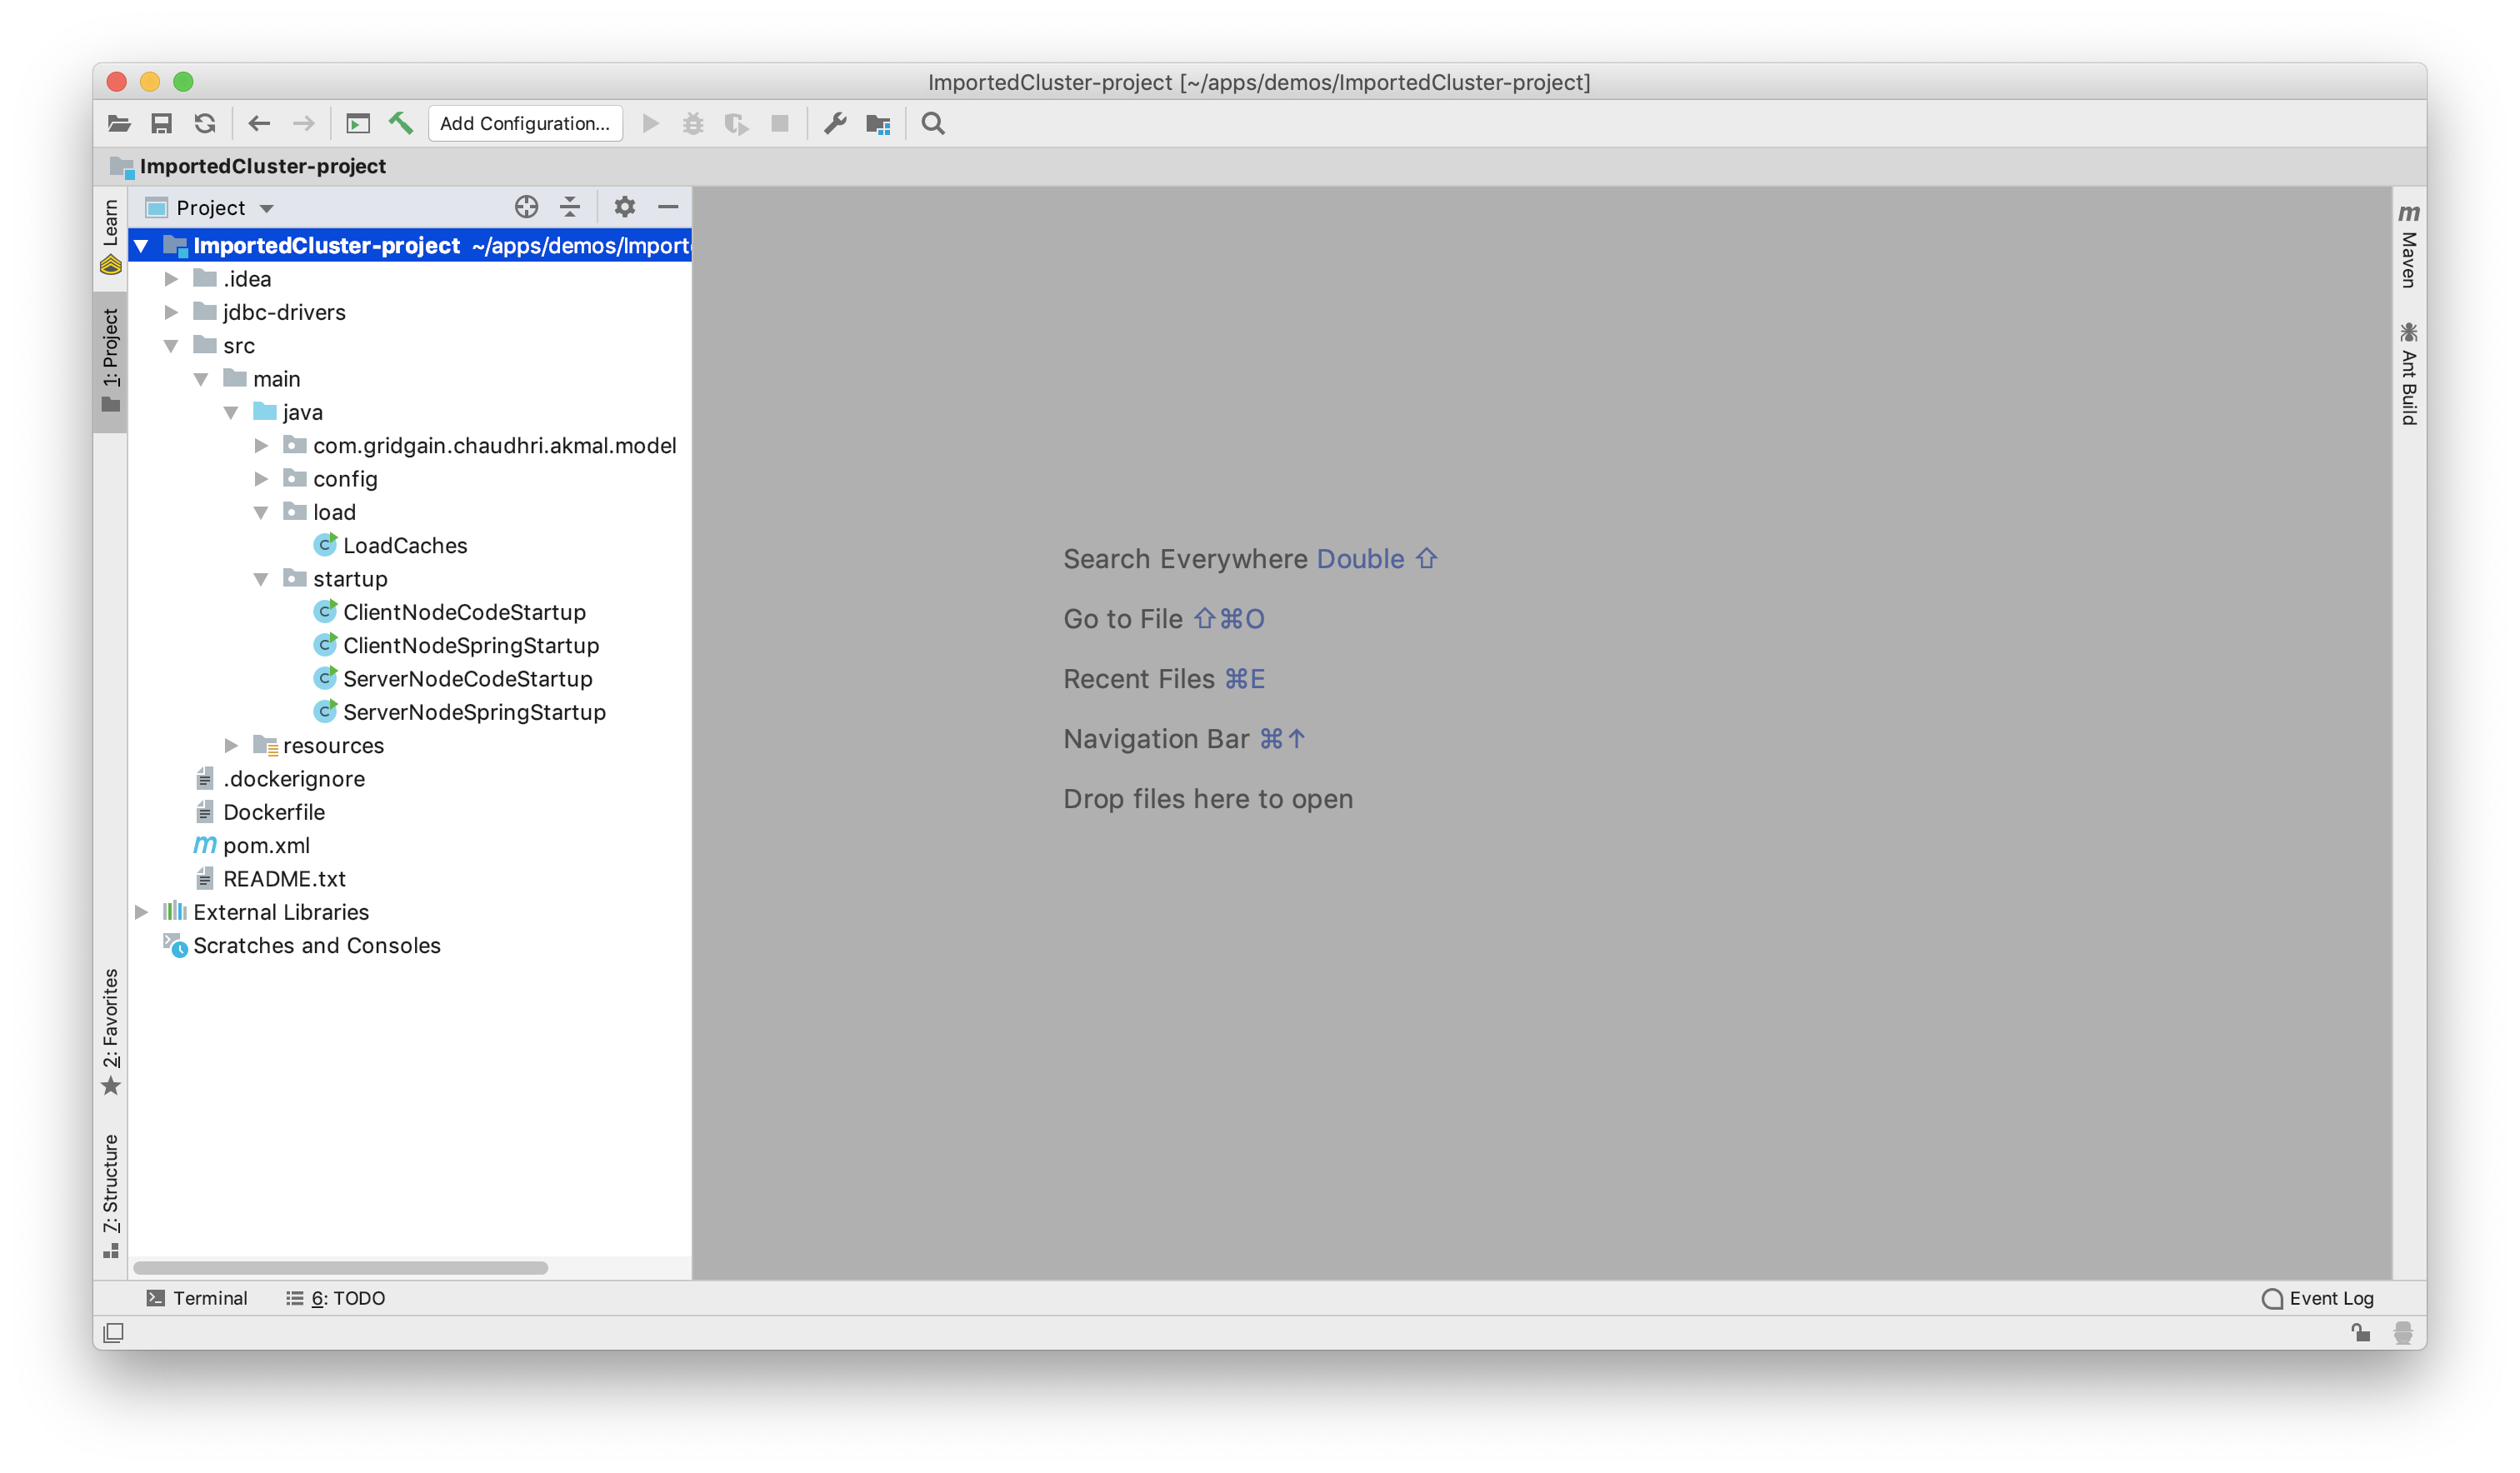
Figure 18. Project Loaded in IDE.
In the pom.xml file, under the dependencies, we should check that there is a dependency for mysql-connector-java. If this is missing, we can add this, as follows:
<dependency>
    <groupId>mysql</groupId>
    <artifactId>mysql-connector-java</artifactId>
    <version>8.0.15</version>
</dependency>
Here the version matches the version of the JDBC driver we used earlier.
In our project, under resources, there is a file called secret.properties, as shown in Figure 19.
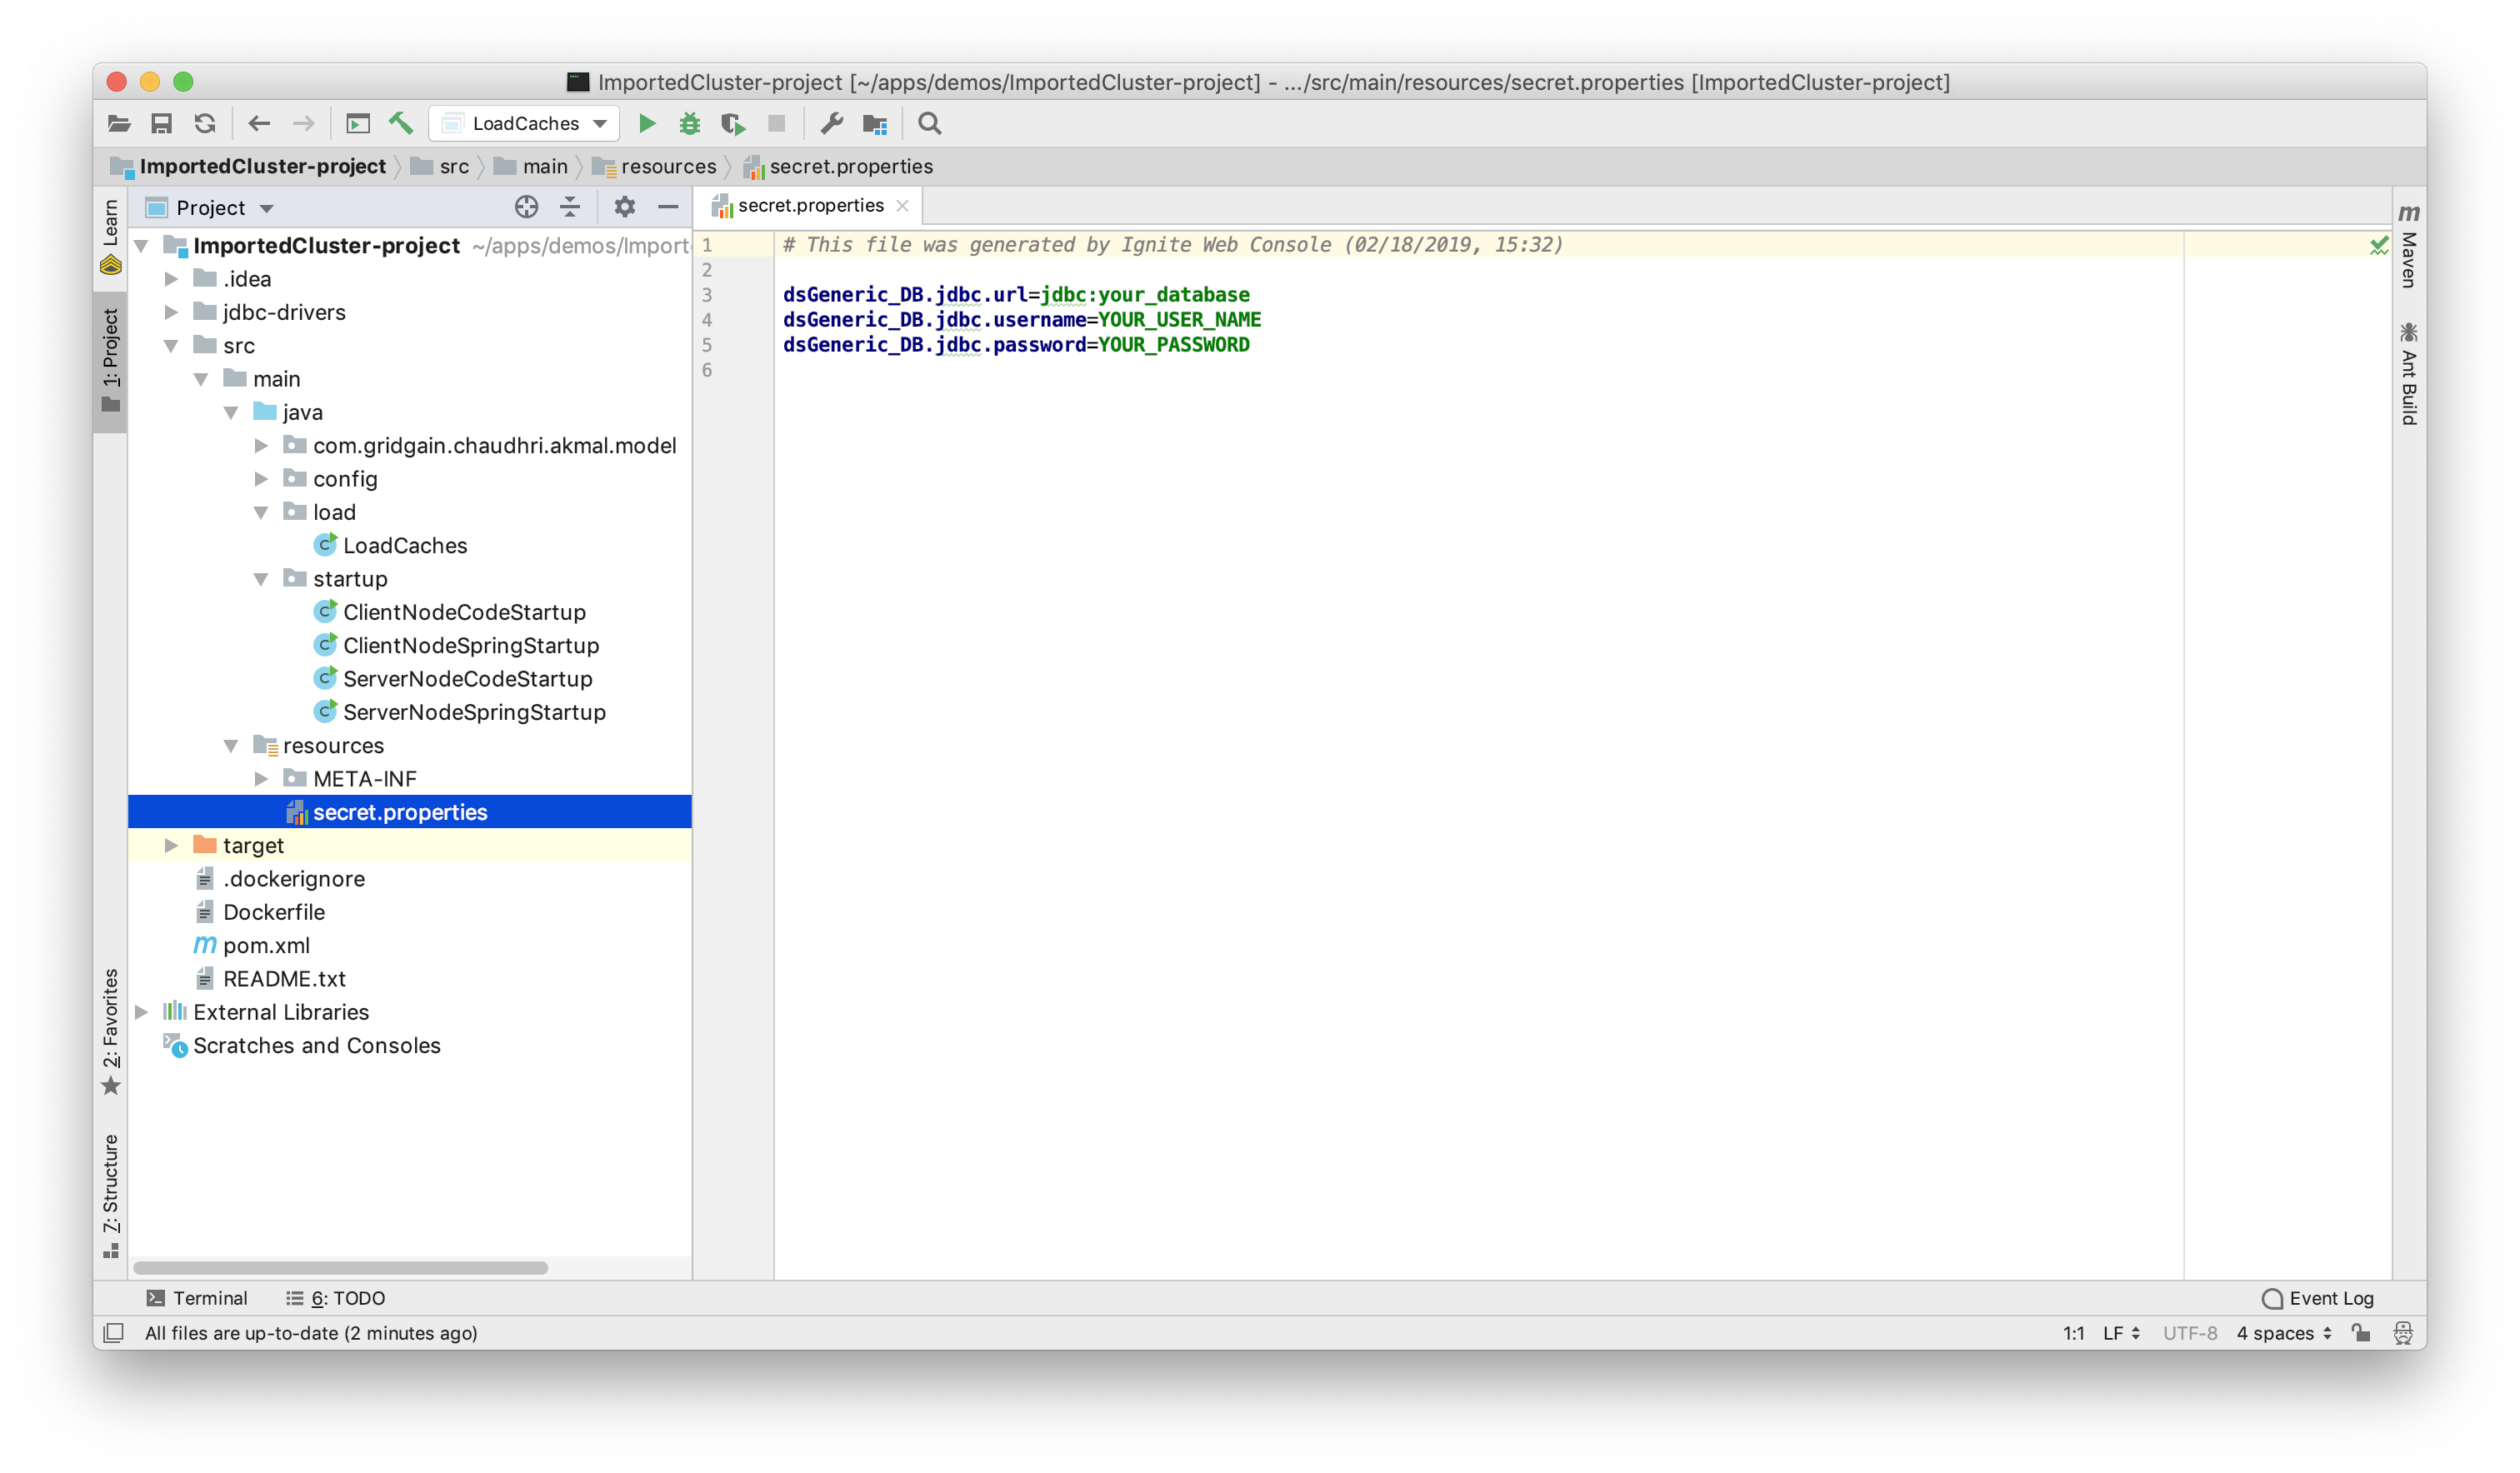
Figure 19. secret.properties.
We need to fill-in the values for the JDBC URL, Username and Password that we used earlier and save the changes.
Once we have rebuilt the project, we can start an Ignite server node, as shown in Figure 20.
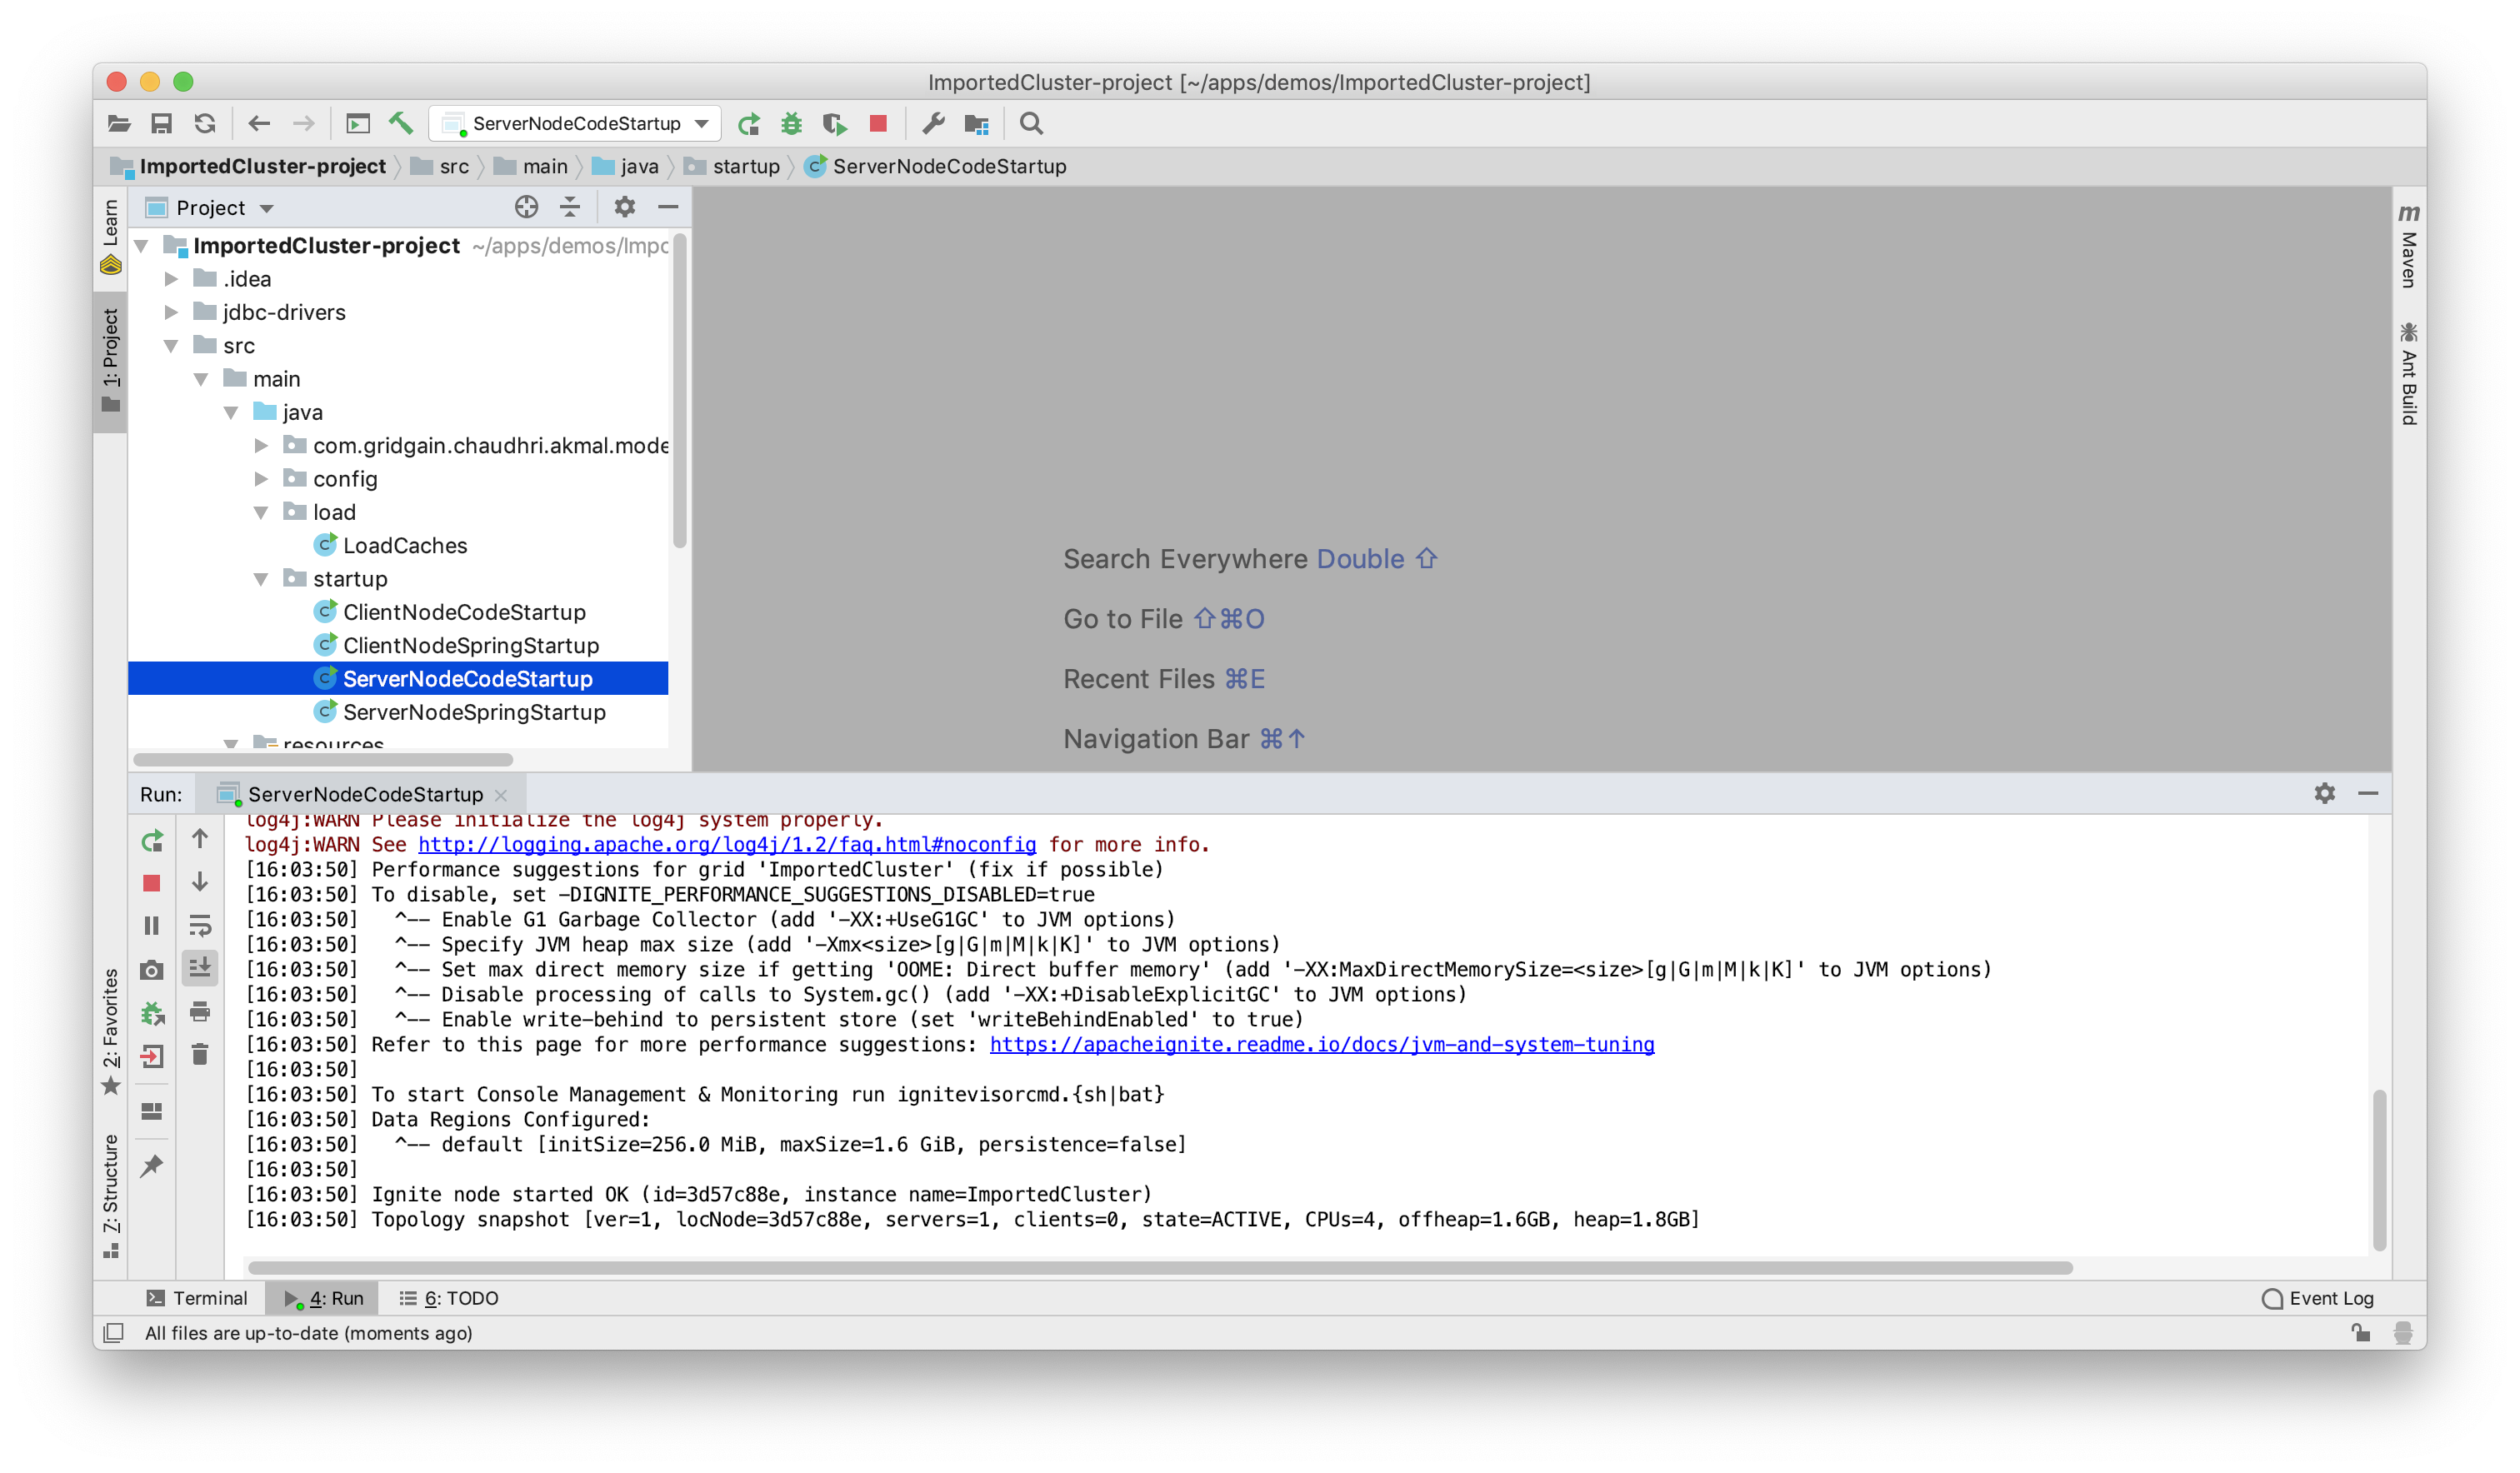
Figure 20. ServerNodeCodeStartup.
Next, we'll run LoadCaches to populate Ignite Storage from the MySQL Server, as shown in Figure 21.
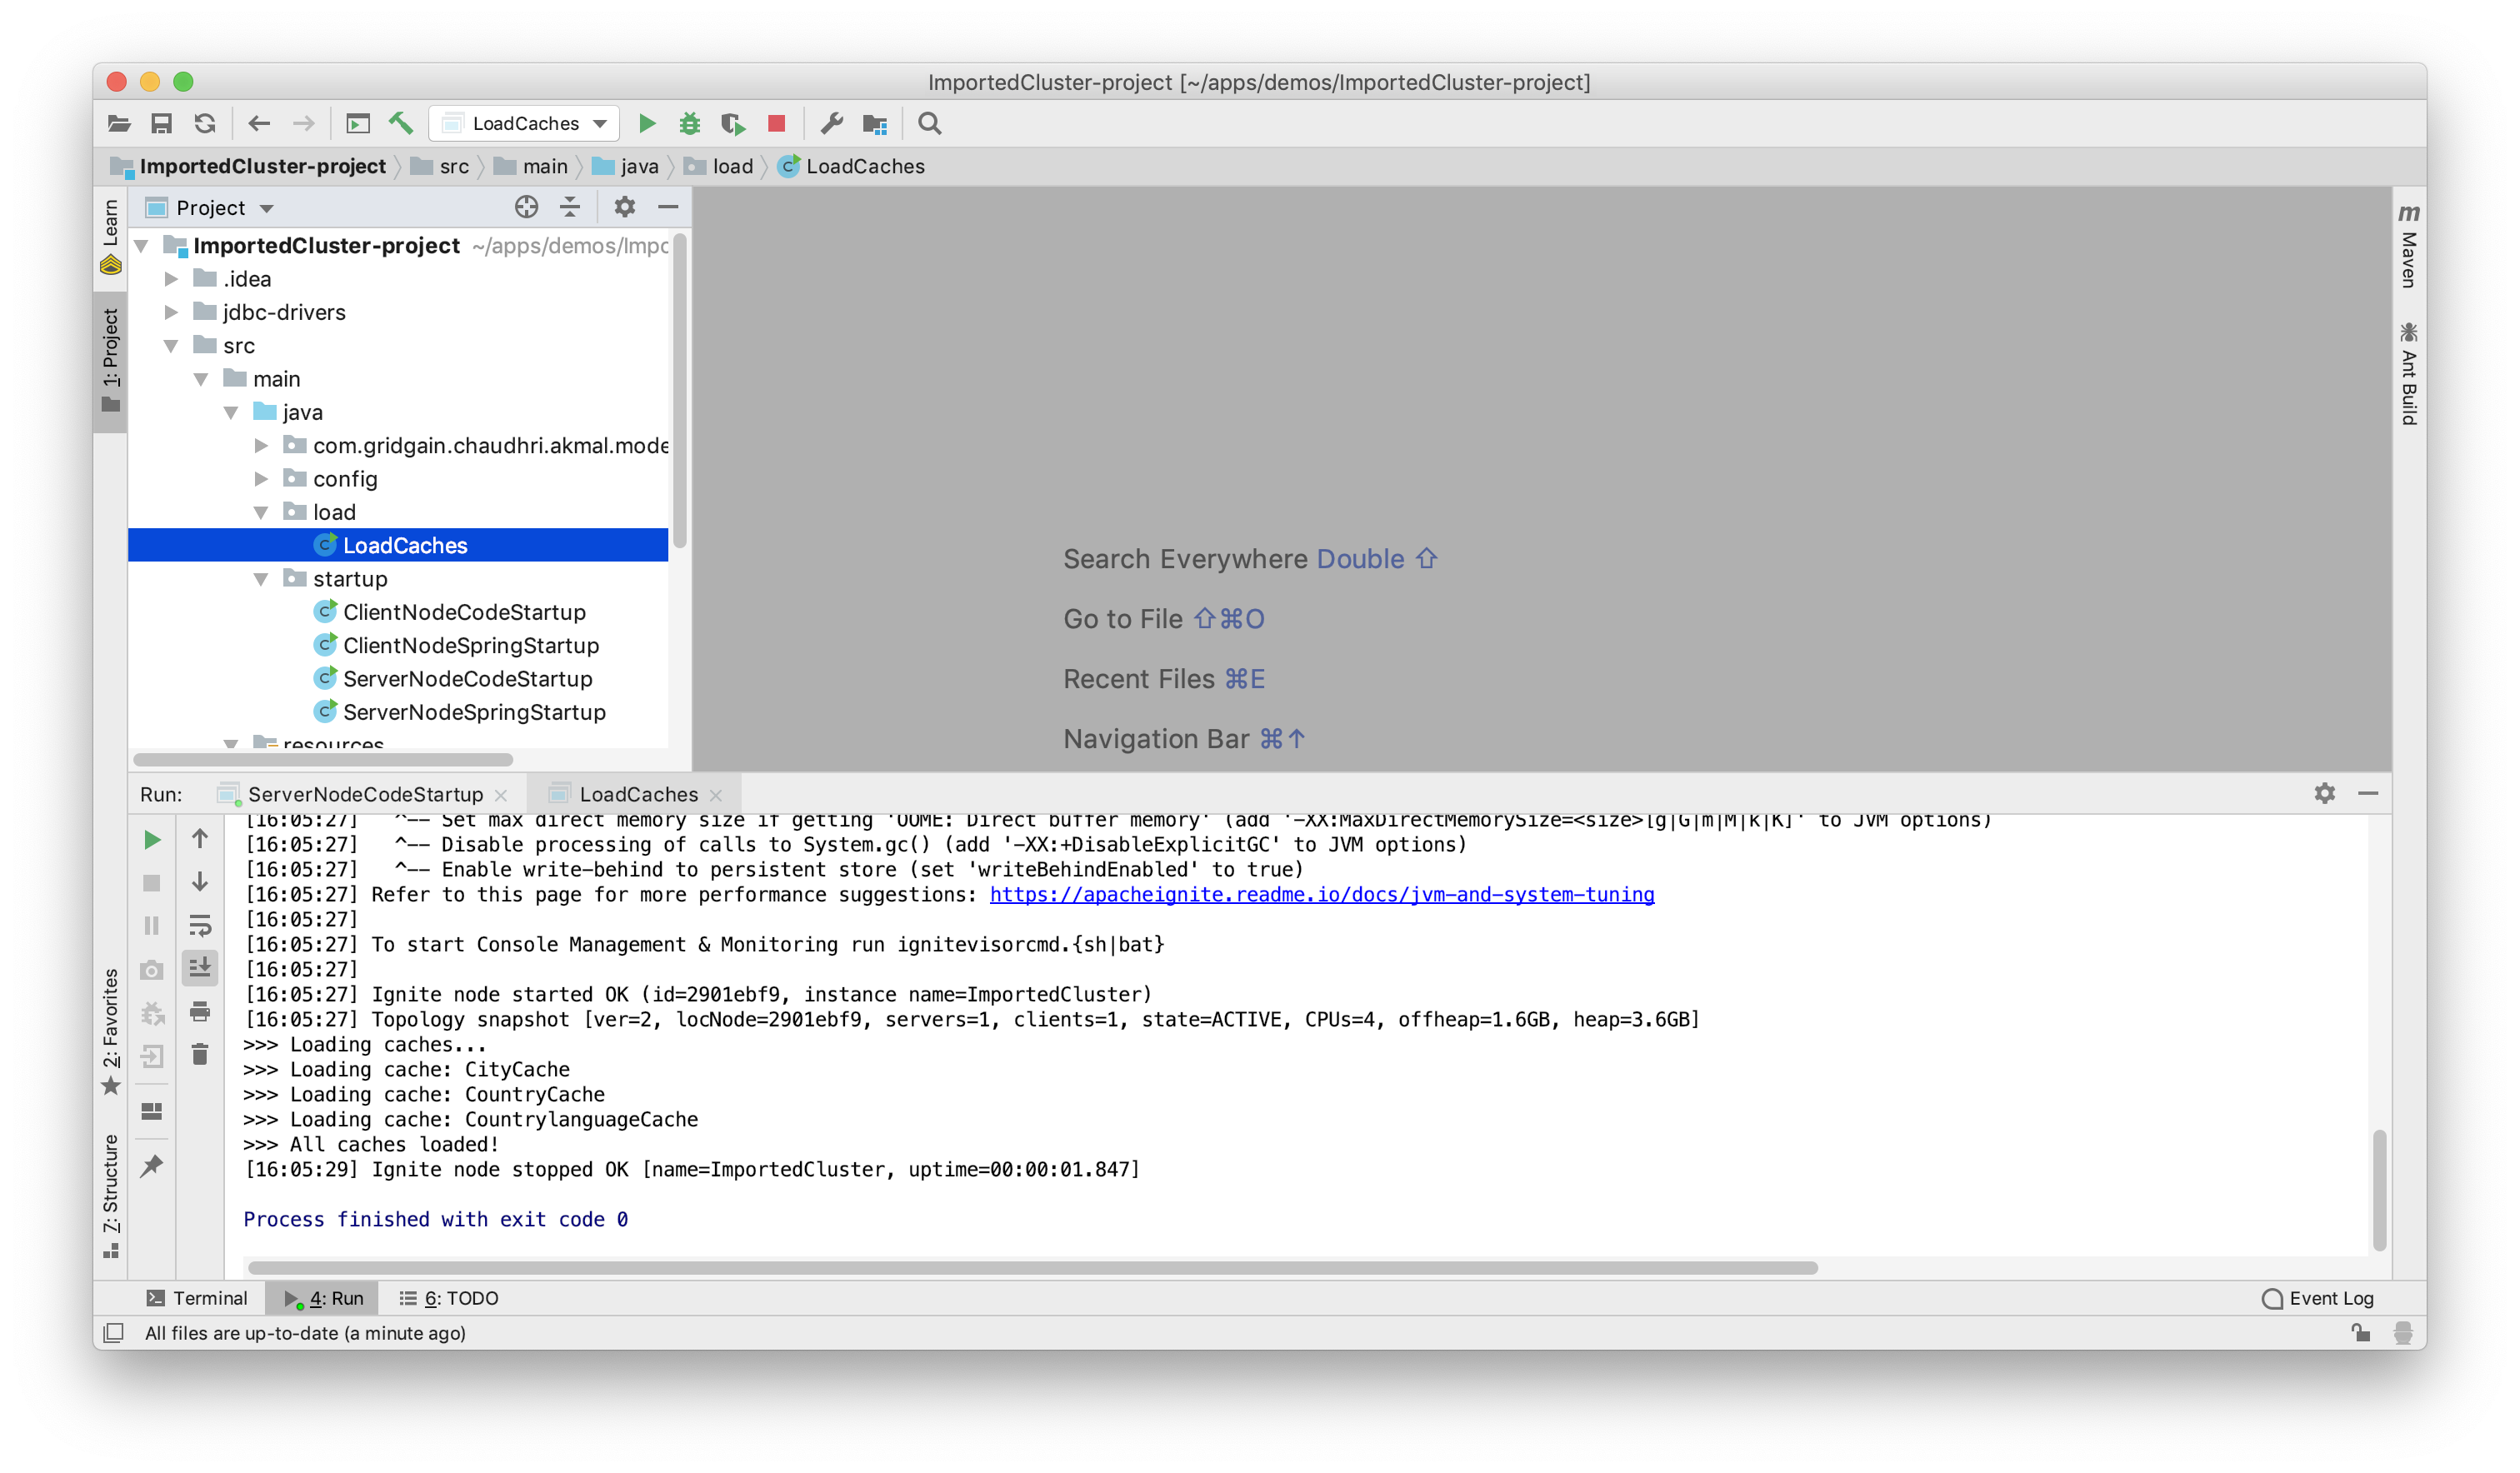
Figure 21. LoadCaches.
Using Web Console, if we navigate to Monitoring > Dashboard > Caches, we can see that Ignite Storage has been created and the data successfully loaded, as shown in Figure 22.
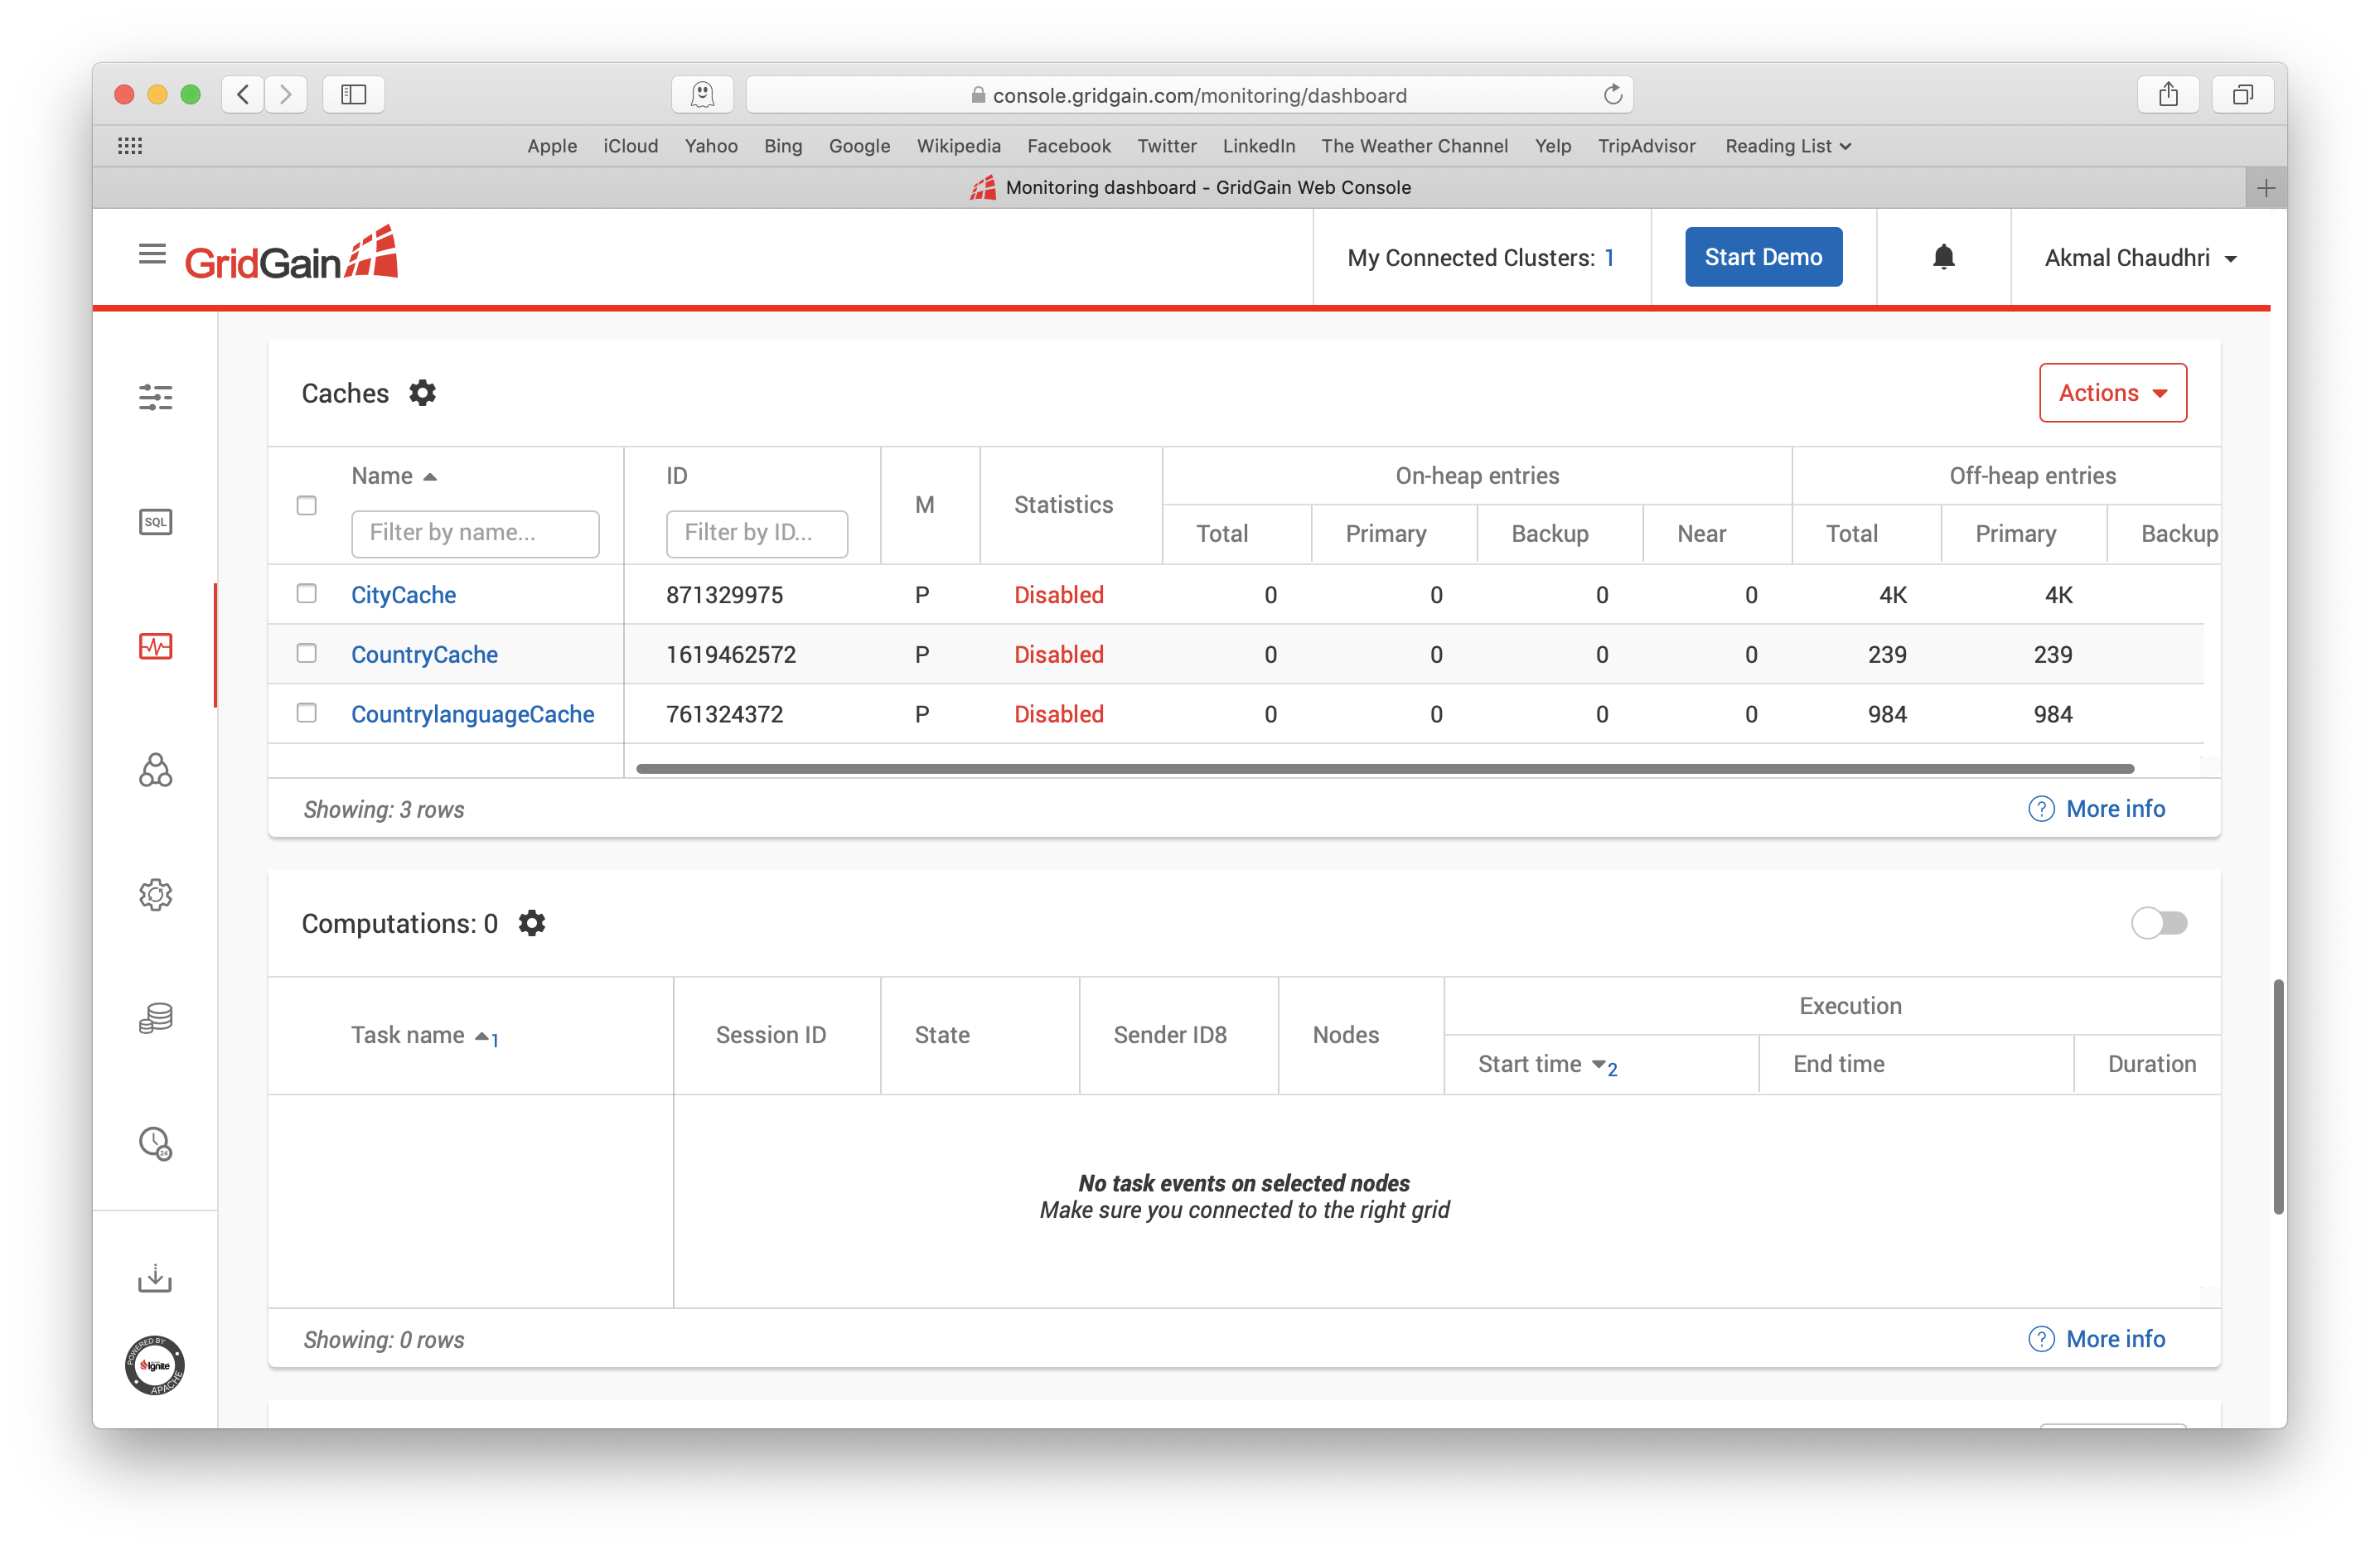
Figure 22. Monitoring > Dashboard > Caches.
Ignite is now successfully running with storage created and loaded with data from a MySQL Server. So, we could now connect to Ignite with any number of different interfaces. However, let's use the Node.js Thin Client.
Node.js Thin Client
Using the Node.js SQL examples that ship with Ignite as templates, we can create several Node.js applications and run the SQL queries shown in Listing 1. The complete Node.js applications are available on GitHub. In the examples below, the Node.js applications were run from the Ignite Node.js examples folder.
-- Q1. 3 Most Populated Countries
SELECT name, MAX(population)
AS max_pop FROM country
GROUP BY name, population
ORDER BY max_pop
DESC LIMIT 3

-- Q2. 3 Most Populated Cities in US, RUS and CHN
SELECT country.name, city.name, MAX(city.population)
AS max_pop FROM country
JOIN city ON city.countrycode = country.code
WHERE country.code IN ('USA','RUS','CHN')
GROUP BY country.name, city.name
ORDER BY max_pop
DESC LIMIT 3

-- Q3. Update Country Name
UPDATE country
SET name = 'USA'
WHERE name = 'United States'

-- Q4. Restore Country Name
UPDATE country
SET name = 'United States'
WHERE name = 'USA'
Listing 1. SQL Examples.
The output for Q1 is shown in Figure 23.
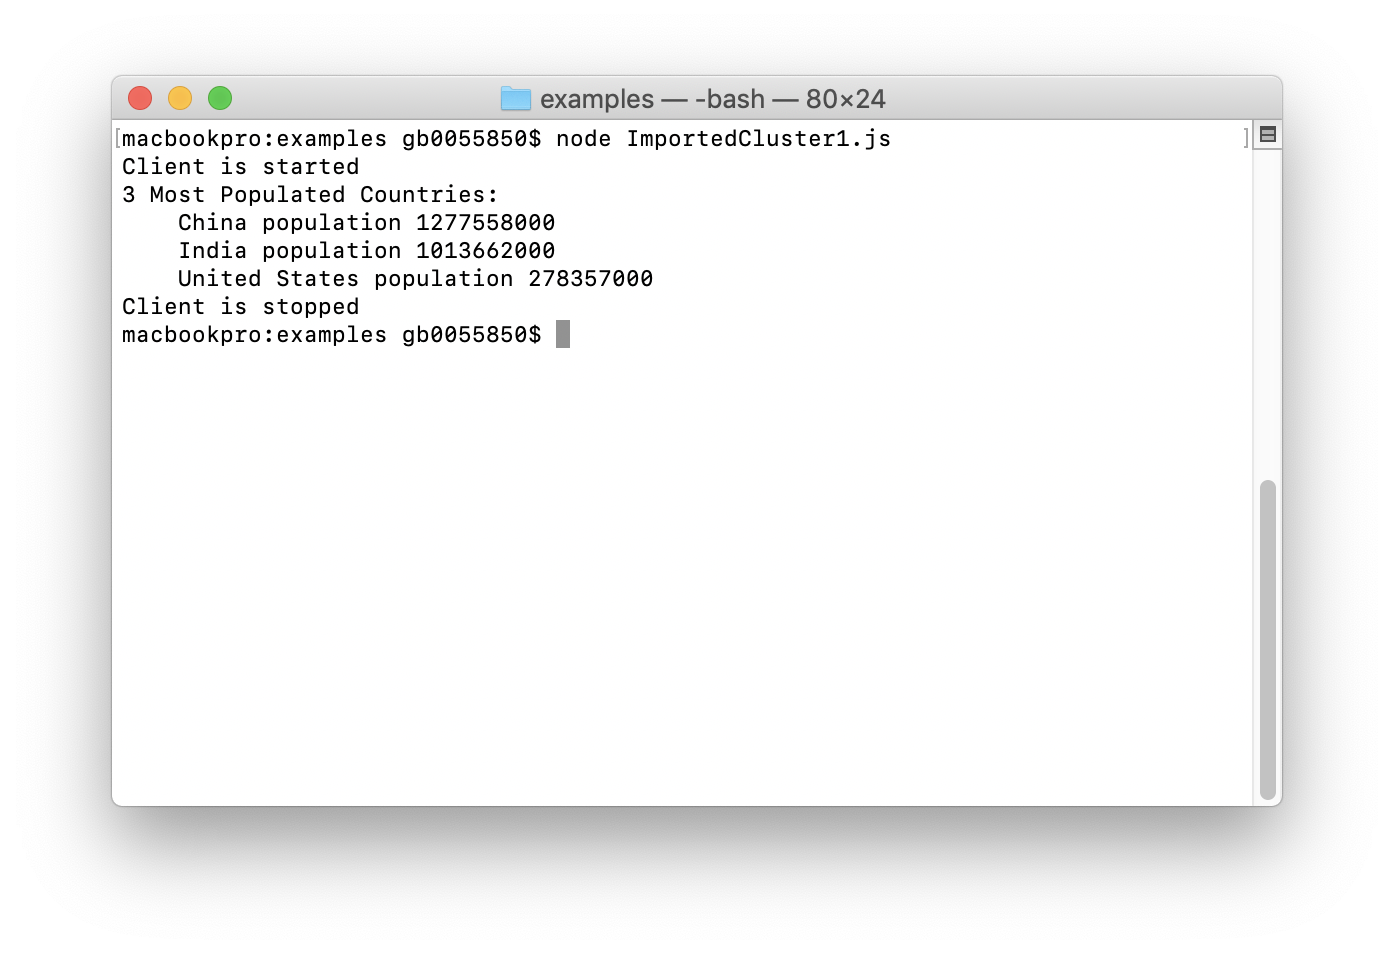
Figure 23. Q1 Output.
Q2 is a little more complex than Q1 and contains a join across two tables. The output for Q2 is shown in Figure 24.
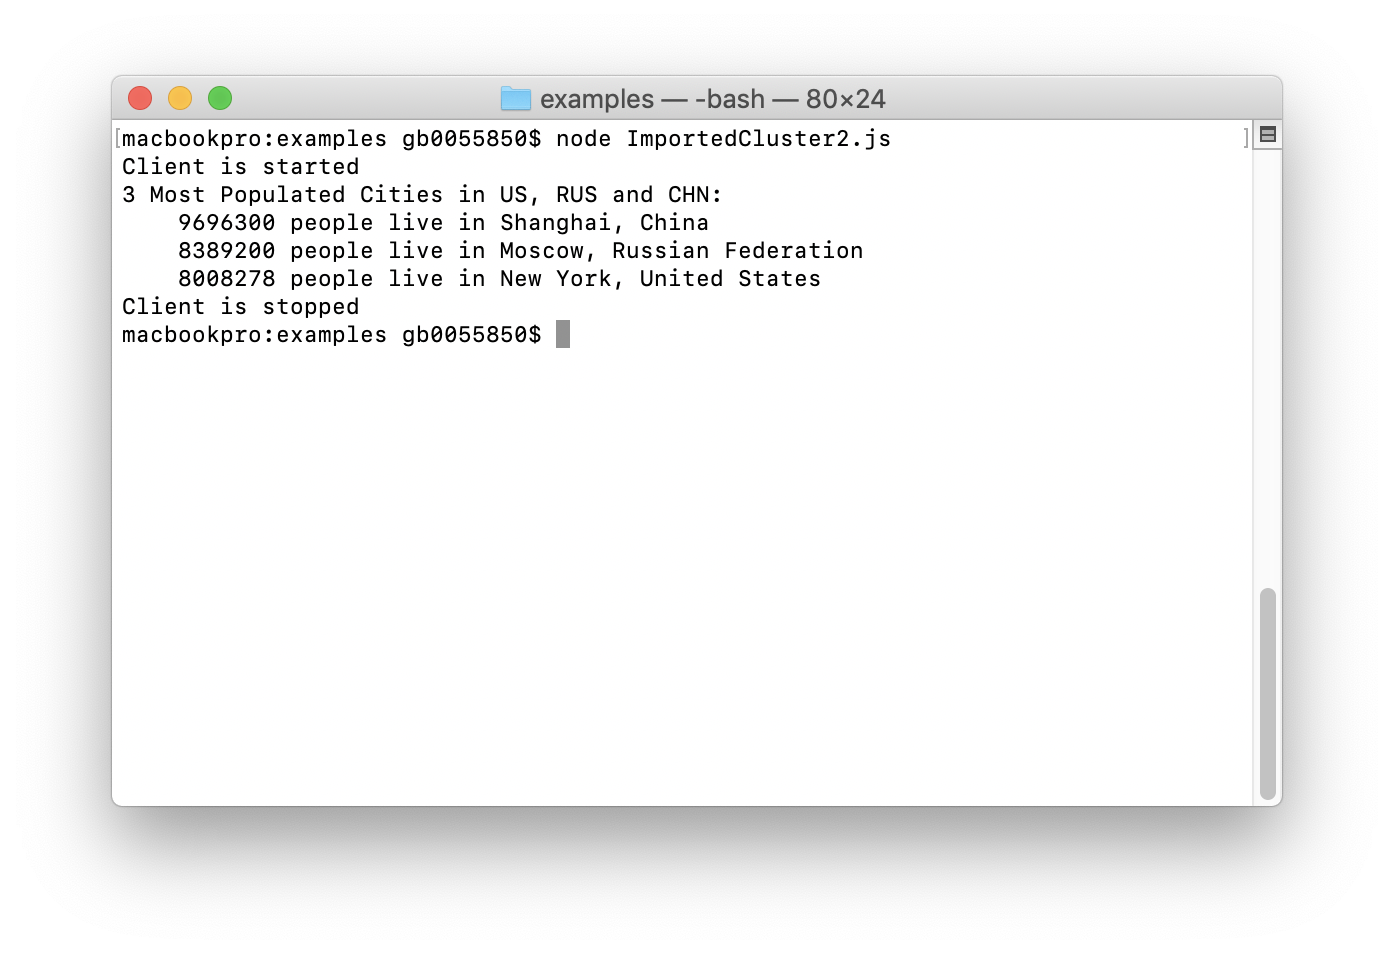
Figure 24. Q2 Output.
Q3 performs an update operation. After Q3 is run, Ignite's cache is updated and the update is also propagated to the MySQL Server, keeping the two in sync. We can check this by using DBeaver. So, first we'll locate the row in the Country table where the value is United States, as shown in Figure 25.

Figure 25. Country Table.
After running Q3 from the terminal, if we refresh DBeaver we can see that the Name field has been changed to USA, as shown in Figure 26.

Figure 26. Country Table.
Q4 enables us to restore the original name and we can verify this by running the query and refreshing DBeaver, as shown in Figure 27.
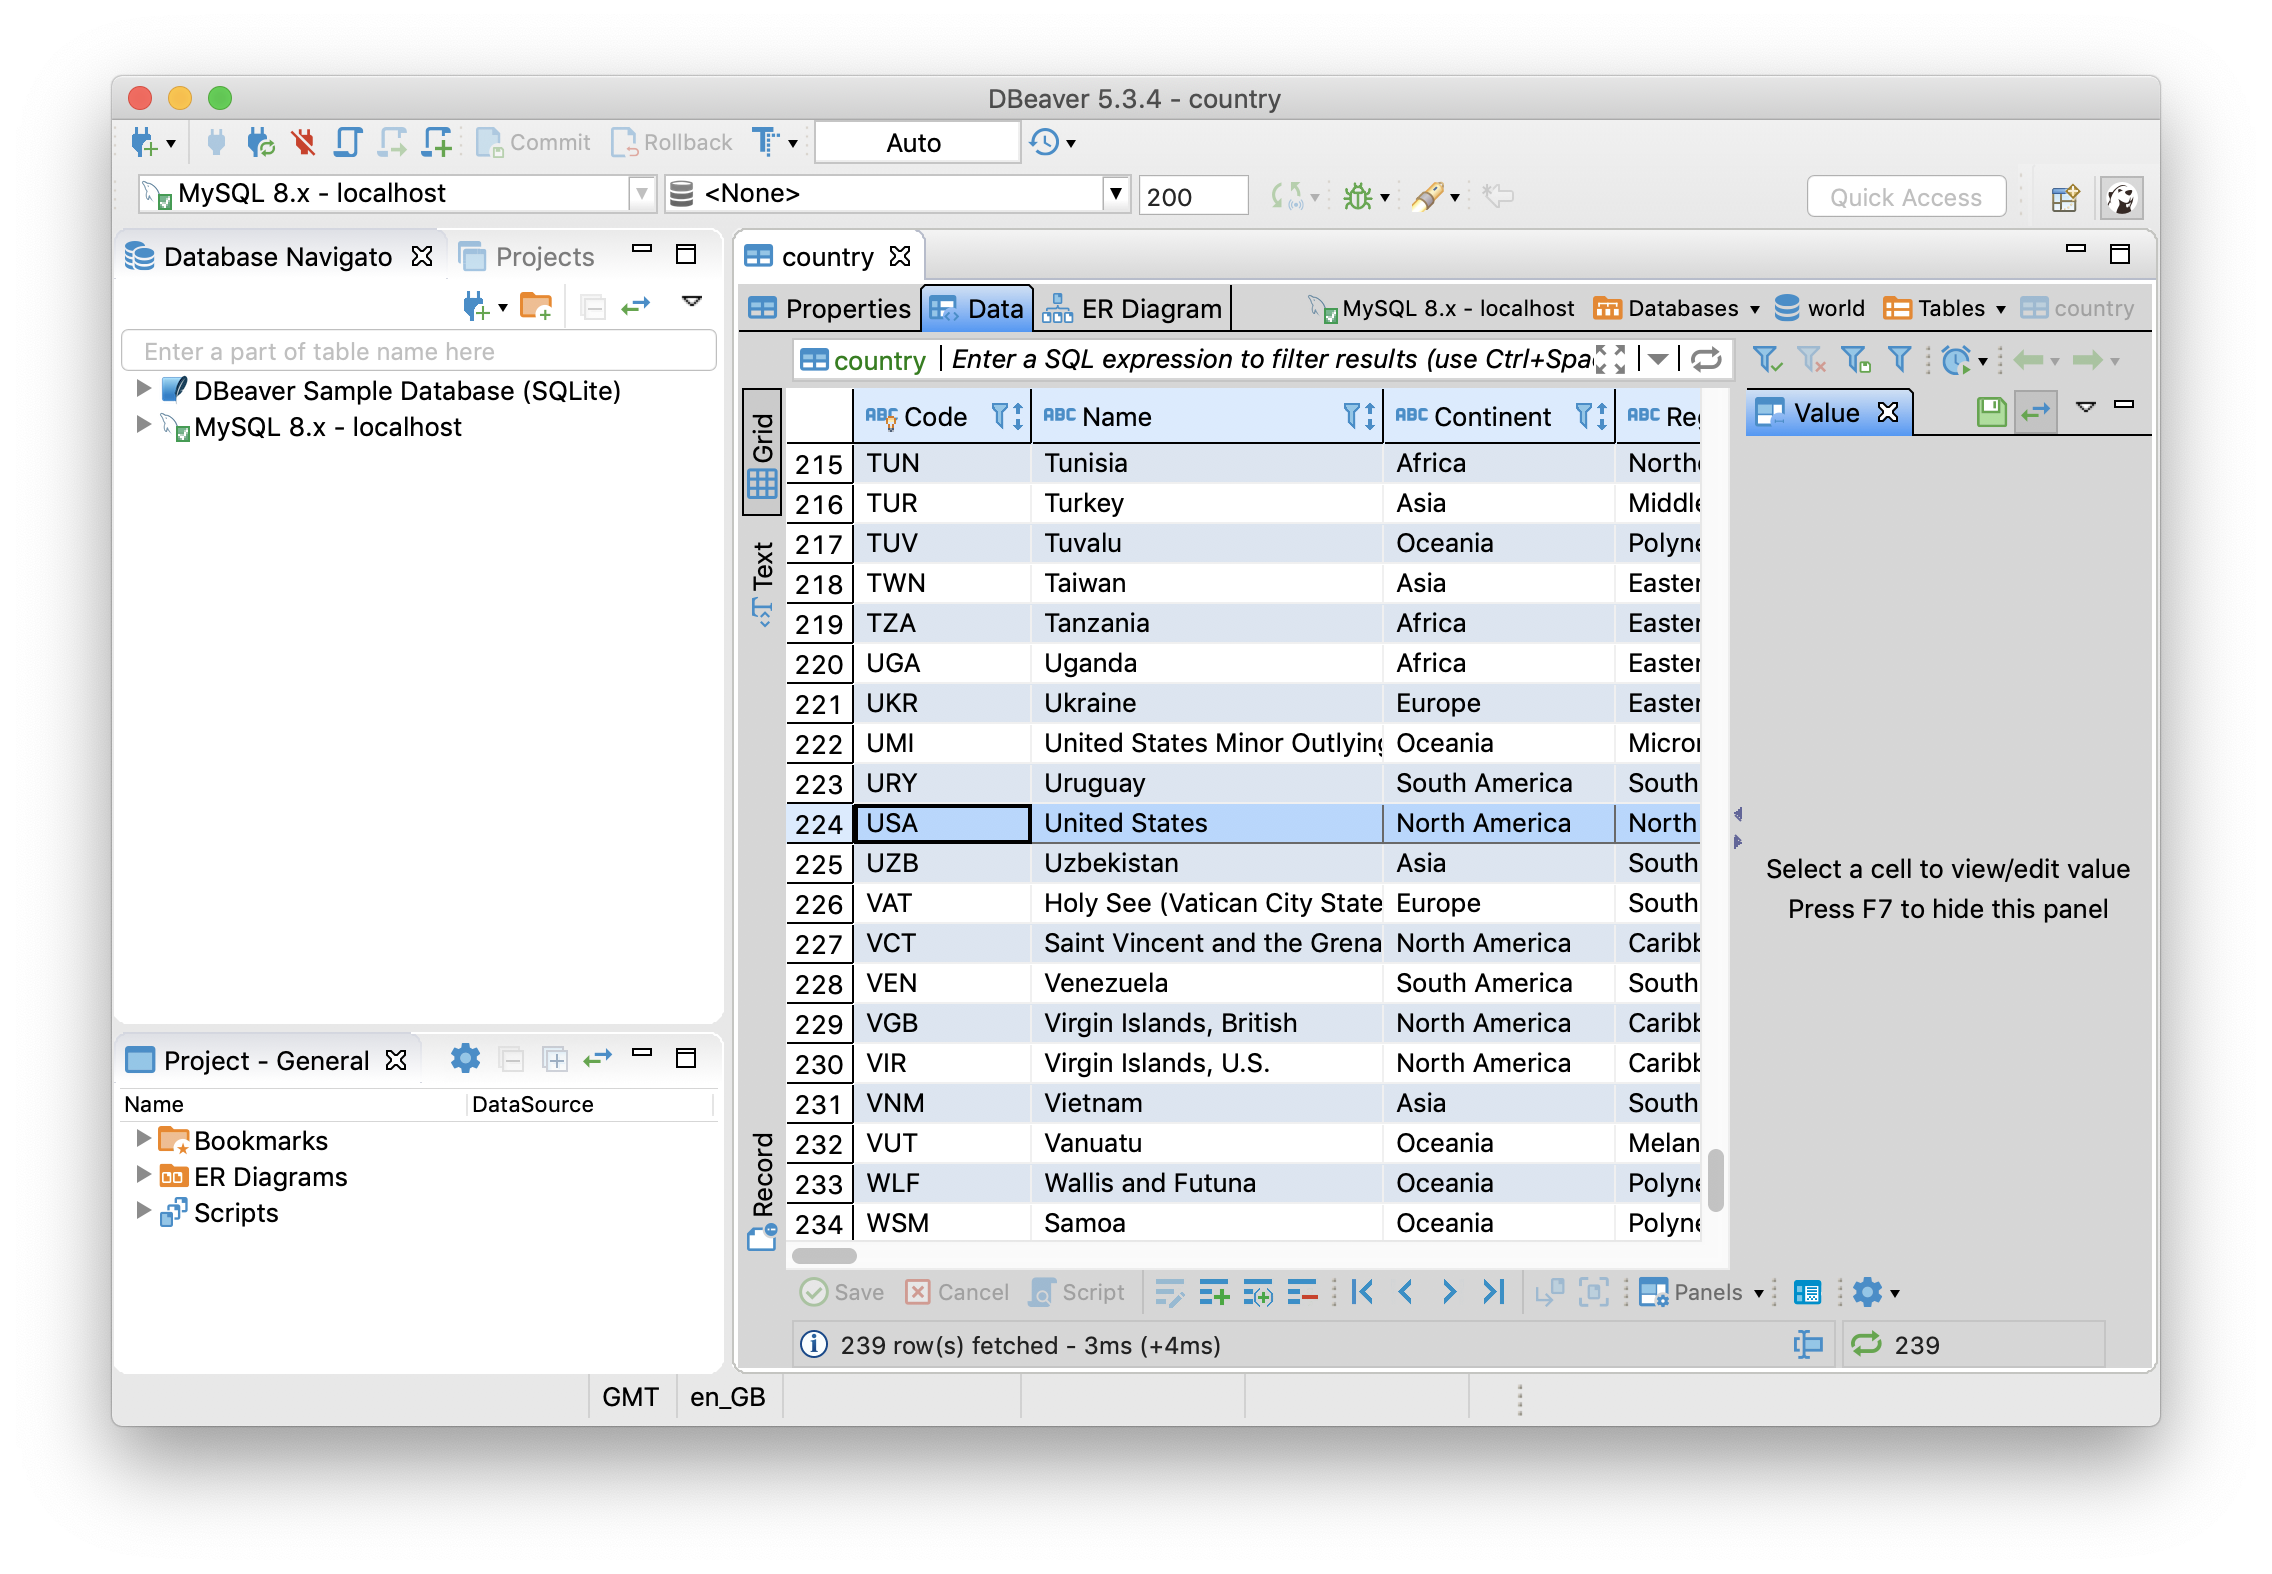
Figure 27. Country Table.
Next Steps
Test the Node.js Thin Client further by modifying and adapting the examples that ship with Ignite. Also, there are many options that Web Console provides that can be used to fine-tune and tweak schema information from an existing database system. The official documentation is a good place to start. The user and dev mailing lists are also great resources if you need further help.
Summary
In this article, we saw how to take schema information from an existing running MySQL Database System and created an Ignite project. This Ignite project enabled us to copy data from the MySQL Server into Ignite Storage and we then performed queries on that data. At scale, Ignite would allow us to use the power of cluster computing to parallelize operations, run in-memory queries at speed, perform analytics, and machine and deep learning. At the same time, we can preserve the business value we have in an existing legacy or heritage system. In our examples, we used the Node.js Thin Client. Ignite also supports Thin Clients for other programming languages.