
Introduction
In the previous article, we discussed the steps required to sign-up for a GridGain® Cloud account, created our first cluster, described the two built-in SQL demos and briefly reviewed the monitoring capabilities. In this article, let's look at examples of how to connect to a GridGain Cloud Cluster using two different programming languages.
Recall that in the previous article, we stopped our cluster. So, the first thing we need to do is to start our cluster, as shown in Figure 1.
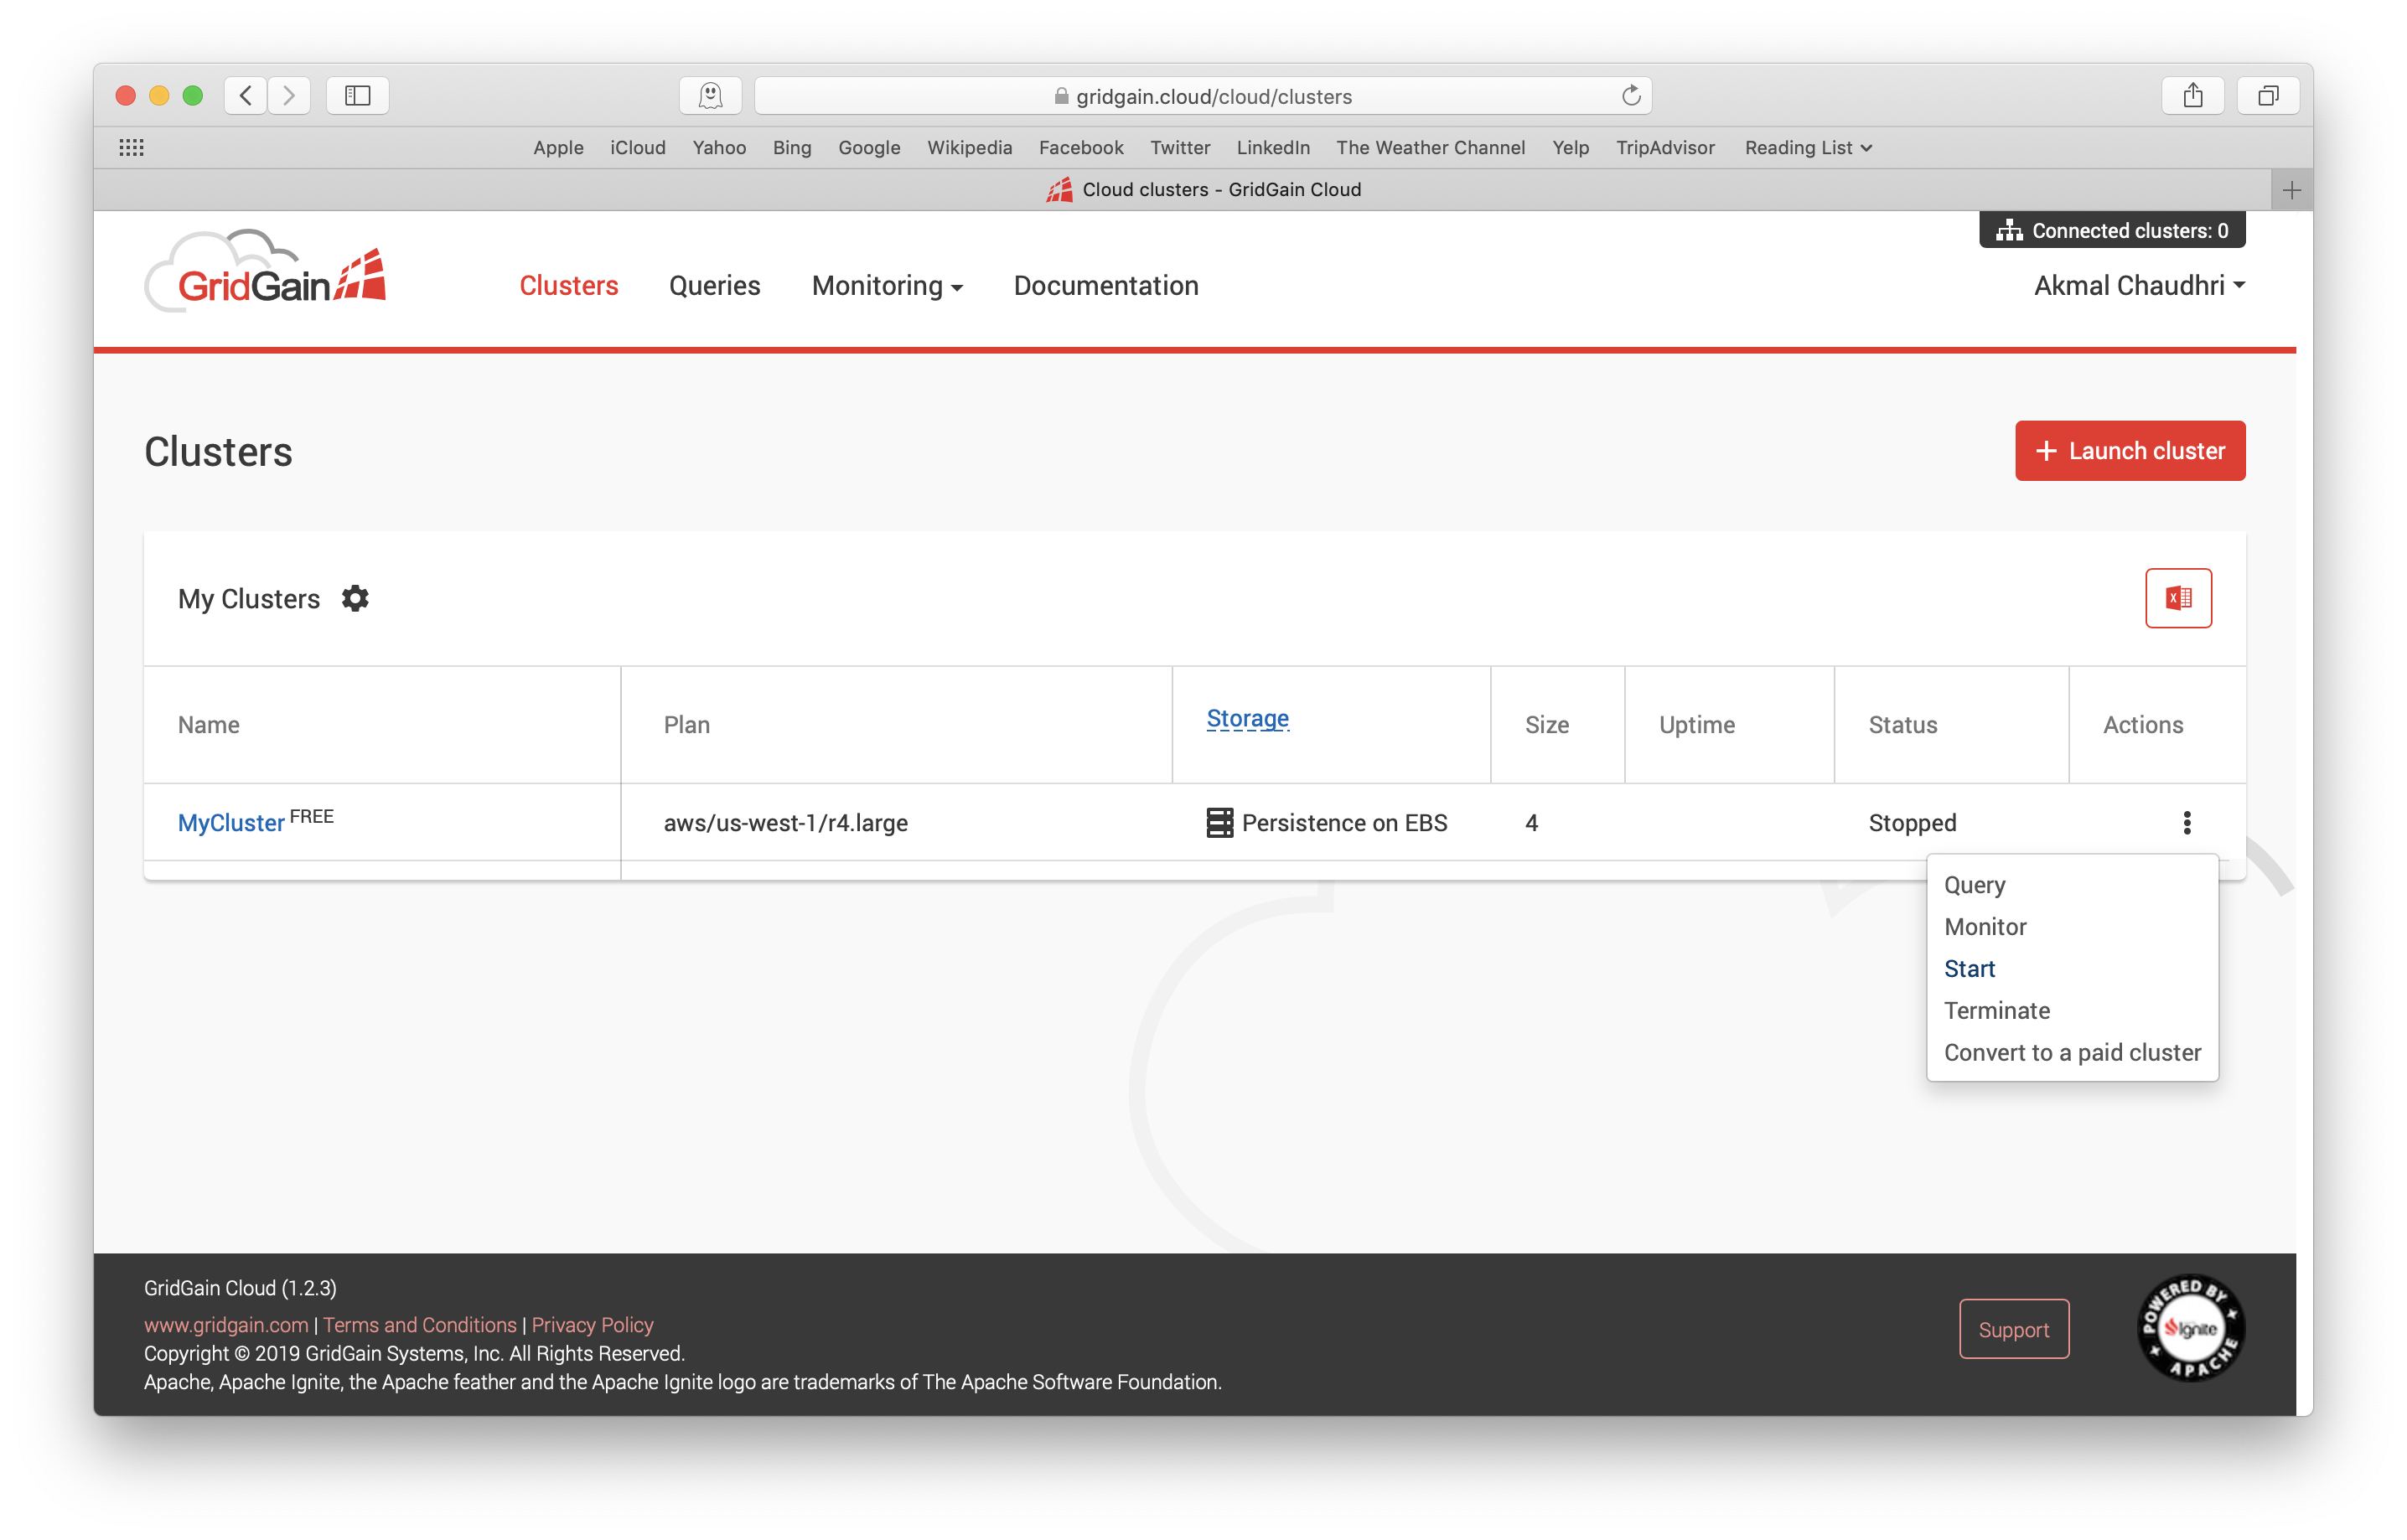
Figure 1. Start Cluster.
After a short time, the cluster should be in the Running state, as shown in Figure 2.
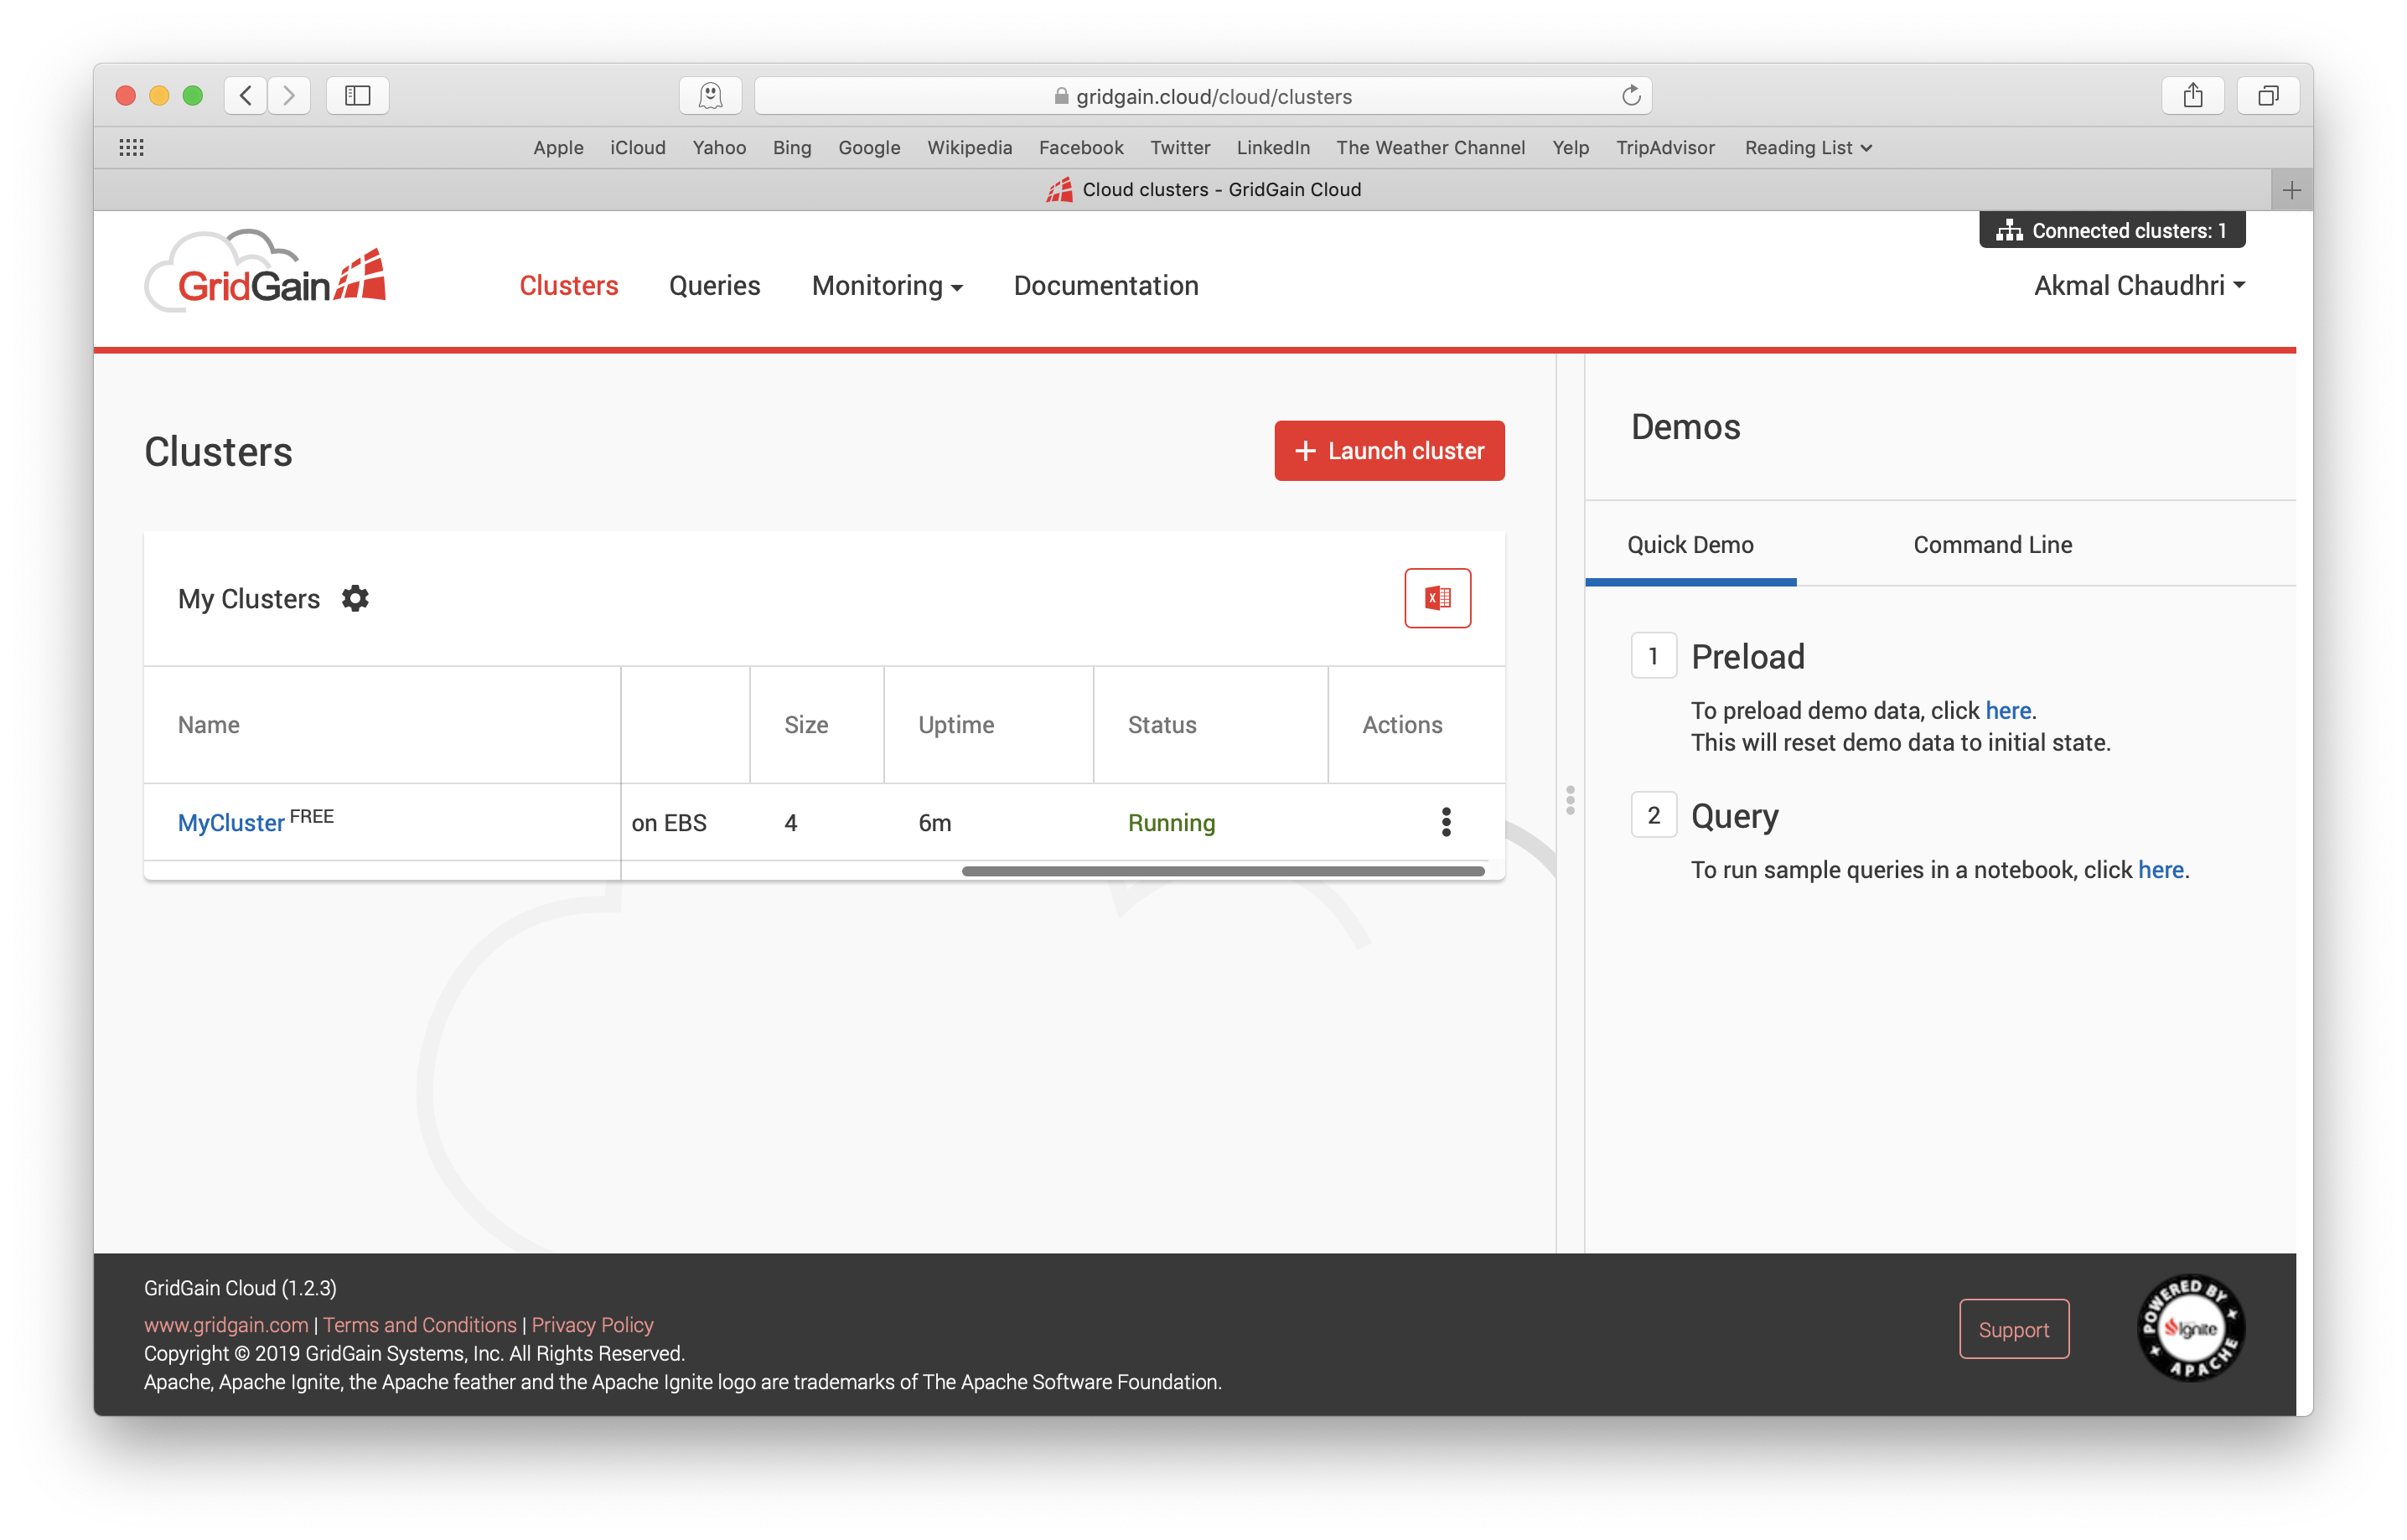
Figure 2. Running Cluster.
Next, we'll click on the cluster name to obtain more information, as shown in Figure 3.
Figure 3. Cluster Information.
We need some information from this page for our code examples.
GridGain and Apache® Ignite™ are multi-model systems. In the previous article, we looked at SQL and JDBC. In this article let's focus on the Key-Value interface.
Java Thin Client Example
For our first example, let's start with Java. Using the Java code template provided in the official documentation, we'll create an IDE project, code a CloudConfig class and plug-in the following four values from the Cluster Information page:
- Thin Client URL
- Cluster Username
- Cluster Password
- SSL Password
We also need to download the Java Key Store and we'll save the keyStore.jks file in the resources directory in our project, as shown in Figure 4.
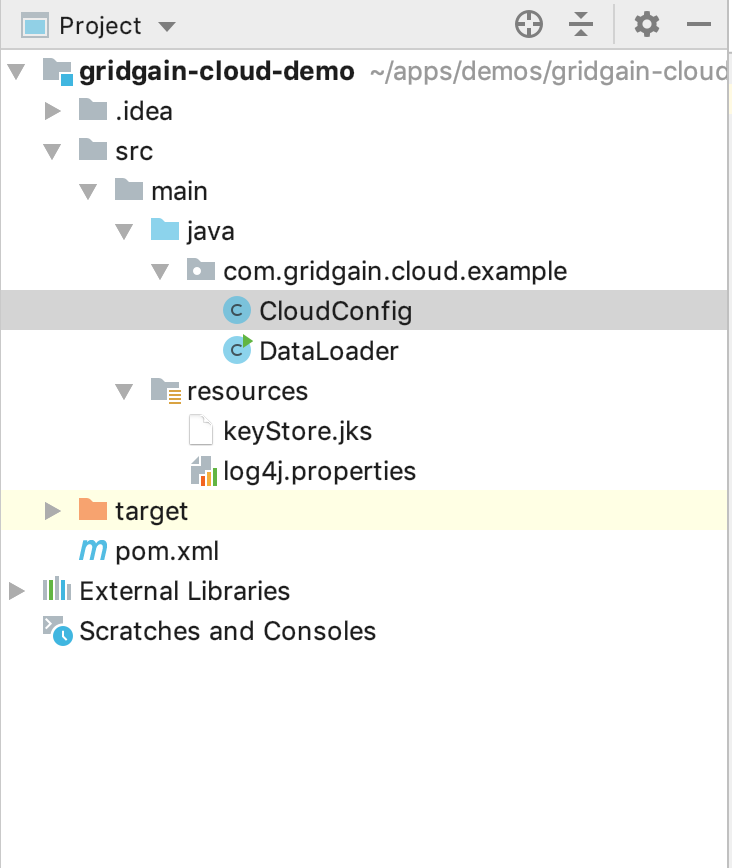
Figure 4. IDE Project.
The complete CloudConfig code is shown in Listing 1.
package com.gridgain.cloud.example;

import org.apache.ignite.client.SslMode;
import org.apache.ignite.client.SslProtocol;
import org.apache.ignite.configuration.ClientConfiguration;

public class CloudConfig {
    public static ClientConfiguration getCloudConfiguration() {
        String thinClient = "d.7dnqzxh9y2eerezor93md7.gridgain.cloud:9620";
        String username = "ignite";
        String pwd = "wjLaB4hKvA";
        String sslPwd = "ZfLNkdj4VCSbrmCgwXsf";

        ClassLoader classLoader = new CloudConfig().getClass().getClassLoader();

        String store = classLoader.getResource("keyStore.jks").getPath();

        ClientConfiguration cfg = new ClientConfiguration()
                .setAddresses(thinClient)
                .setUserName(username)
                .setUserPassword(pwd)
                .setSslMode(SslMode.REQUIRED)
                .setSslClientCertificateKeyStorePath(store)
                .setSslClientCertificateKeyStoreType("JKS")
                .setSslClientCertificateKeyStorePassword(sslPwd)
                .setSslTrustCertificateKeyStorePath(store)
                .setSslTrustCertificateKeyStoreType("JKS")
                .setSslTrustCertificateKeyStorePassword(sslPwd)
                .setSslKeyAlgorithm("SunX509")
                .setSslTrustAll(false)
                .setSslProtocol(SslProtocol.TLS);

        return cfg;
    }
}
Listing 1. CloudConfig Class.
Now, we'll write a DataLoader class that stores some data in our cluster. The complete code is shown in Listing 2.
package com.gridgain.cloud.example;

import org.apache.ignite.Ignition;
import org.apache.ignite.client.ClientCache;
import org.apache.ignite.client.IgniteClient;

public class DataLoader {
    public static void main(String[] args) {
        try (IgniteClient igniteClient = Ignition.startClient(CloudConfig.getCloudConfiguration())) {
            final String CACHE_NAME = "put-get-example";

            ClientCache<Integer, String> cache = igniteClient.getOrCreateCache(CACHE_NAME);

            System.out.println("> Cache put example started.");
            cache.put(1, "John Doe");
            cache.put(2, "Jane Roe");
            System.out.println("> Stored values in cache.");

            System.out.println("> Cache get example started.");
            System.out.println("> Retrieved instance from cache: " + cache.get(1));
            System.out.println("> Retrieved instance from cache: " + cache.get(2));

        } catch (Exception e) {
            System.err.format("Unexpected failure: %s\n", e);
            e.printStackTrace();
        }
    }
}
Listing 2. DataLoader Class.
Our code stores two Key-Value pairs into a cache and then retrieves the values and outputs them to the console, as shown in Figure 5.
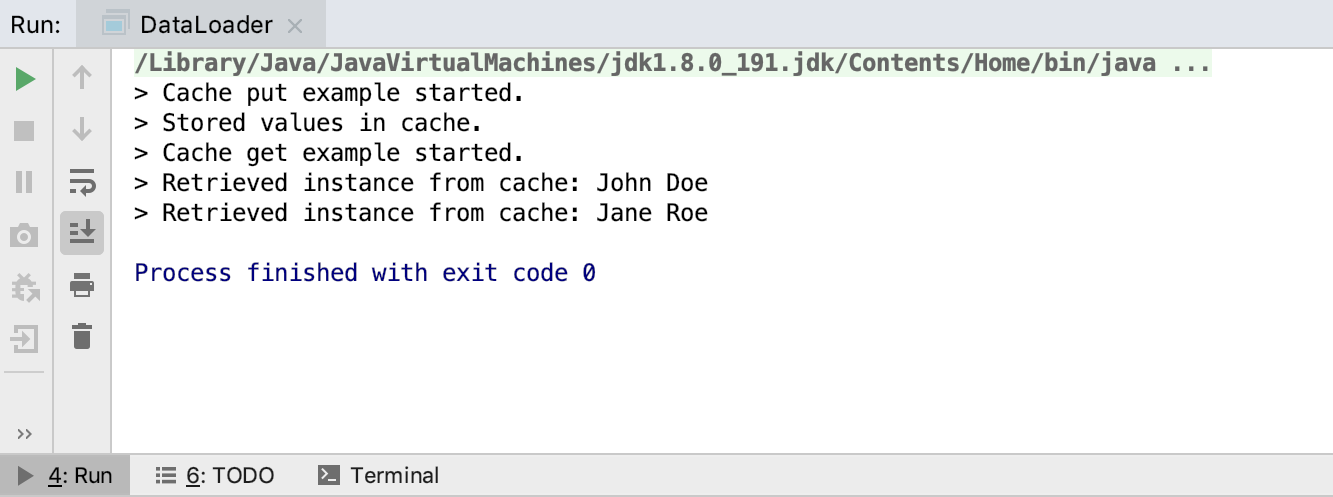
Figure 5. Java Output.
Using Monitoring > Dashboard from the GridGain Cloud Console, we can check the cache, as shown in Figure 6.

Figure 6. Monitoring > Dashboard.
We can see that a cache called put-get-example has been created and two Primary values have been stored.
Python Thin Client Example
Let's now use the Python programming language. We'll store two additional Key-Value pairs in our put-get-example cache. We'll save and run this program from the home directory of a user called demo in a Linux environment. Using the template provided in the official documentation, we'll create a simple program and plug-in the following three values from the Cluster Information page:
- Thin Client URL
- Cluster Username
- Cluster Password
We also need to download the PEM Certificate and we'll save the client.pem file in our Linux environment home directory. We should also modify the permissions on this file to ensure that it remains private.
Before running our Python code, we need to run the following command:
pip install pyignite
The complete code is shown in Listing 3.
from pyignite import Client

client = Client(
    username = 'ignite',
    password = "wjLaB4hKvA",
    use_ssl = True,
    ssl_keyfile = '/home/demo/client.pem',
    ssl_certfile = '/home/demo/client.pem'
)
client.connect('d.7dnqzxh9y2eerezor93md7.gridgain.cloud', 9620)

cache = client.get_or_create_cache('put-get-example')

print("> Cache put example started.")
cache.put(3, "Mary Major")
cache.put(4, "Richard Miles")
print("> Stored values in cache.")

print("> Cache get example started.");
print("> Retrieved instance from cache: " + cache.get(3));
print("> Retrieved instance from cache: " + cache.get(4));
Listing 3. Python Code.
Our code stores two Key-Value pairs into the put-get-example cache and then retrieves the values and outputs them to the terminal, as shown in Figure 7.
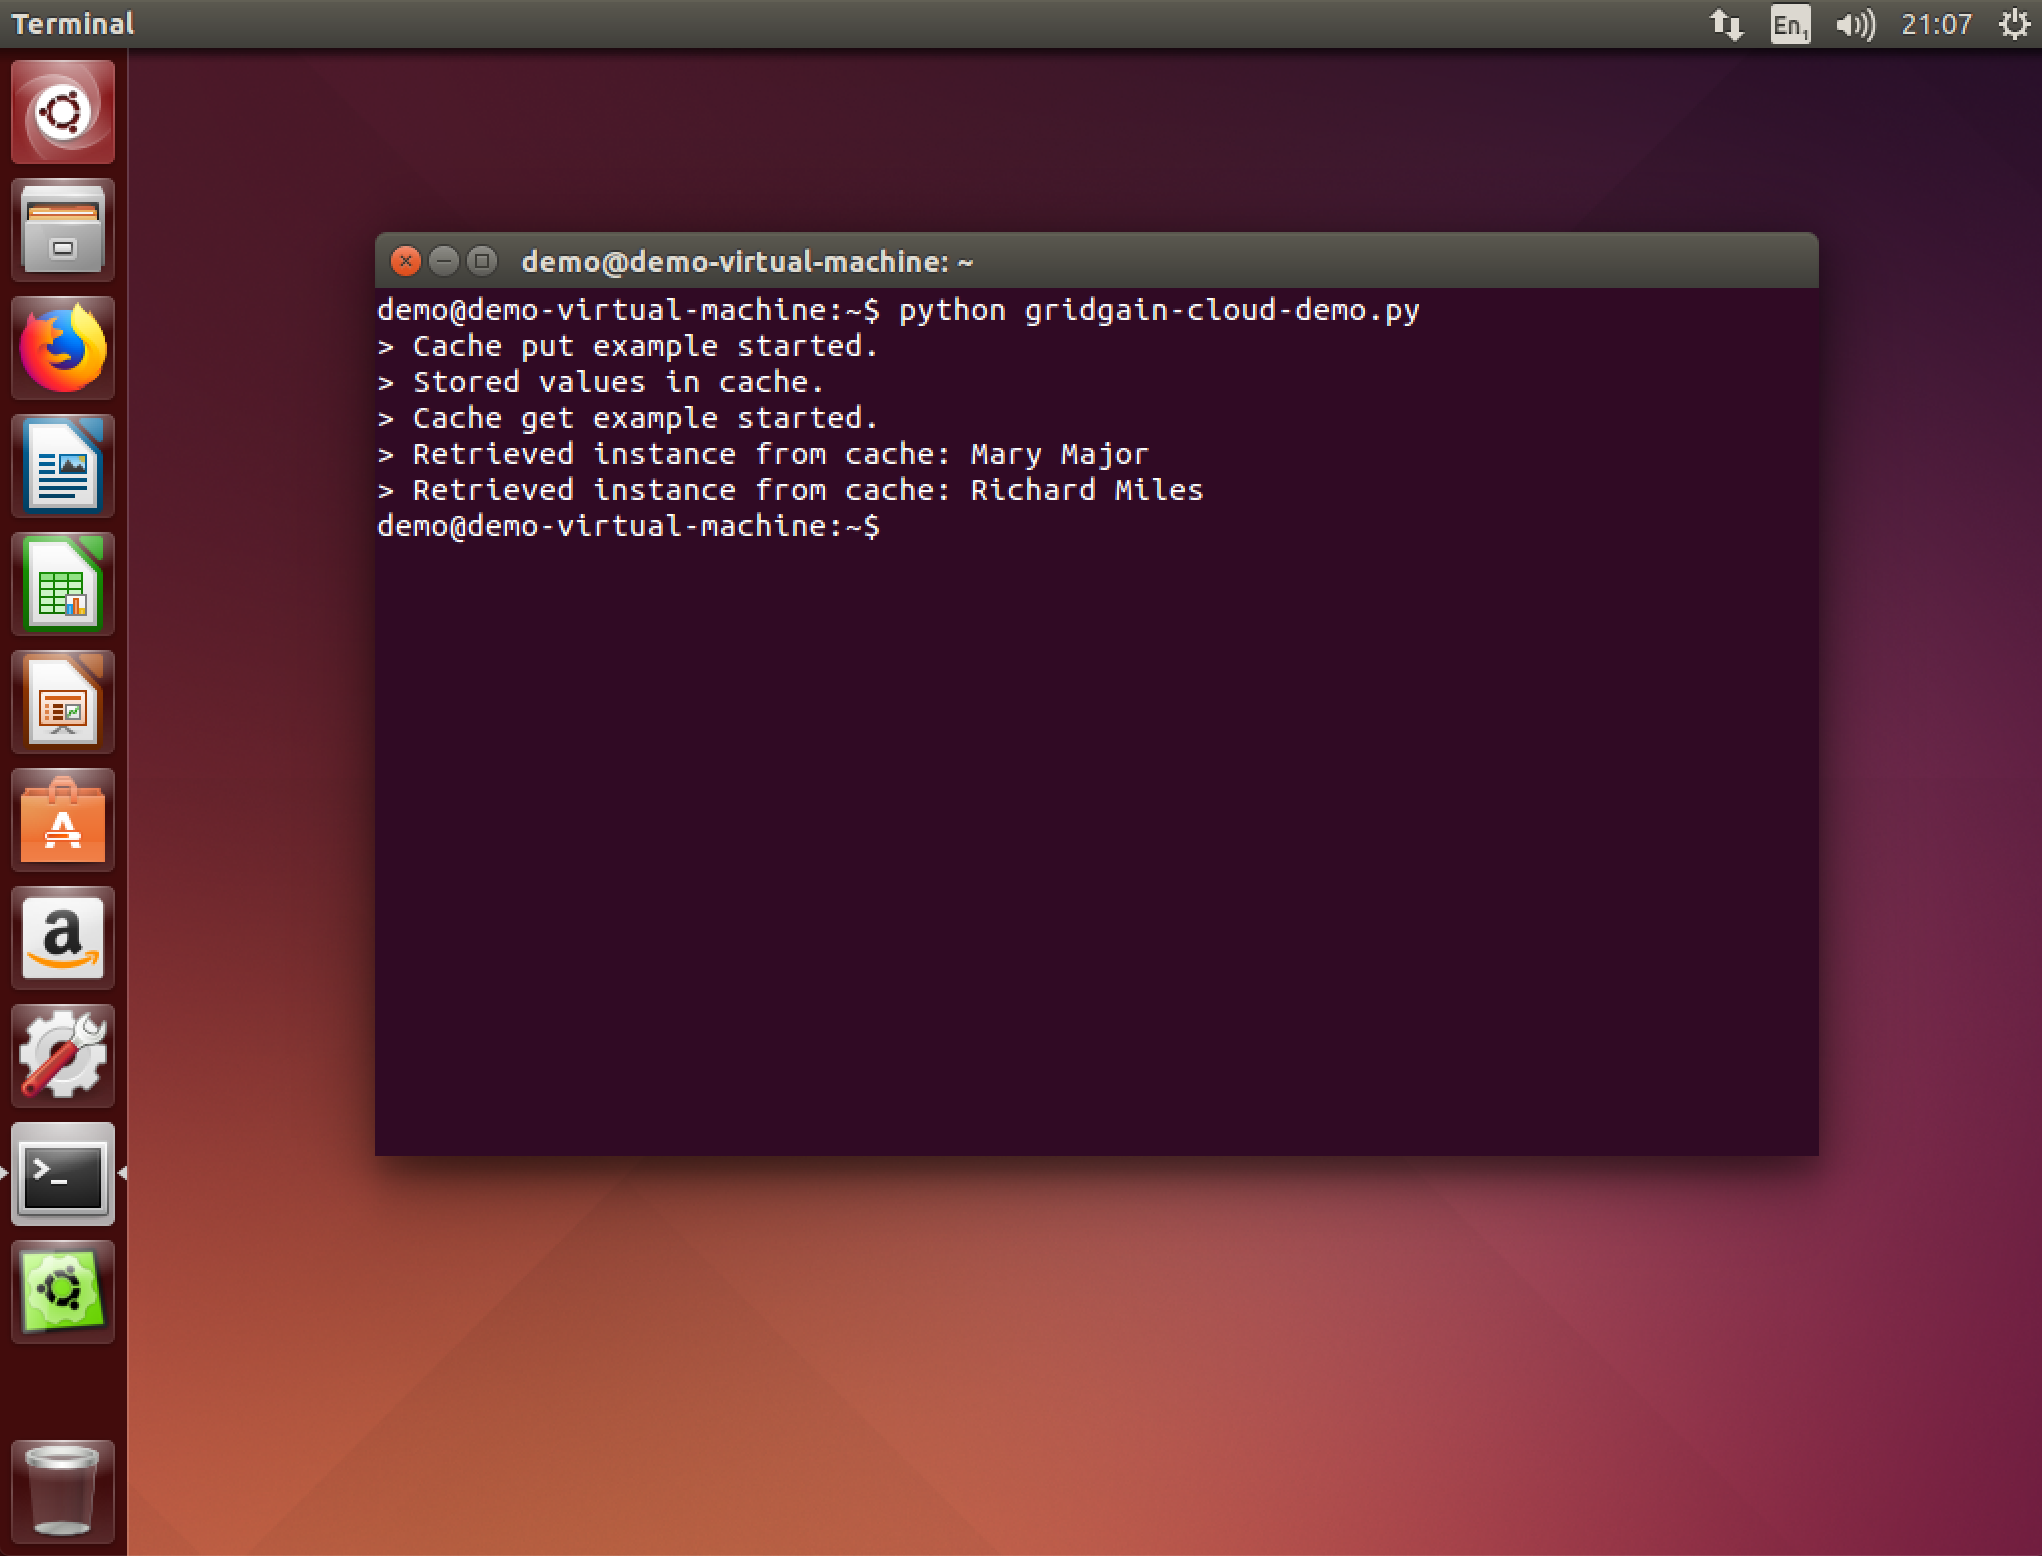
Figure 7. Python Output.
Using Monitoring > Dashboard from the GridGain Cloud Console, we can check the cache, as shown in Figure 8.
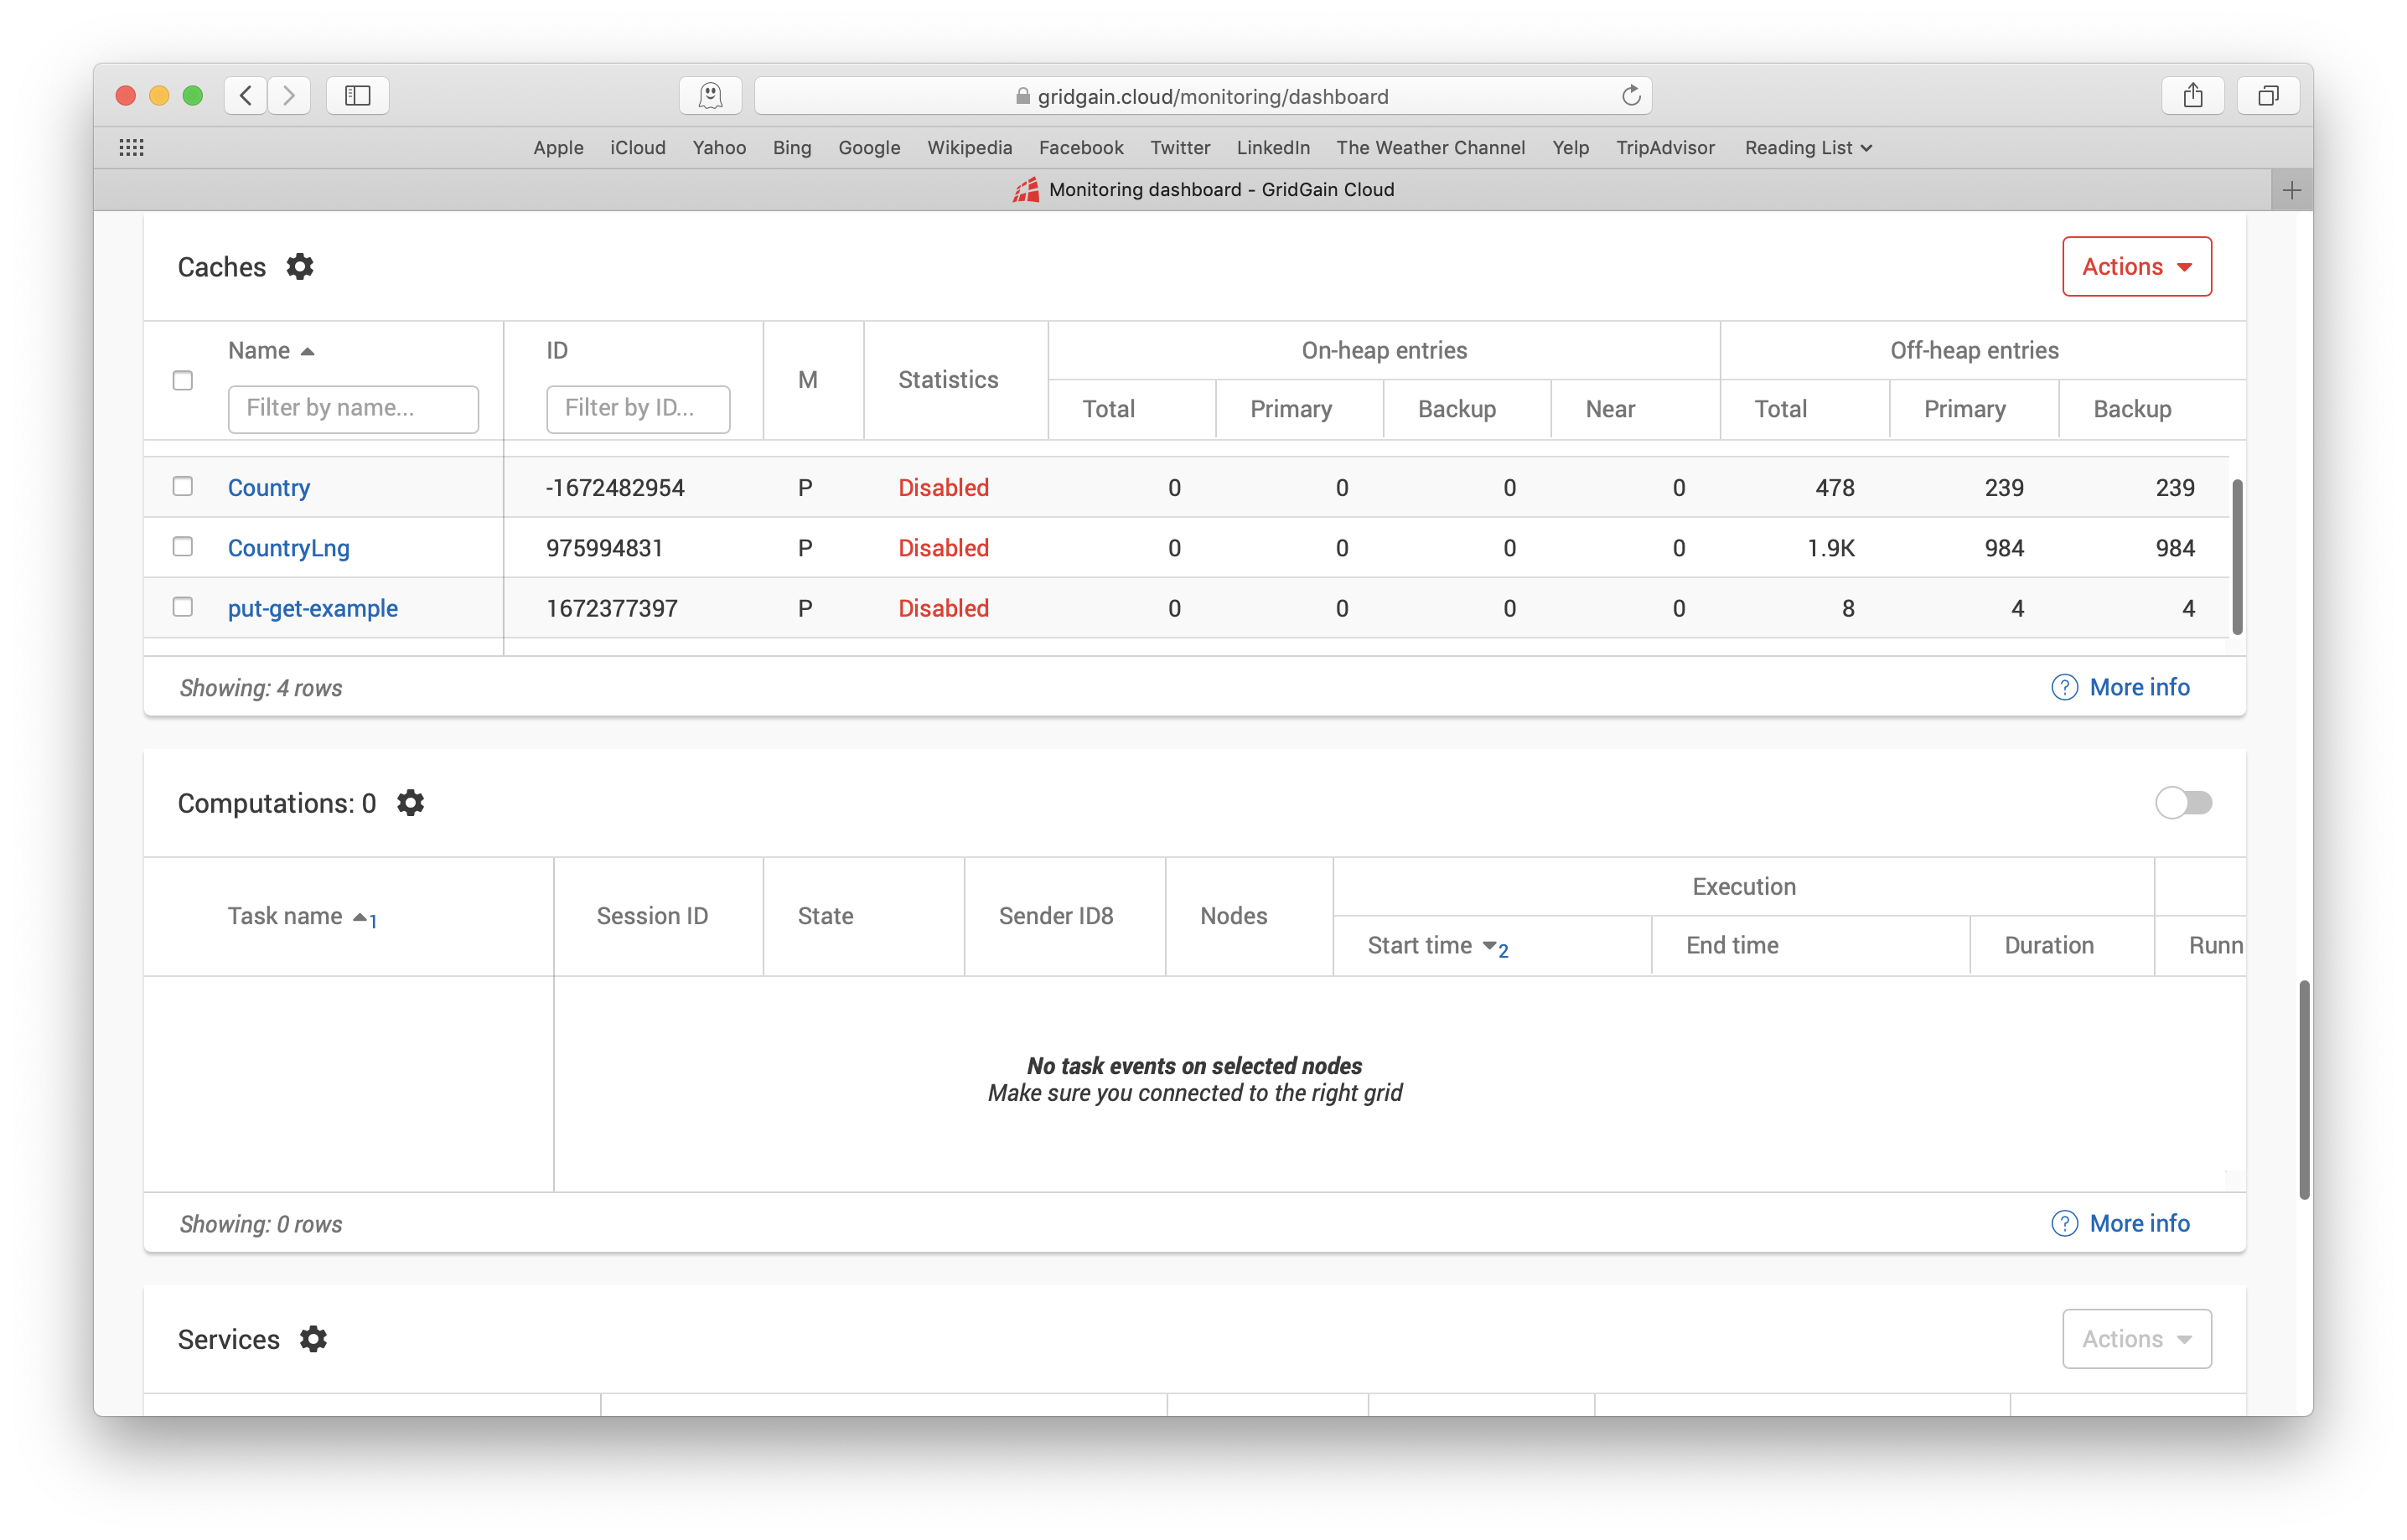
Figure 8. Monitoring > Console.
We can see that in the cache called put-get-example, two additional Primary values have been stored.
Next Steps
The official documentation provides additional information and code examples for other languages, such as Node.js, PHP, C++ and .NET. Additional thin client code examples can also be found on GitHub. There is also a webinar titled GridGain Cloud: Deploy Apache Ignite in Minutes that discusses this technology in more detail.
Summary
In this second article, we have seen how to connect to our GridGain Cloud Cluster from two different programming languages using the Key-Value interface; we have successfully stored and retrieved our data.