
One of the features of Apache® Ignite™ is its ability to integrate with streaming technologies, such as Spark Streaming, Flink, Kafka, and so on. These streaming capabilities can be used to ingest finite quantities of data or continuous streams of data, with the added bonus of fault tolerance and scale that Ignite provides. Data can be streamed into Ignite at very high rates that may reach many millions of events per second. This is possible, since the data can be streamed into an Ignite cluster in parallel as shown in Figure 1.
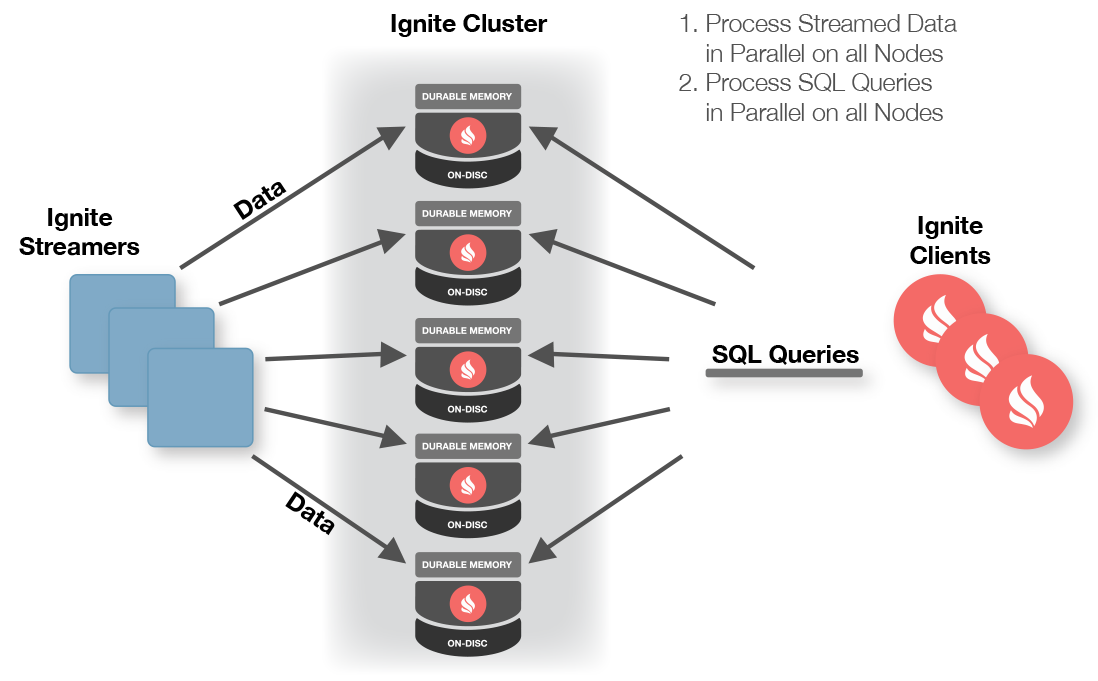
Figure 1. Ignite Streamers (Source: Apache).
Once the data are in an Ignite cluster, we can run queries, perform analytics or apply machine learning algorithms on that data. Using Figure 1, the steps to perform streaming are as follows:
- Streams of data are injected into Ignite by clients.
- Data are automatically partitioned amongst the Ignite data nodes.
- Data can be concurrently processed in the cluster.
- SQL queries (for example) can be concurrently performed on the streamed data.
- Clients can subscribe to data changes for never-ending queries.
In this two-part series, we will focus on the Kafka Data Streamer. This consumes messages for a Kafka Topic from a Kafka Broker and inserts these messages into an Ignite cache. There is an Open Source solution for Apache Ignite, and an Enterprise Confluent Certified Kafka Connector for GridGain. A detailed comparison of these two implementations is provided in the GridGain documentation. Let's focus on the Kafka Connector for GridGain, since this provides a range of enterprise-ready features, such as:
- No coding, configuration-driven.
- Scalability and resilience.
- Support for Ignite data schemas to enable automated streaming of data from Ignite to numerous other systems with Kafka Connectors.
- DevOps-friendly monitoring.
We can see the high-level architecture in Figure 2. GridGain can act as a source and sink and we'll look at some examples of how to do this in this article and the next one.
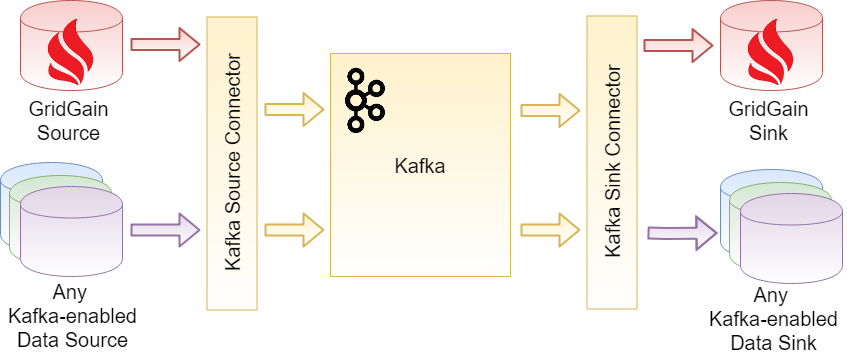
Figure 2. Certified Kafka Connector (Source: GridGain).
Let's now build an application, step-by-step, following the GridGain documentation. In this first example, we will use GridGain as the data source and an RDBMS as the data sink, as shown in Figure 3.
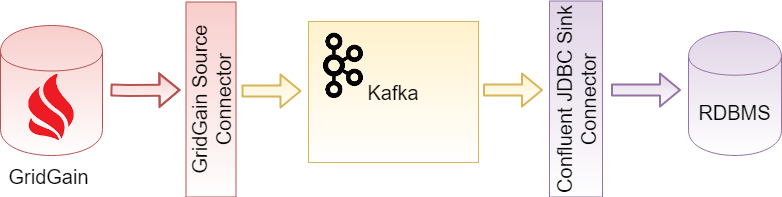
Figure 3. GridGain source and RDBMS sink (Source: GridGain).
Using GridGain with Kafka Connector to persist data in an RDBMS
If you'd like to follow along with this example, ensure that you meet the required prerequisites first:
- Download and install GridGain Enterprise or GridGain Ultimate, version 8.4.9 or higher.
- Download and install Kafka, version 2.0 or higher.
- Download and install MySQL, version 8.0 or higher.
- Download and install DBeaver.
- Ensure that the variables $GRIDGAIN_HOME and $KAFKA_HOME are correctly set to their relevant installation directories.
Install the GridGain Source Connector
Following the instructions in the GridGain documentation, we'll execute these steps to ensure that all the dependencies are available:
$ cd $GRIDGAIN_HOME/integration/gridgain-kafka-connect
$ ./copy-dependencies.sh
We'll use the following directory for the Kafka Connectors:
/usr/local/opt/kafka/connect
Next, we will copy the gridgain-kafka-connect directory to the above location.
In our example, we'll run a single worker Kafka Connect cluster, so we'll modify the following file:
$KAFKA_HOME/config/connect-standalone.properties
and add the full path to the directory we just copied, as follows:
plugin.path=/usr/local/opt/kafka/connect/gridgain-kafka-connect
This completes the source setup. Let's now focus on the sink setup.
Install the JDBC Sink Connector
We'll start by downloading the Confluent JDBC Connector package and extracting it into a directory called confluentinc-kafka-connect-jdbc.
We'll use MySQL Server as the RDBMS and start by downloading the MySQL JDBC Driver and copying the jar file to the following directory:
confluentinc-kafka-connect-jdbc/lib
Next, we'll copy the confluentinc-kafka-connect-jdbc directory to the Kafka Connectors directory. We also need to add the directory path to the properties file, as follows:
plugin.path=/usr/local/opt/kafka/connect/gridgain-kafka-connect,/usr/local/opt/kafka/connect/confluentinc-kafka-connect-jdbc
Both source and sink are now ready, so let's now configure GridGain.
Start a GridGain Cluster
GridGain ships with some configuration files that can be found in the $GRIDGAIN_HOME/examples/config directory. However, for our example application, we will create a new configuration file, as follows:
<?xml version="1.0" encoding="UTF-8"?>
<beans xmlns="http://www.springframework.org/schema/beans"
       xmlns:xsi="http://www.w3.org/2001/XMLSchema-instance"
       xmlns:util="http://www.springframework.org/schema/util"
       xsi:schemaLocation="
        http://www.springframework.org/schema/beans
        http://www.springframework.org/schema/beans/spring-beans.xsd
        http://www.springframework.org/schema/util
        http://www.springframework.org/schema/util/spring-util.xsd">
    <bean id="ignite.cfg" class="org.apache.ignite.configuration.IgniteConfiguration">
        <property name="discoverySpi">
            <bean class="org.apache.ignite.spi.discovery.tcp.TcpDiscoverySpi">
                <property name="ipFinder">
                    <bean class="org.apache.ignite.spi.discovery.tcp.ipfinder.vm.TcpDiscoveryVmIpFinder">
                        <property name="addresses">
                            <list>
                                <value>127.0.0.1:47500..47502</value>
                            </list>
                        </property>
                    </bean>
                </property>
            </bean>
        </property>
        <!-- Explicitly enable peer class loading. -->
        <property name="peerClassLoadingEnabled" value="true"/>
    </bean>
</beans>
We'll store this configuration file in the $GRIDGAIN_HOME directory.
To connect to a GridGain cluster and run some SQL code, we can use the GridGain Web Console. We also need to download the Web Agent so that the Web Console can correctly communicate with the GridGain cluster. The option to download the Web Agent is offered from the Web Console. We also need to ensure that the following directory:
$GRIDGAIN_HOME/libs/optional/ignite-rest-http
is copied one level up to the directory:
$GRIDGAIN_HOME/libs/
From the $GRIDGAIN_HOME directory, we can start a GridGain server from the terminal, as follows:
$ $GRIDGAIN_HOME/bin/ignite.sh ignite-server.xml
The output should be similar to that shown in Figure 4.
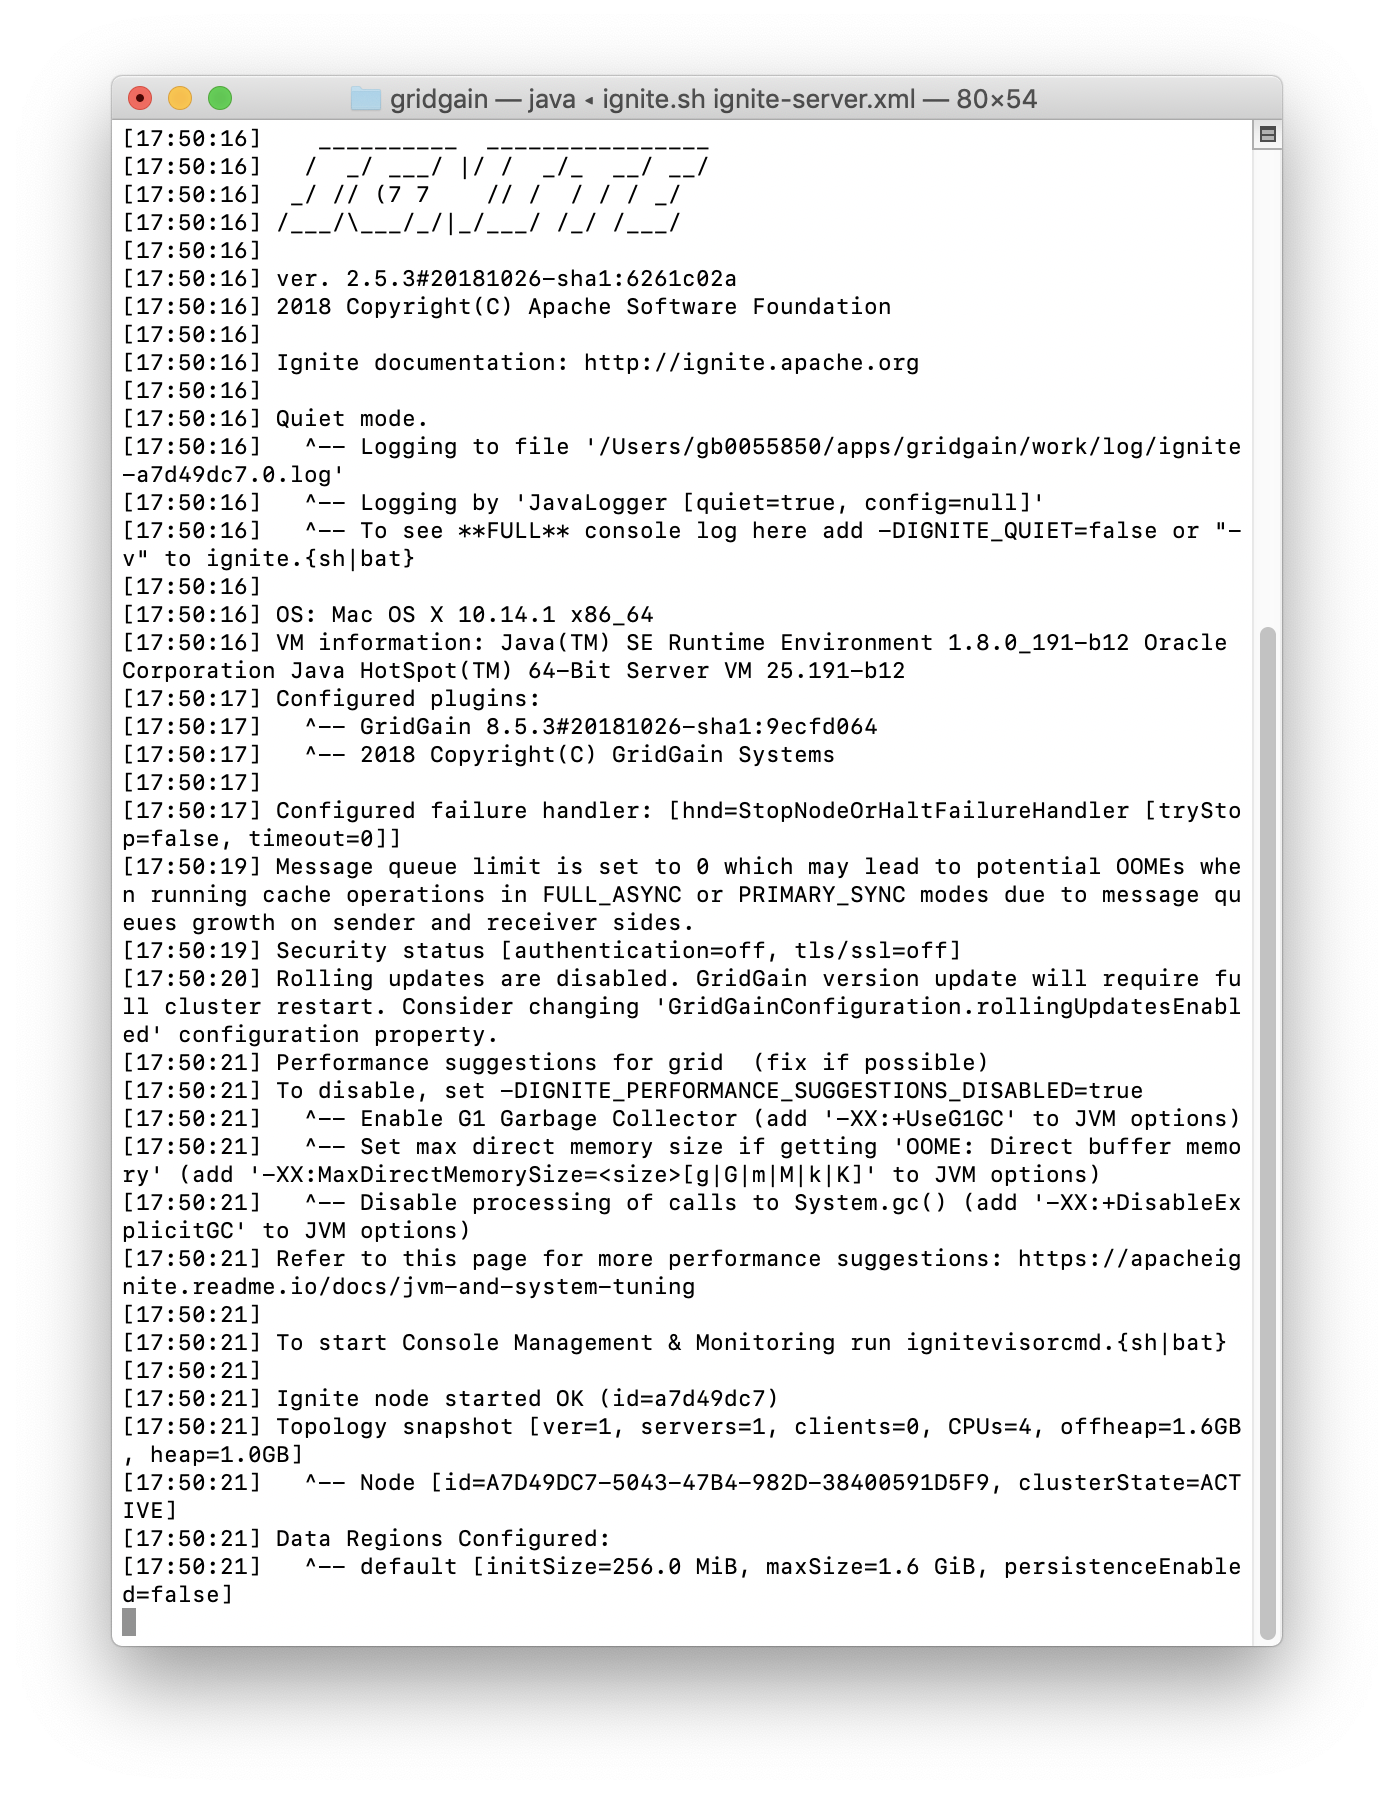
Figure 4. GridGain Cluster Node.
We can also start the Web Agent by running the following command from the Web Agent directory:
$ ./ignite-web-agent.sh
The output should be similar to that shown in Figure 5.
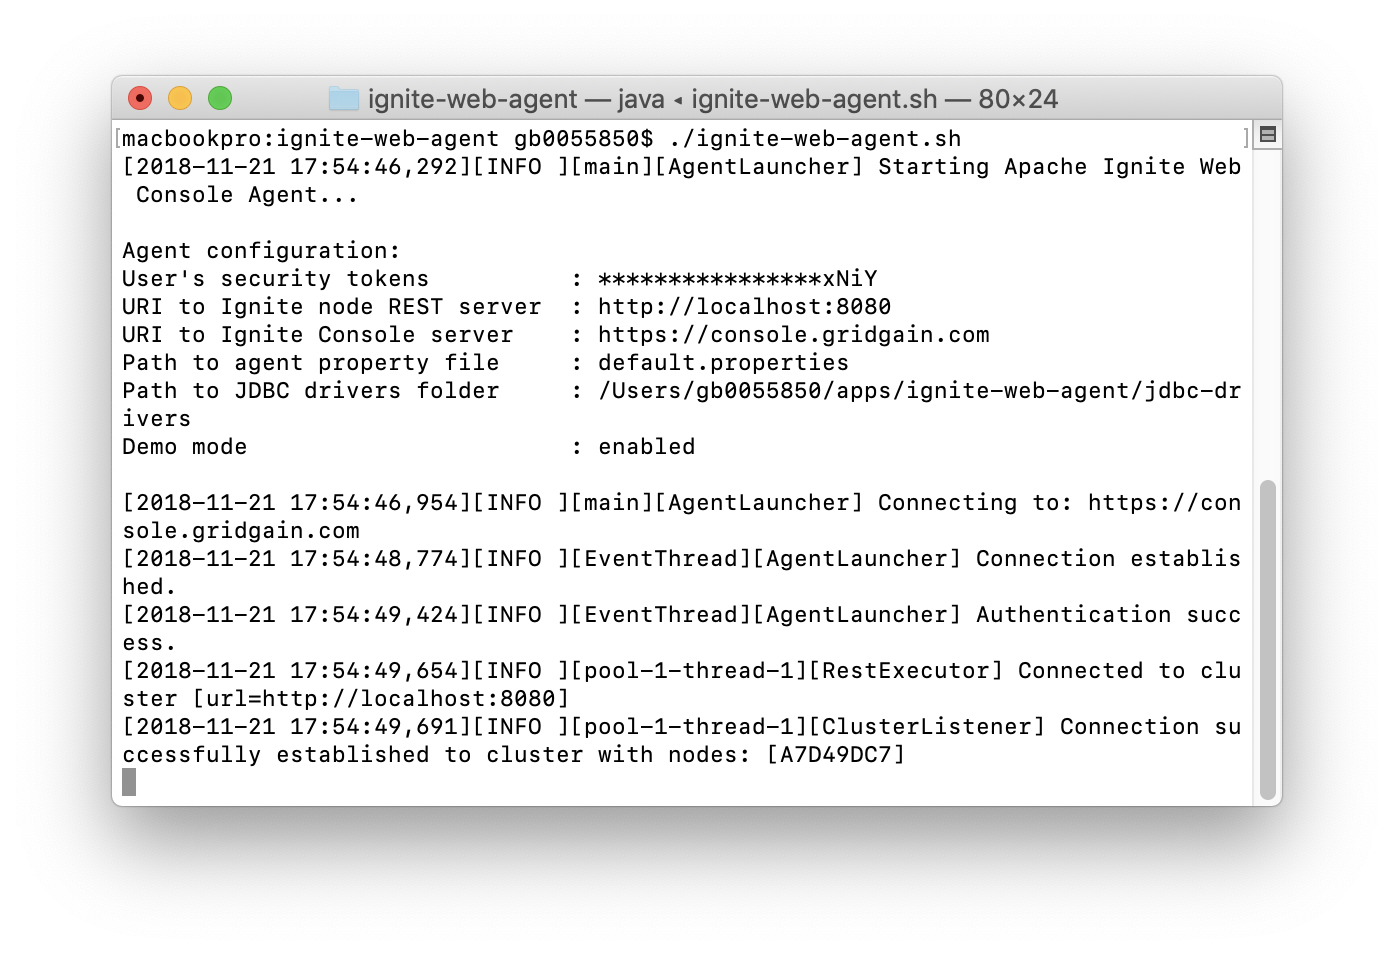
Figure 5. Web Agent.
Create a Relational Table and add some Rows
Using the Queries tab on the Web Console, we can create a Relational Table and some Rows, as follows:
CREATE TABLE IF NOT EXISTS Person (id int, city_id int, name varchar, PRIMARY KEY (id));
INSERT INTO Person (id, name, city_id) VALUES (1, 'John Doe', 3);
INSERT INTO Person (id, name, city_id) VALUES (2, 'John Smith', 4);
Once we execute this, we can check the status from Monitoring > Dashboard, as shown in Figure 6. We can see that a table has been created with two rows.
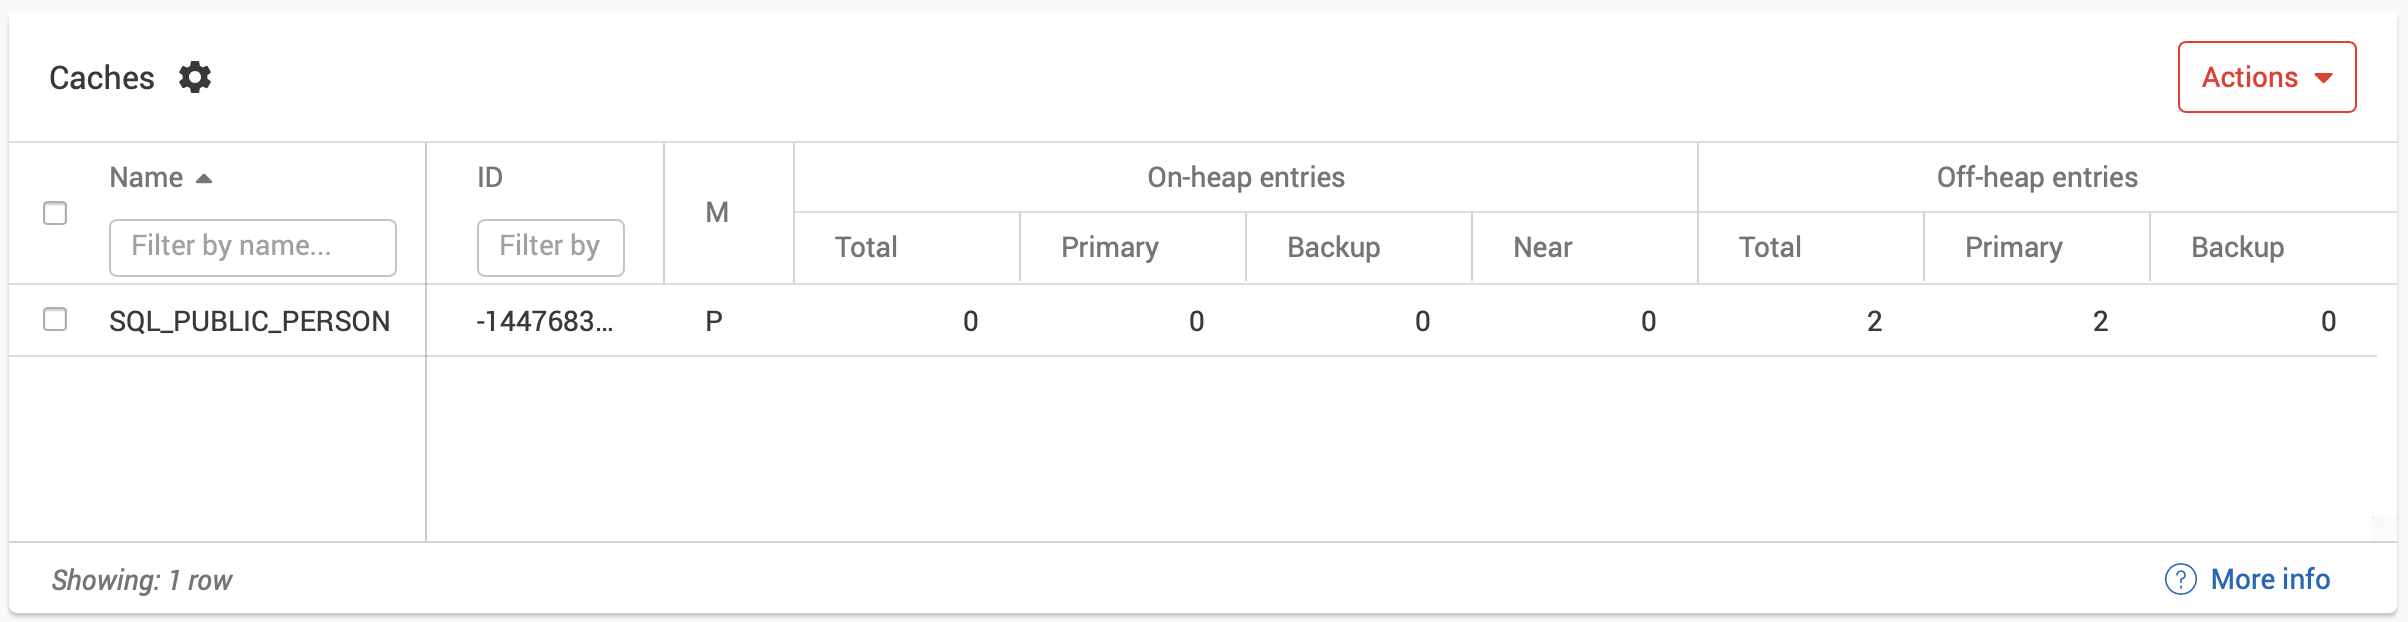
Figure 6. Person Table.
MySQL Database
Let's now prepare the JDBC sink side by creating a database in MySQL. We can do this using the DBeaver tool. We'll create an empty database called gridgain-kafka-mysql and a user called demo with password demo. We will give this user full control over this database, as shown in Figure 7.
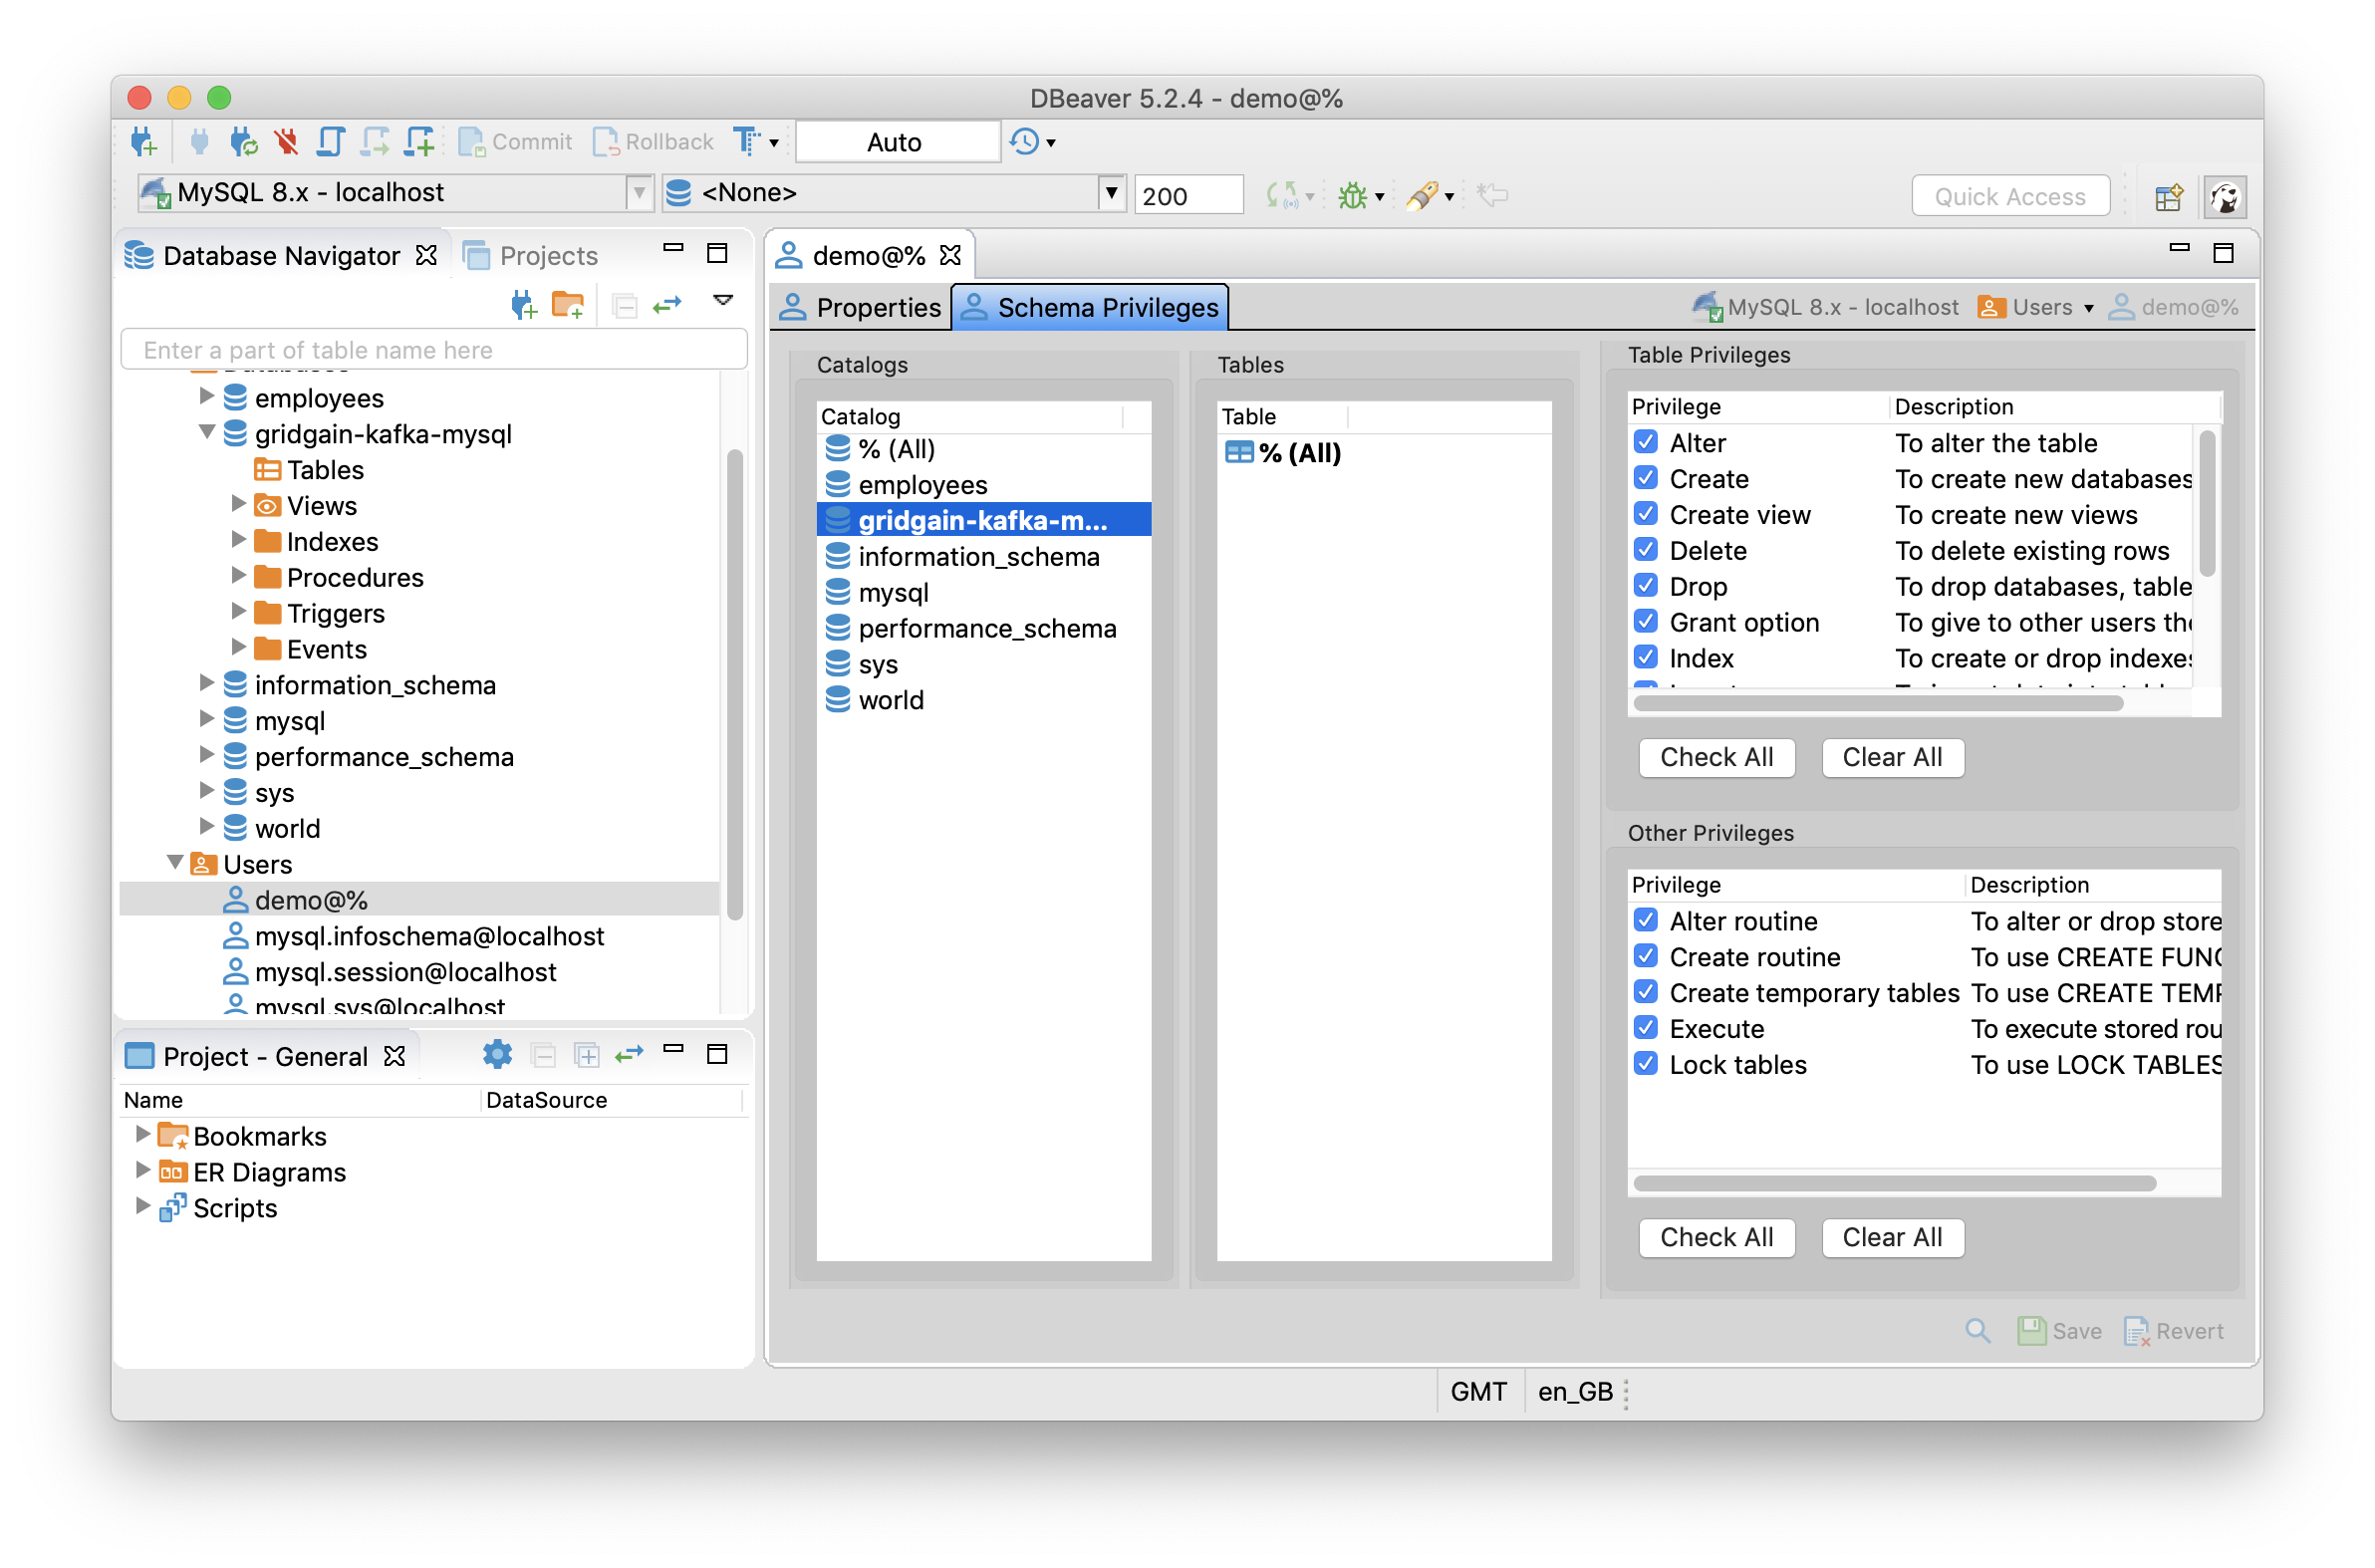
Figure 7. MySQL Database and User Demo.
Start Kafka Cluster
We are now ready to test our application. Let's begin by starting a Zookeper instance, as follows:
$ $KAFKA_HOME/bin/zookeeper-server-start.sh $KAFKA_HOME/config/zookeeper.properties
Next, we'll start a Kafka Broker, as follows:
$ $KAFKA_HOME/bin/kafka-server-start.sh $KAFKA_HOME/config/server.properties
Start Kafka Connect Cluster
In our example application, we are creating a Relational Table and need to send schema details along with the data. Therefore, we need to check that the following file:
$KAFKA_HOME/config/connect-standalone.properties
contains these properties:
key.converter=org.apache.kafka.connect.json.JsonConverter
value.converter=org.apache.kafka.connect.json.JsonConverter
key.converter.schemas.enable=true
value.converter.schemas.enable=true
Next, we need to create source and sink properties files, as follows:
- kafka-connect-gridgain-source.properties
name=kafka-connect-gridgain-source
tasks.max=2
connector.class=org.gridgain.kafka.source.IgniteSourceConnector
igniteCfg=GRIDGAIN_CONFIG_PATH/ignite-server.xml
topicPrefix=quickstart-
Replace GRIDGAIN_CONFIG_PATH with the full path to where you saved the GridGain configuration file.
- kafka-connect-mysql-sink.properties
name=kafka-connect-mysql-sink
tasks.max=2
connector.class=io.confluent.connect.jdbc.JdbcSinkConnector
topics=quickstart-SQL_PUBLIC_PERSON,quickstart-SQL_PUBLIC_CITY
connection.url=jdbc:mysql://localhost:3306/gridgain-kafka-mysql
connection.user=demo
connection.password=demo
auto.create=true
We will save these two properties files in the $KAFKA_HOME directory.
Finally, we can start the Kafka Connect Worker from the $KAFKA_HOME directory, as follows:
$ $KAFKA_HOME/bin/connect-standalone.sh $KAFKA_HOME/config/connect-standalone.properties kafka-connect-gridgain-source.properties kafka-connect-mysql-sink.properties
The Results
First, let's switch to DBeaver and refresh the list of tables for our database. There should be a new table with two rows, as shown in Figure 8.
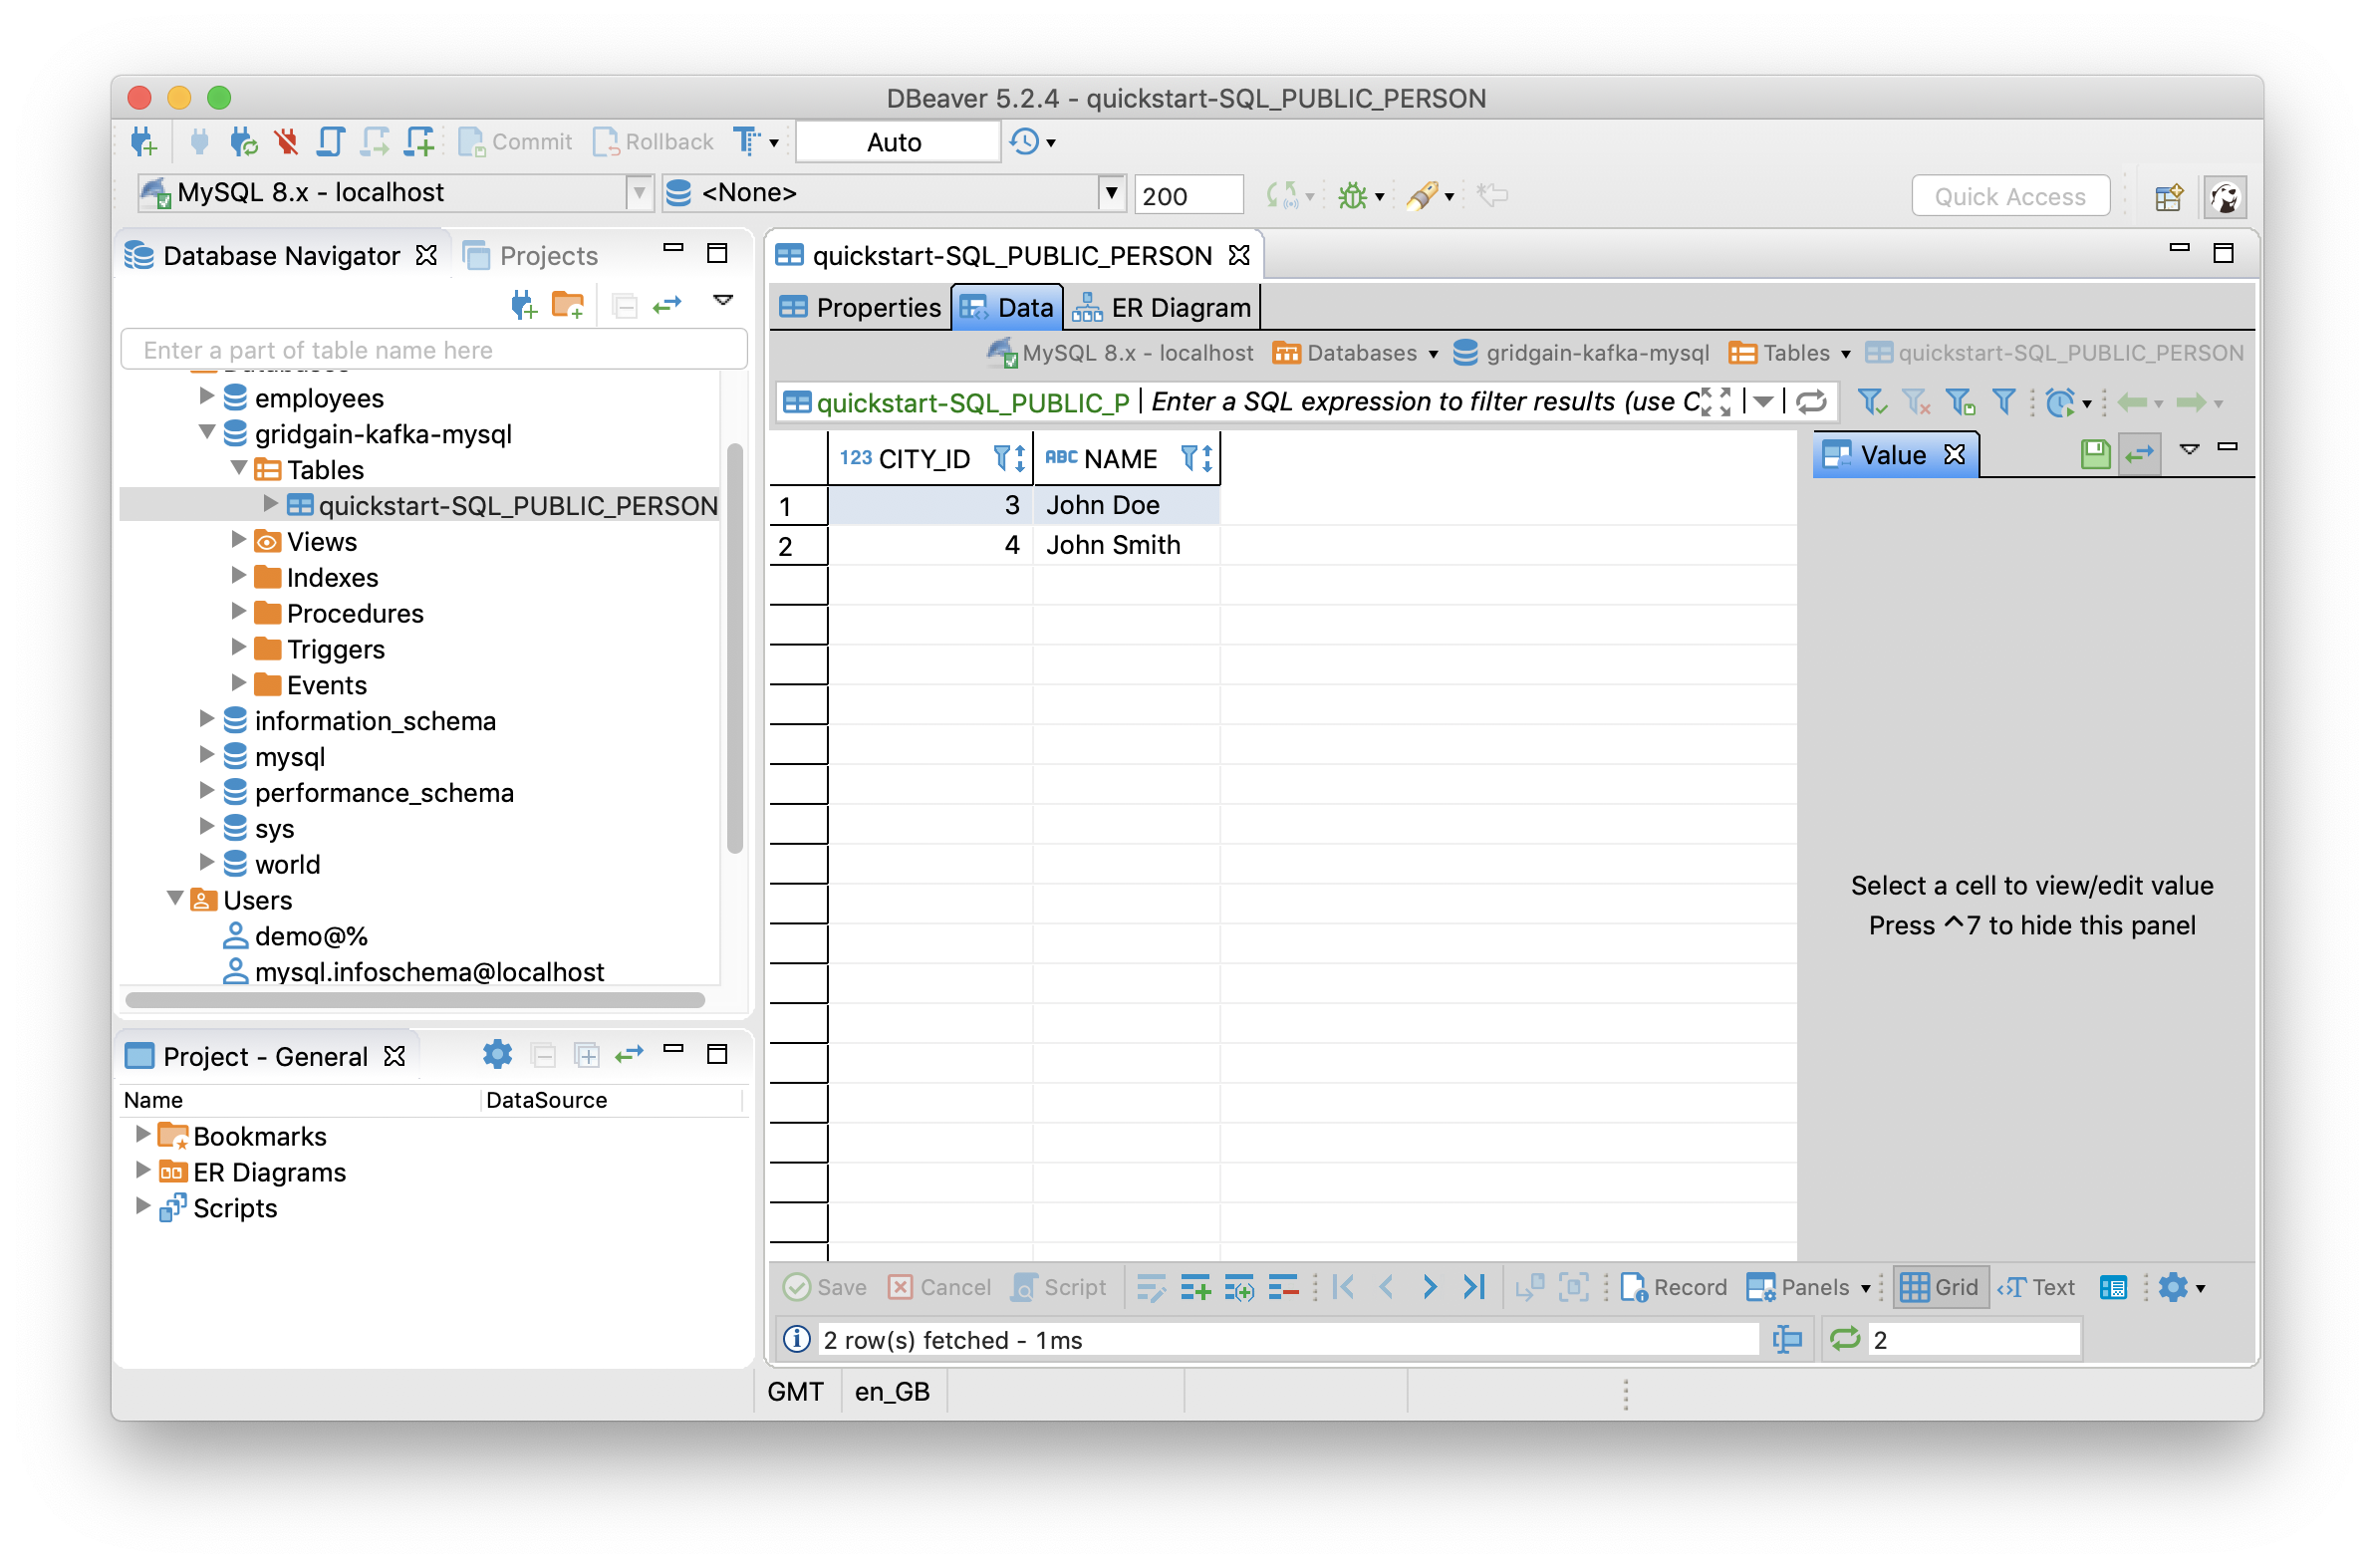
Figure 8. Initial Data Load.
From Web Console, let's create another row in the table using the following command:
INSERT INTO Person (id, name, city_id) VALUES (3, 'Mike', 5);
Once we execute this in the Web Console and refresh the table in DBeaver, we should see another row added, as shown in Figure 9.
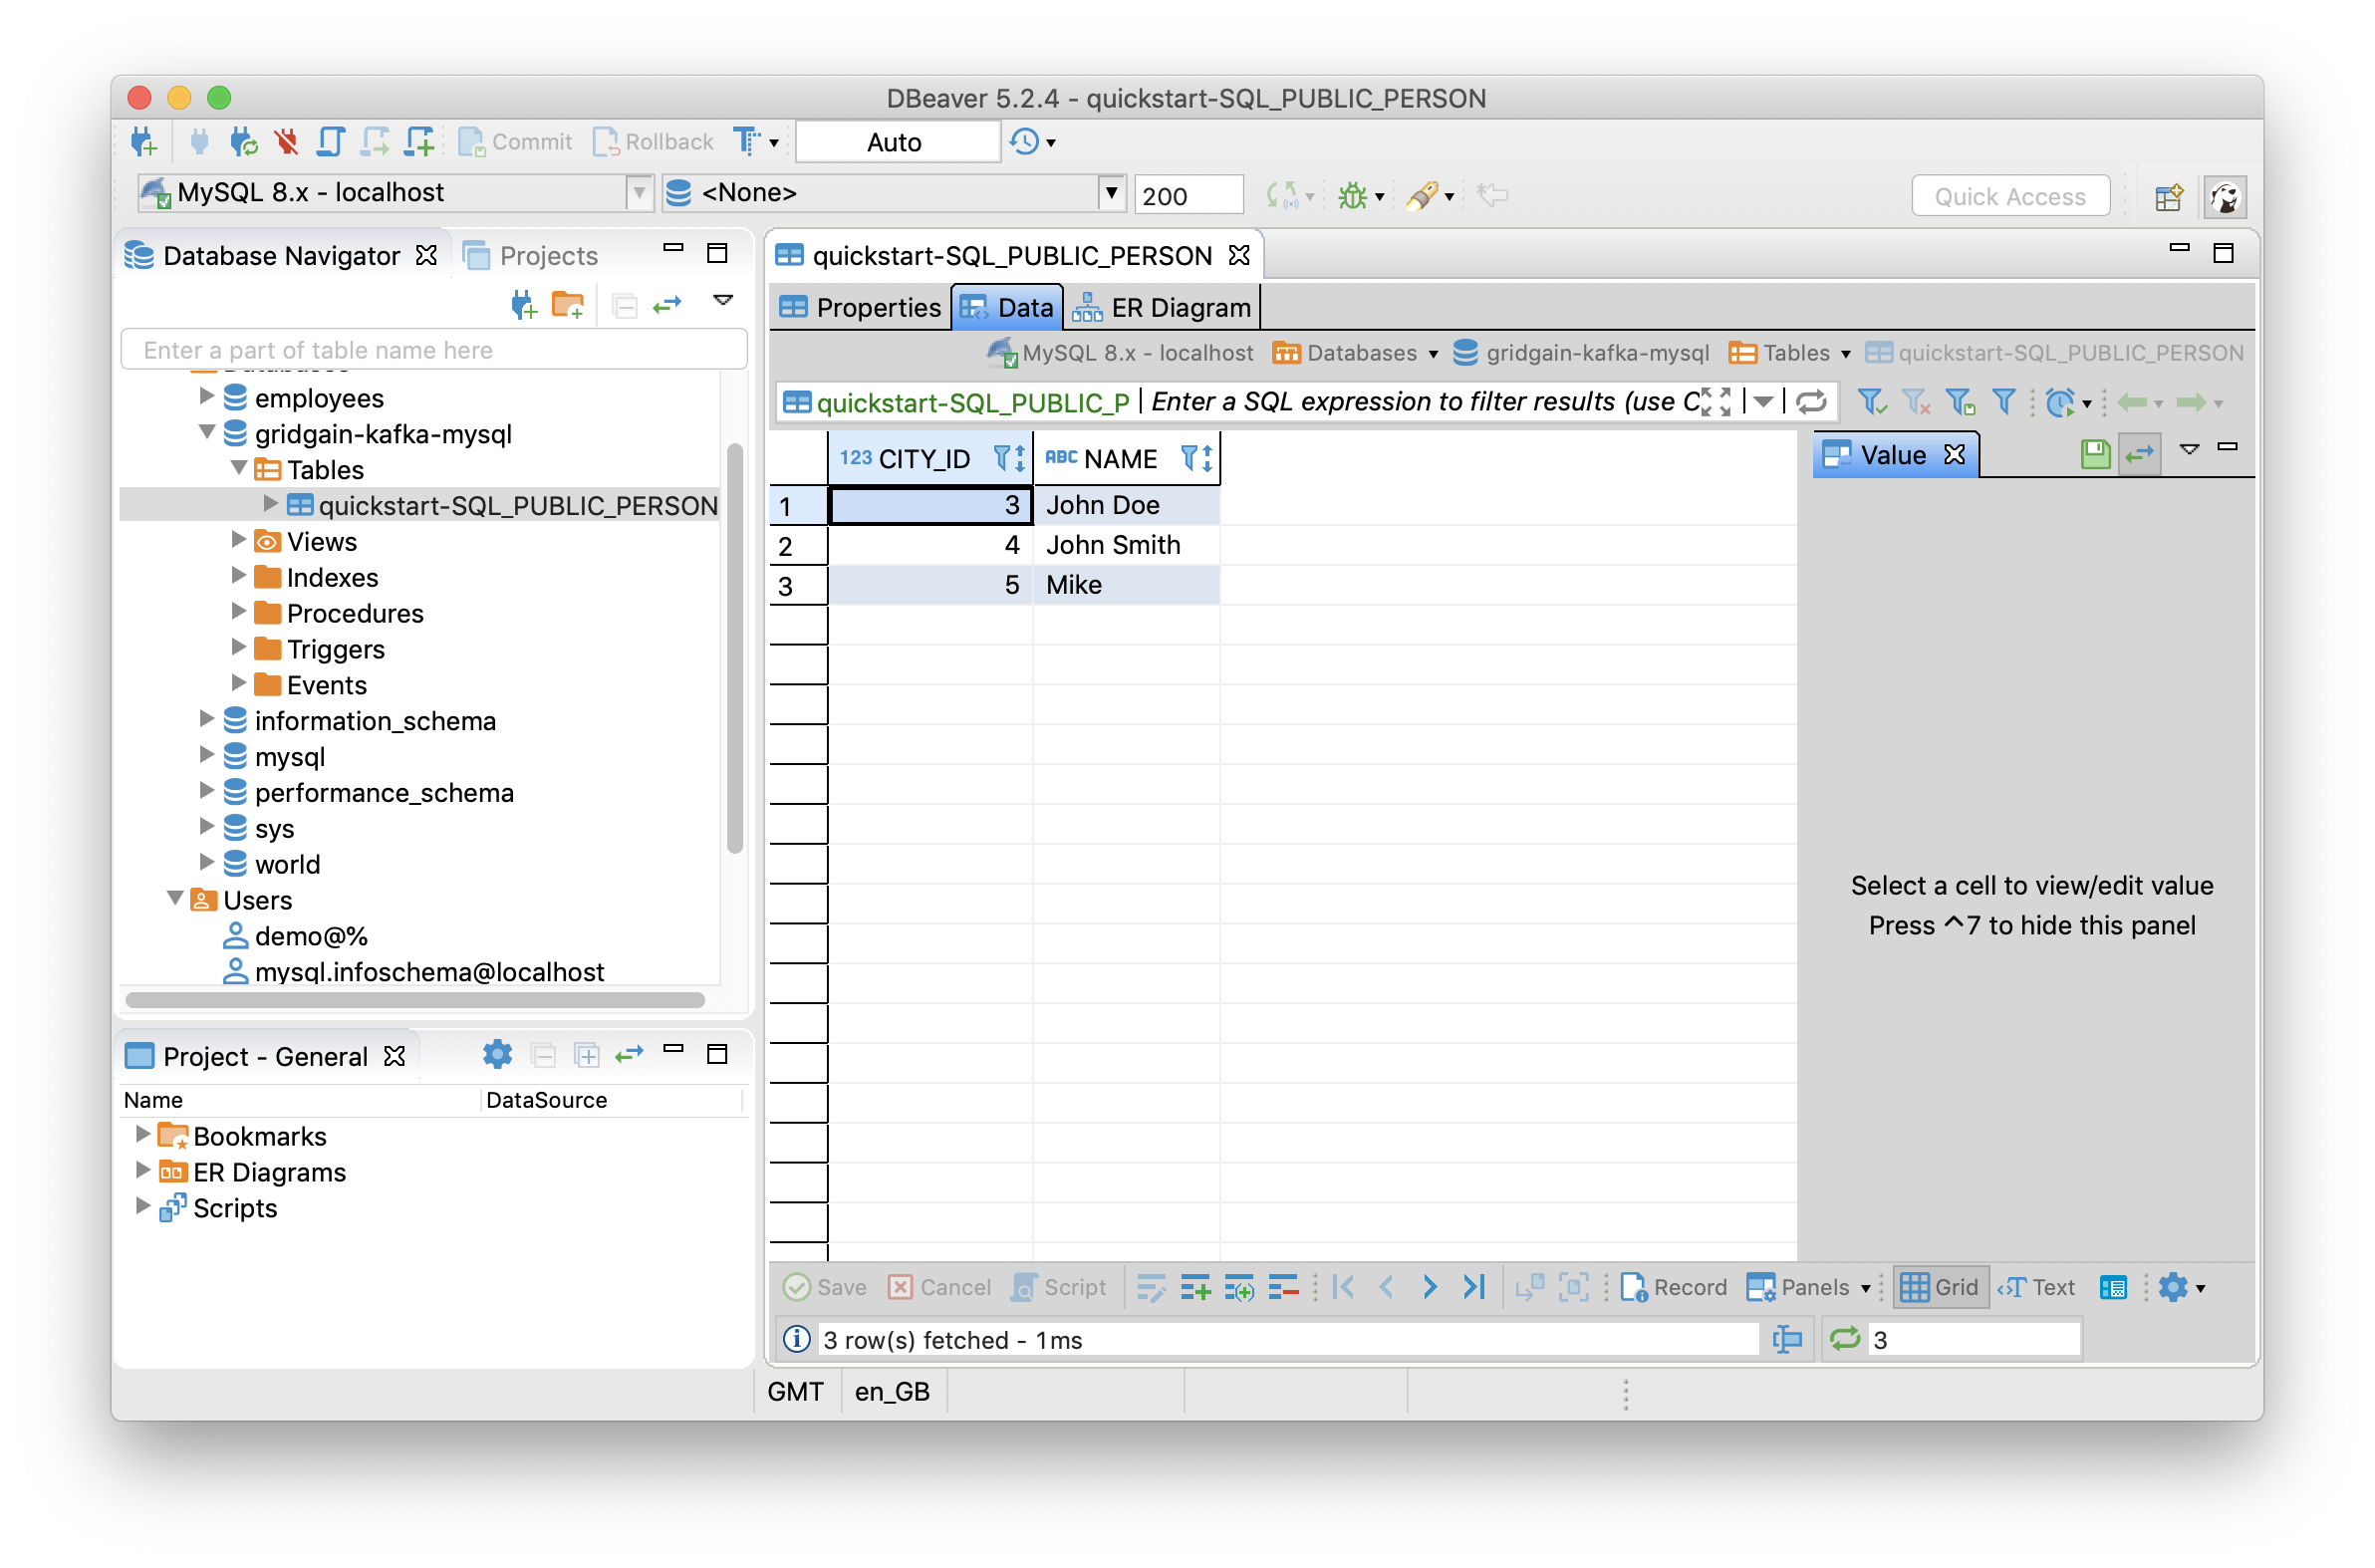
Figure 9. Runtime Data Load.
Finally, let's create a new table in Web Console with the following values:
CREATE TABLE IF NOT EXISTS City (id int, name varchar, PRIMARY KEY (id));
INSERT INTO City (id, name) VALUES (3, 'San-Francisco');
INSERT INTO City (id, name) VALUES (4, 'Oakland');
Once we execute this in the Web Console and refresh the tables in DBeaver, there should be a new table with two rows, as shown in Figure 10.
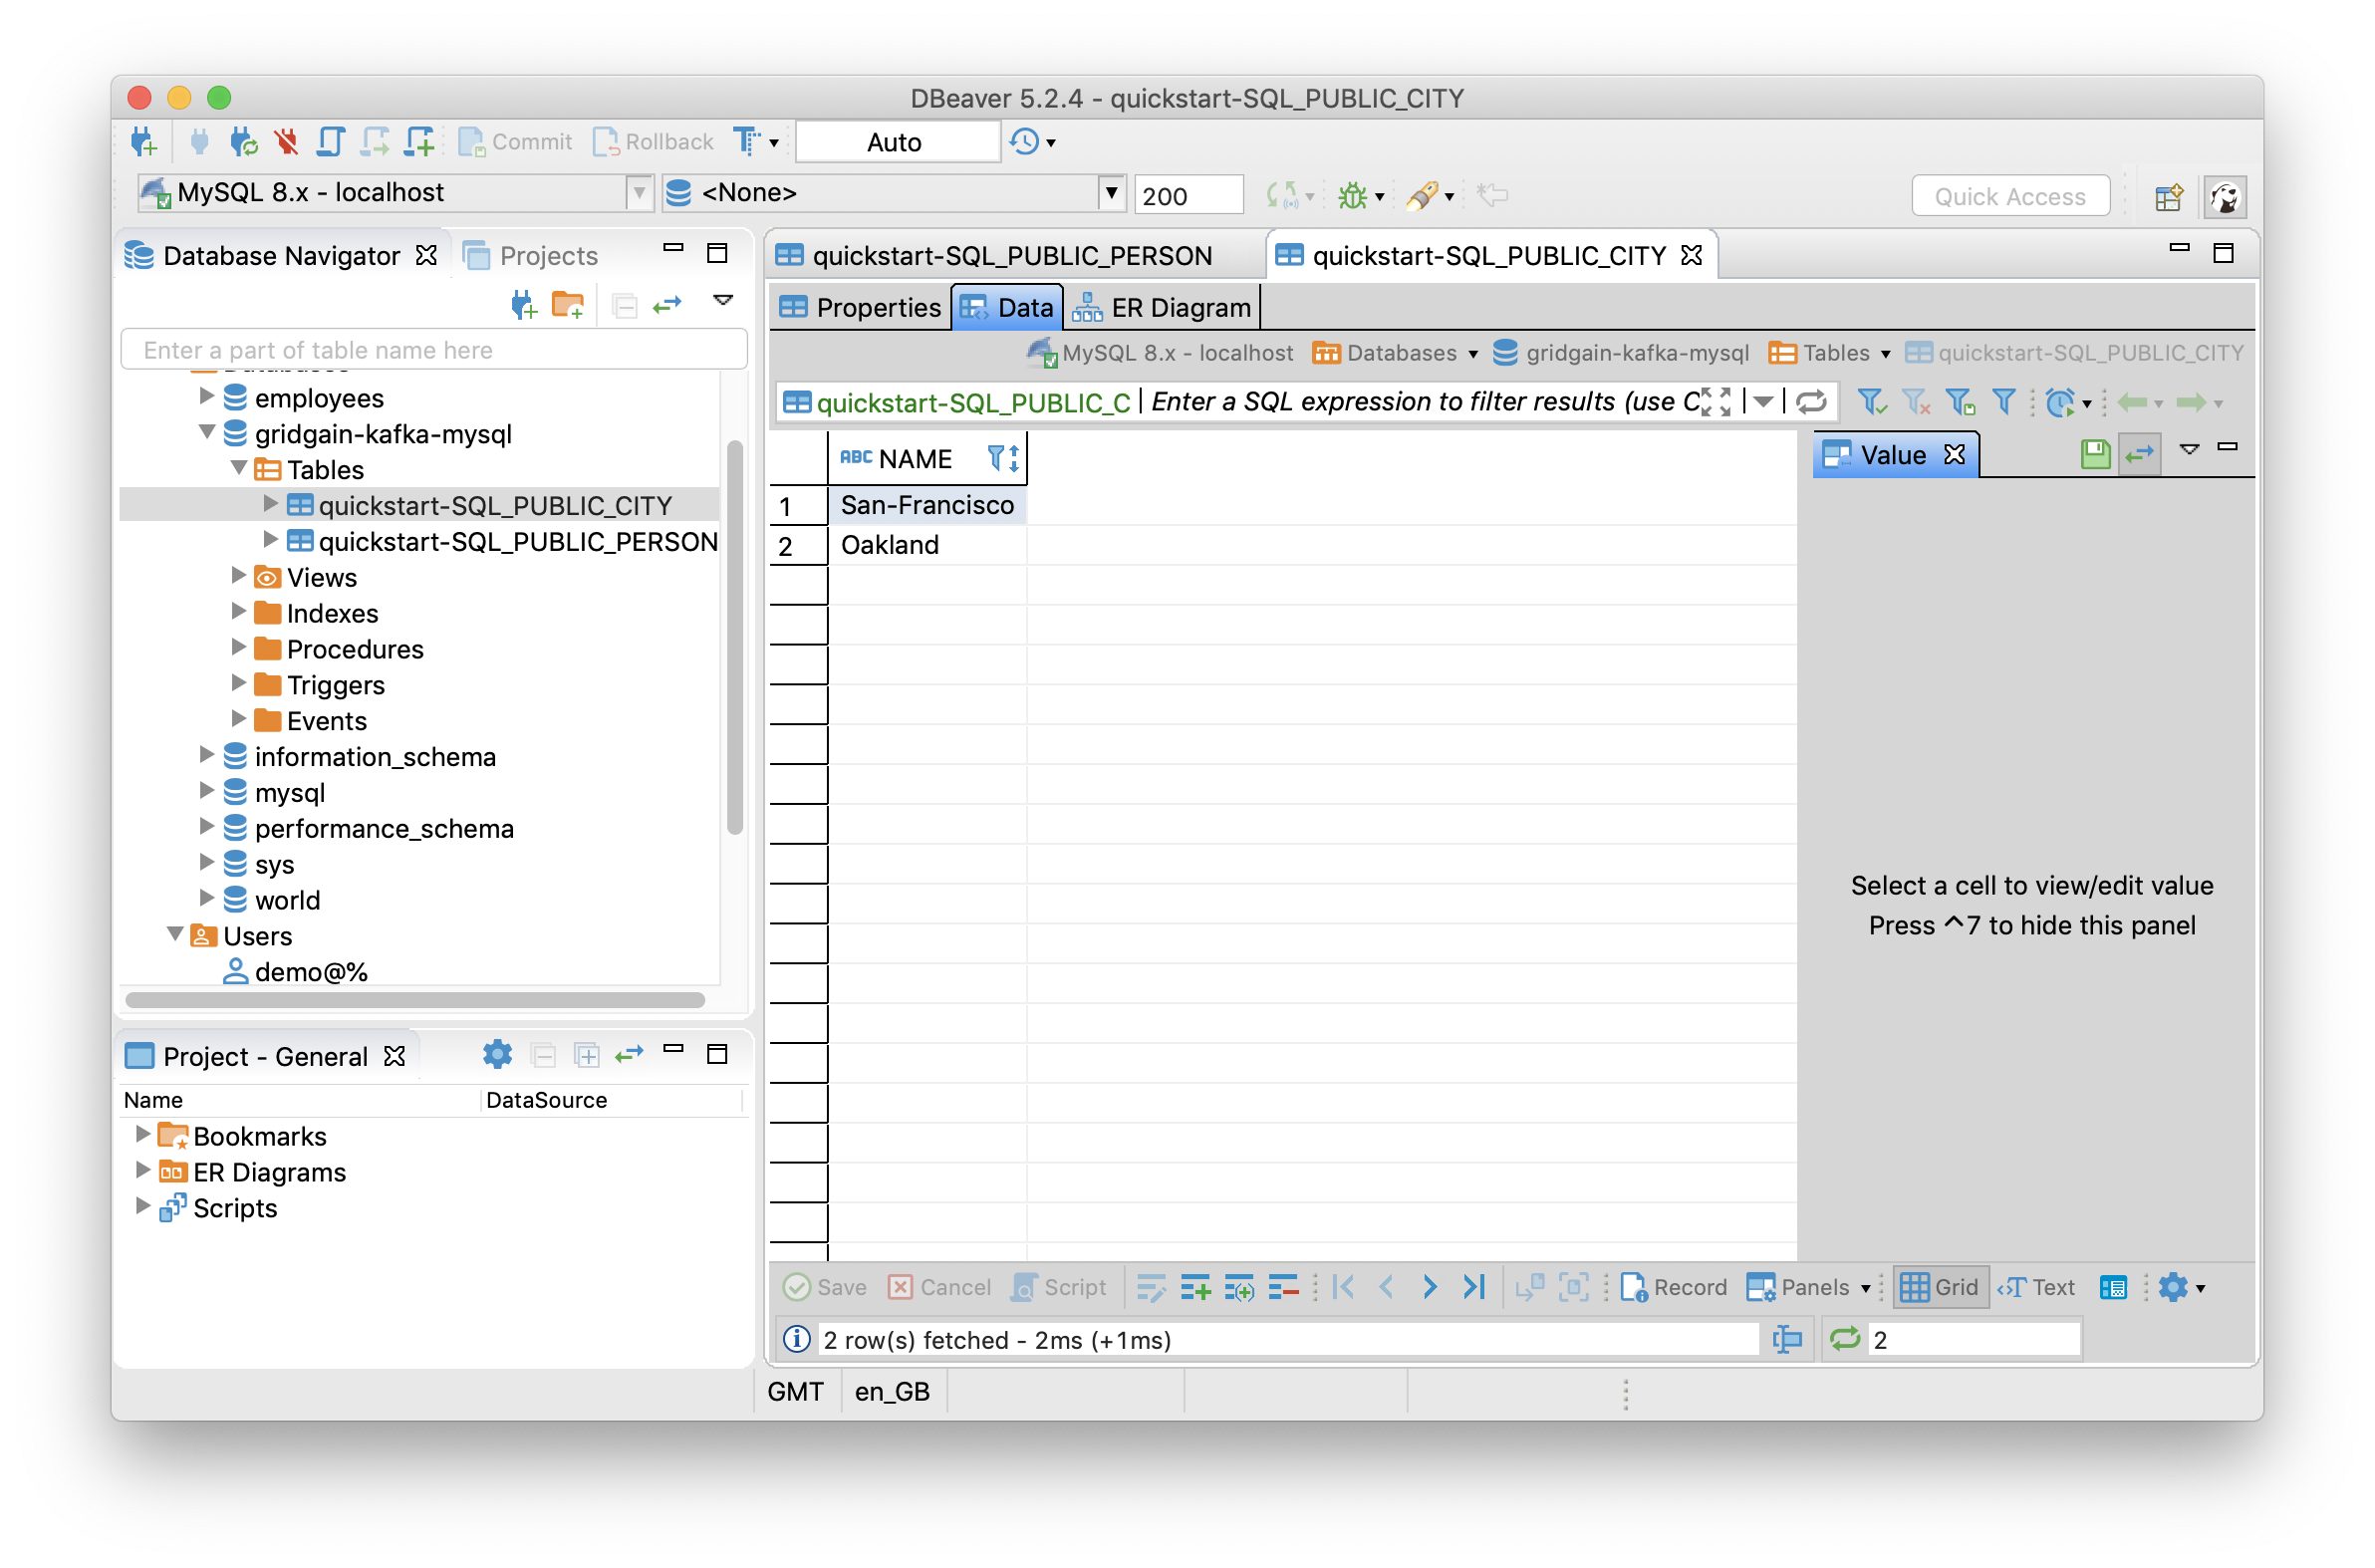
Figure 10. Dynamic Reconfiguration.
Summary
In this example application, we have seen the ease with which we can integrate GridGain and Kafka. The Kafka Connector has been certified by Confluent and provides a range of robust enterprise features beyond basic capabilities supported by the implementation available for Apache Ignite.
In the next article in this series, we will look at how to use the Kafka Connector when building applications in the cloud. Stay tuned!