
The GridGain in-memory computing platform has always been famous for its ability to be deployed and managed in heterogeneous environments. It doesn’t matter if you’d like GridGain to work on-premise or to operate in the cloud; to scale out across commodity servers or scale up within powerful mainframes. And if need to get GridGain provisioned by Kubernetes or Docker Swarm -- you get that, too. There are literally no deployment or provisioning limitations.
What is GridGain Cloud all about? It’s an entirely new solution to help both GridGain customers and Apache Ignite users forget about all the hassles of distributed clusters deployment, management and monitoring. You, as a software engineer or architect, invest your time and resources in applications and services development, while GridGain Cloud takes care of and manages your GridGain as an in-memory cache (current version) or memory-centric database (on our roadmap) deployments.
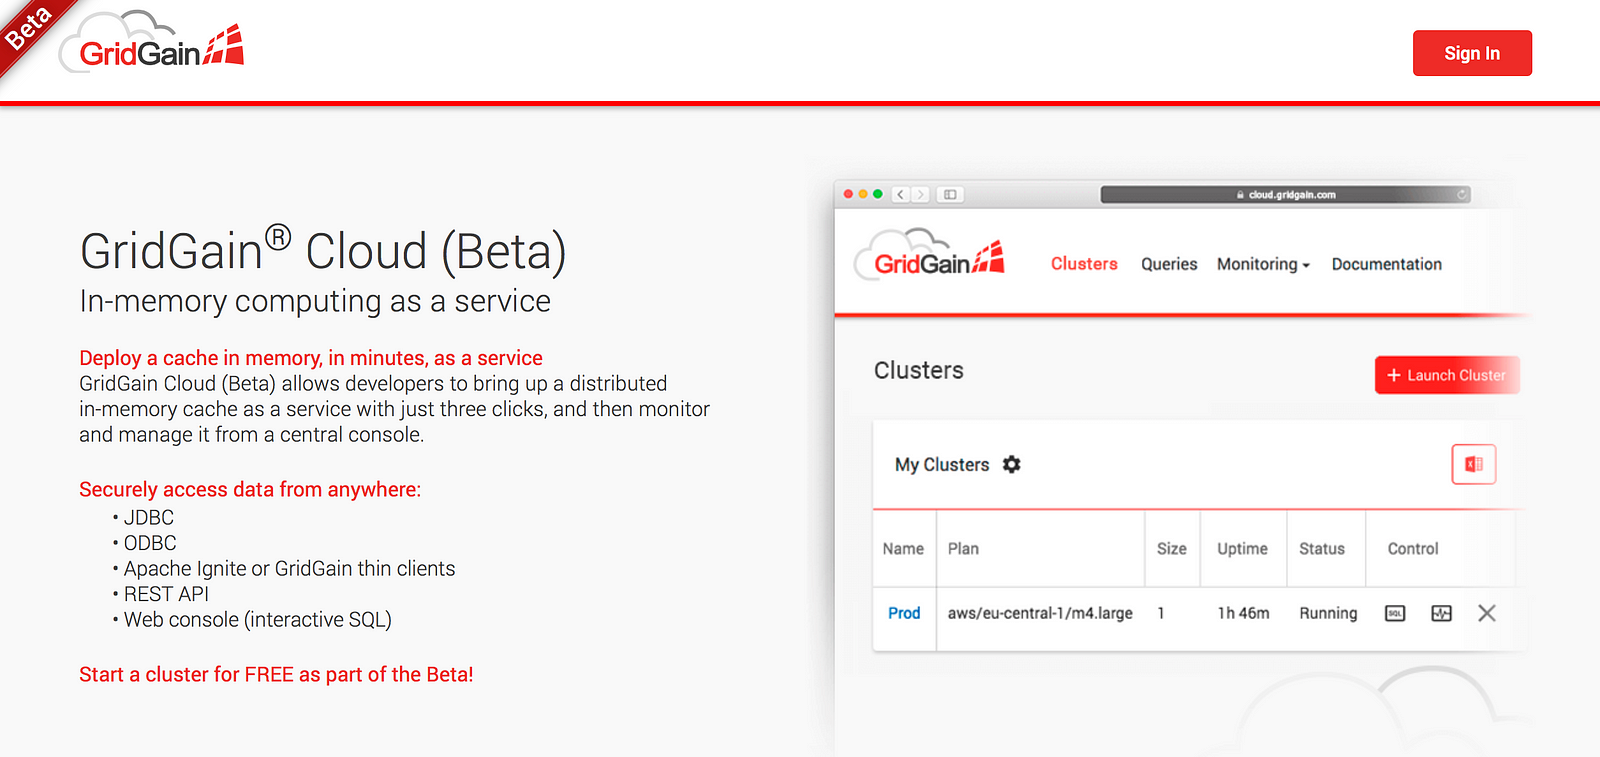
Enough talk. Let’s get started with GridGain Cloud and experience how straightforward it is to launch our first cluster there and use SQL for data processing.
Sign Up and Start a Free Cluster
I'll skip the sign-up process details here. It’s easy to follow. Just go to the main page and create an account there.
Once you’re in, launch the very first cluster by clicking the “Launch Cluster” button and you'll see a pop-up window like the one below:
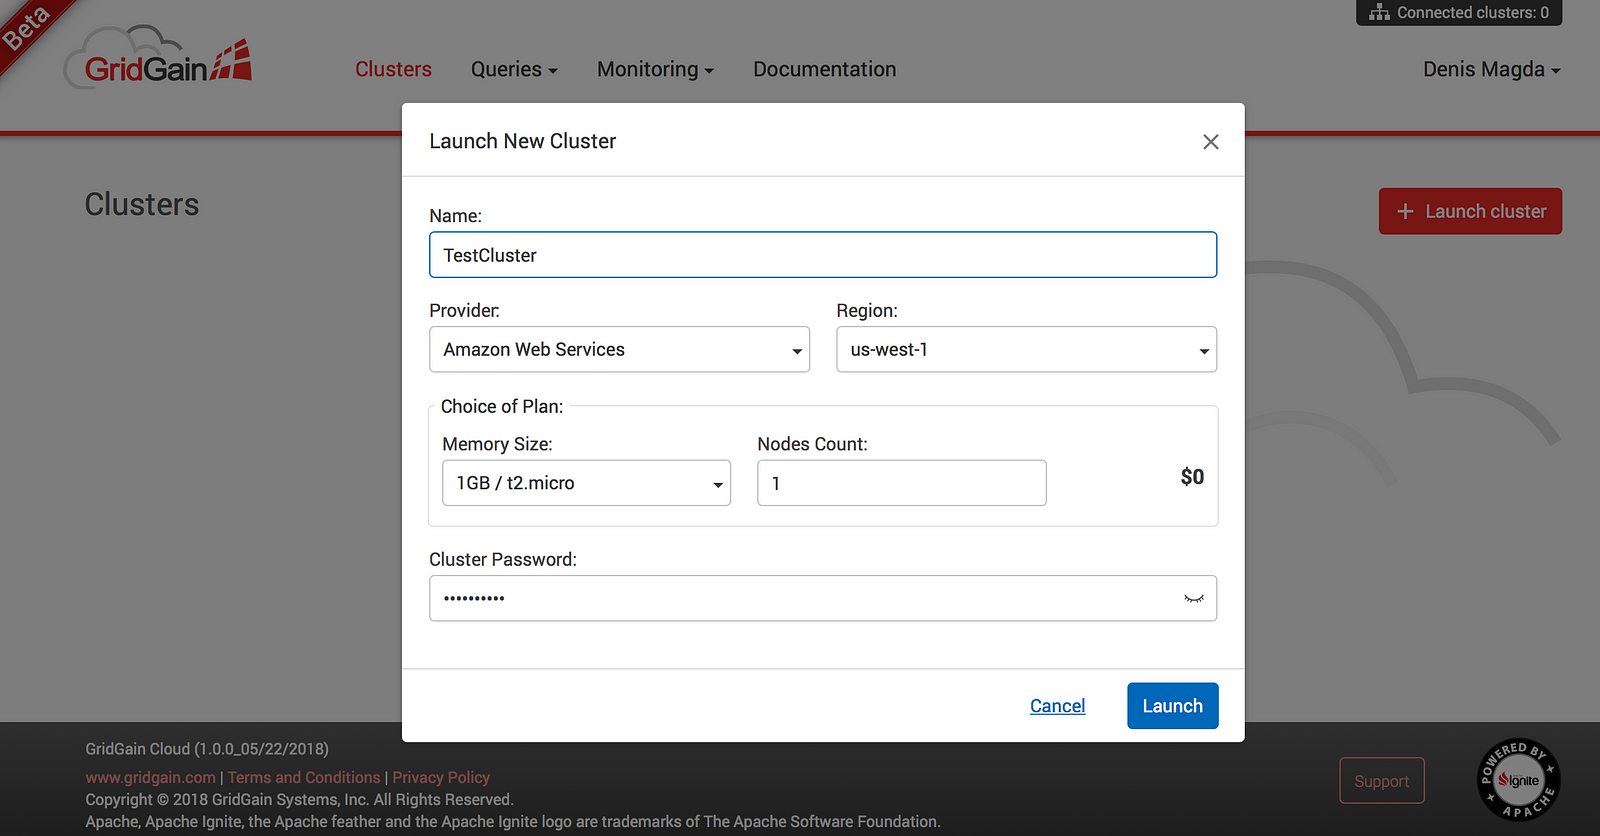
The service allows us to start a single-node cluster for free or select a more powerful configuration and pay for it on-the-go. Let’s go for the free option for now by pressing “Launch” button.
Connect to the Cluster
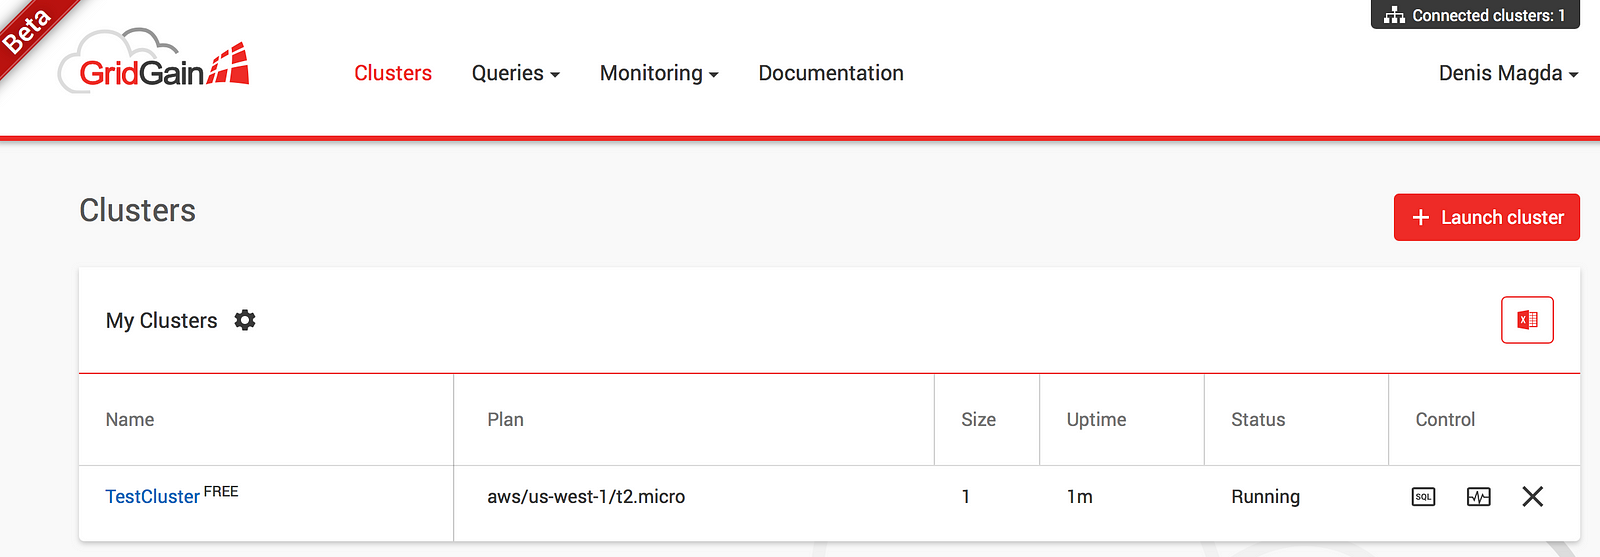
As soon as the cluster is booted, you’ll see it in the “Running” state as follows:
What do we do next? Lets make use of the deployment by connecting from an application. GridGain Cloud goes with several connectivity options (SQL, REST, Thin Clients) and SQL was favored for the sake of getting started.
Below the “My Cluster” block you’ll see a “Demo” section that shows how to start with our cluster within minutes. Go with “Command Line” to test GridGain Cloud from the perspective of a software developer:
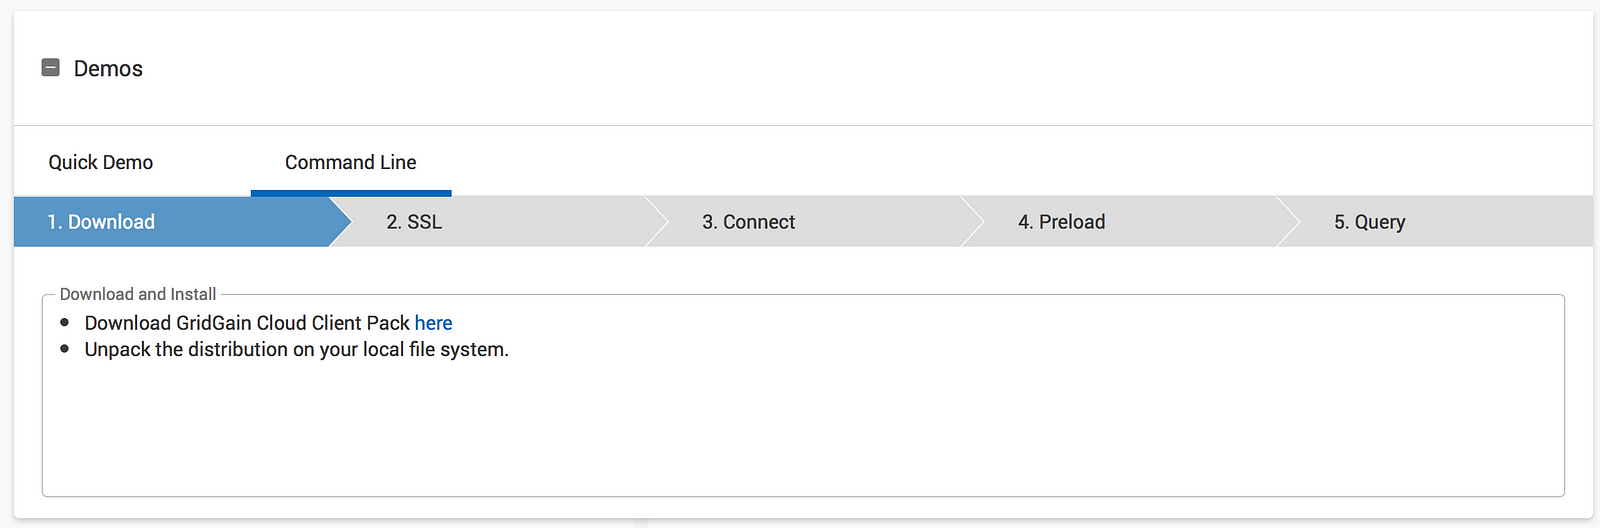
As the first step suggests, let’s download GridGain Cloud Client Pack and unzip it on our local laptops.
Next, move to Step 2 (SSL) and download your personal SSL certificate putting it under {gridgain_cloud_pack}/bin directory.
Finally, it’s time to connect to GridGain Cloud. Just follow Step 3 (Connect): open your favorite command line tool (CMD), navigate to{gridgain_cloud_pack}/bin folder, copy the connection string like the one below:
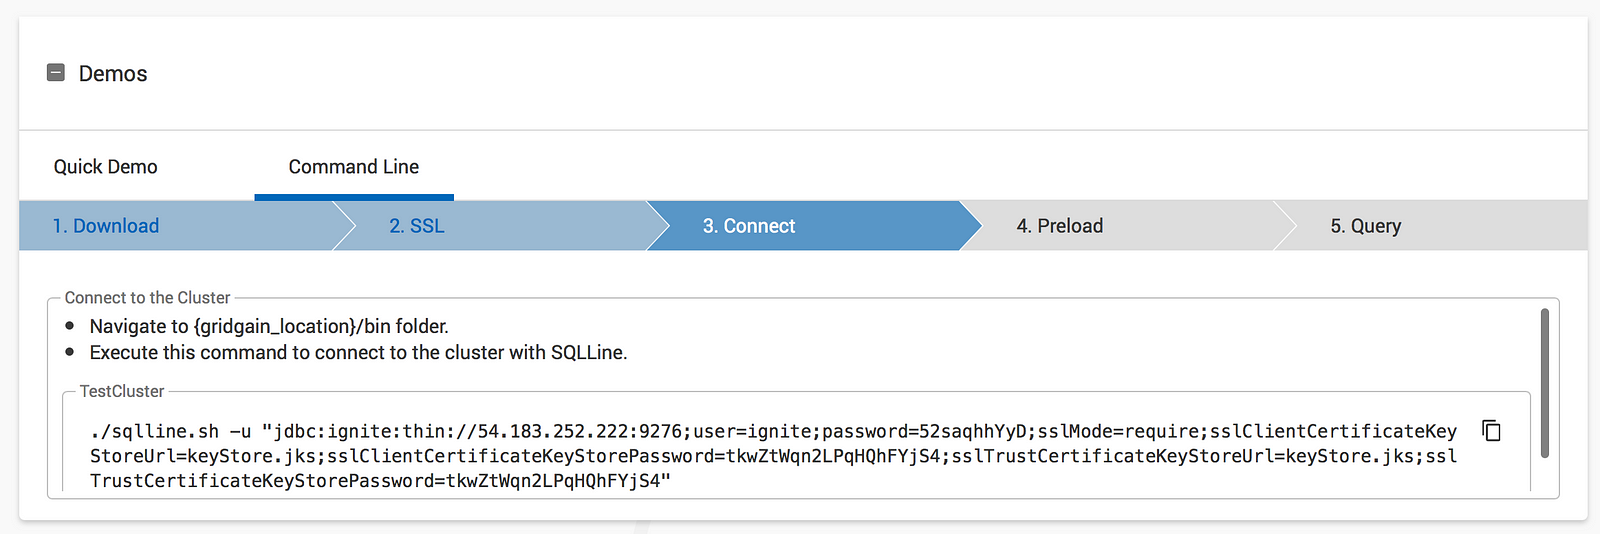
Run the connection string from CMD. You’ll get SQLLine tool started which connects you to GridGain Cloud through GridGain JDBC driver. That’s the output you should see on your laptop:
Denis-Magda-MacBook-Pro:bin dmagda$ ./sqlline.sh -u "jdbc:ignite:thin://54.183.252.222:9276;user=ignite;password=52saqhhYyD;sslMode=require;sslClientCertificateKeyStoreUrl=keyStore.jks;sslClientCertificateKeyStorePassword=tkwZtWqn2LPqHQhFYjS4;sslTrustCertificateKeyStoreUrl=keyStore.jks;sslTrustCertificateKeyStorePassword=tkwZtWqn2LPqHQhFYjS4"
sqlline version 1.3.0
0: jdbc:ignite:thin://54.183.252.222:9276>
We’ve got connected!
Preloading and Querying World Database
GridGain is fluent in SQL. So, the next step would be to take an SQL script with a sample database and preload the data into the cloud.
Luckily, GridGain Cloud Client Pack already goes with a sample World Database that represents a snapshot of countries and cities across the globe. So, as Step 4 (Preload) suggests, let’s execute the command below from our SQLLine session:
!run ../examples/sql/world.sql
Once the database is created, we’re good to run any queries we like including aggregations, grouping, ordering and distributed join. For instance, let’s find out top 3 most populated countries in the world by running this query from the command line connection:
SELECT name, MAX(population) as max_pop FROM country
 GROUP BY name, population
 ORDER BY max_pop DESC LIMIT 3;
Here’s an answer (note, the database is a little bit outdated, and the current population numbers can be completely different):
| China | 1277558000 |
| India | 1013662000 |
| United States | 278357000 |
Next, if we want to find the most inhabited cities in China, the USA and Russia then our query would be the following:
SELECT country.name, city.name,
MAX(city.population) as max_pop FROM country
 JOIN city ON city.countrycode = country.code
 WHERE country.code IN ('USA','RUS','CHN')
 GROUP BY country.name, city.name ORDER BY max_pop DESC LIMIT 3;
Turns out to be that the top list is as follows:
| China | Shanghai | 9696300 |
| Russian Federation | Moscow | 8389200 |
| United States | New York | 8008278 |
Next Steps
In general, that’s it. It’s simple to start the first cluster in GridGain Cloud and connect to it from our development environment. Now we can focus on application development while our distributed storage is managed for us.
As the next steps, check out Thin Clients (that make it easy connecting from Java, .NET, Node.JS, Python, and other languages) as well as REST APIs as connectivity options.