GridGain for Python
This chapter explains system requirements for running GridGain and how to install GridGain, start a cluster, and run a simple Hello World example using a thin client for Python.
Thin Client is a lightweight GridGain connection mode. It does not participate in the cluster, never holds any data, or performs computations. All it does is establish a socket connection to an individual GridGain node and perform all operations through that node.
Since GridGain is built on top of Apache Ignite, GridGain reuses Ignite’s system properties, environment properties, startup scripts, etc. wherever possible.
Prerequisites
GridGain was officially tested on:
JDK |
Oracle JDK 8 and later, Open JDK 8 and later, IBM JDK 8 and later |
OS |
Linux (any flavor), Mac OSX (10.6 and up), Windows (XP and up), Windows Server (2008 and up), Oracle Solaris |
ISA |
x86, x64, SPARC, PowerPC |
Network |
No restrictions (10G recommended) |
and:
Python |
Version 3.4 or above |
Installing GridGain
GridGain is available in three editions: Community Edition (CE), Enterprise Edition (EE) and Ultimate Edition (UE). For this example, we’ll use the GridGain CE, which is distributed as binary, docker, and cloud images, and via RPM/DEB. This chapter explains how to install the GridGain CE binary distribution.
To get started with the GridGain CE binary distribution:
-
Download the GridGain binary as a zip archive.
-
Unzip the zip archive into the installation folder in your system.
-
Move the
ignite-rest-httpfolder from{gridgain}/libs/optionalto{gridgain}/libsto enable the Ignite REST library for the cluster. The library is used by GridGain Web Console for cluster management and monitoring needs. -
(Optional) Enable required modules.
-
(Optional) Set the
IGNITE_HOMEenvironment variable or Windows PATH to point to the installation folder and make sure there is no trailing/(or\for Windows) in the path.
Once that’s done, execute the following command to install the Python Thin
Client package. This thin client is abbreviated as pygridgain:
$ pip3 install pygridgainStarting a GridGain Node
Before connecting to GridGain via the Python thin client, you must start at least one GridGain cluster node.
You can start a GridGain node from the command line using the default configuration or by passing a custom configuration file. You can start as many nodes as you like and they will all automatically discover each other.
Navigate into the bin folder of GridGain installation directory from the command shell. Your command might look like this:
$ cd {gridgain}/bin/$ cd {gridgain}\bin\Start a GridGain node with a custom configuration file that is passed as a parameter to
ignite.sh|bat like this:
$ ./ignite.sh examples/config/example-ignite.xml$ ignite.bat examples\config\example-ignite.xmlYou will see output similar to this:
[08:53:45] Ignite node started OK (id=7b30bc8e)
[08:53:45] Topology snapshot [ver=1, locNode=7b30bc8e, servers=1, clients=0, state=ACTIVE, CPUs=4, offheap=1.6GB, heap=2.0GB]
Open another tab from your command shell and run the same command again:
$ ./ignite.sh examples/config/example-ignite.xml$ ignite.bat examples\config\example-ignite.xmlCheck the Topology snapshot line in the output. Now you have a cluster of two server nodes with more CPUs and RAM
available cluster-wide:
[08:54:34] Ignite node started OK (id=3a30b7a4)
[08:54:34] Topology snapshot [ver=2, locNode=3a30b7a4, servers=2, clients=0, state=ACTIVE, CPUs=4, offheap=3.2GB, heap=4.0GB]
Running Your First GridGain Application
Once the cluster is started, you can use the GridGain Python thin client to perform cache operations.
Assuming that the server node is running locally, here is a HelloWorld example that puts and gets values from the cache:
from pygridgain import Client

client = Client()
client.connect('127.0.0.1', 10800)

#Create cache
my_cache = client.create_cache('my cache')

#Put value in cache
my_cache.put(1, 'Hello World')

#Get value from cache
result = my_cache.get(1)
print(result)
To run this, you can save the example as a text file (hello.py for example) and run it from the command line:
python hello.py
Or you can enter the example into your Python interpreter/shell (IDLE on Windows, for example) and modify/execute it there.
Using GridGain Web Console
GridGain Web Console is an interactive configuration, management, and monitoring tool, built on top of Apache Ignite Web Console.
-
Go to https://console.gridgain.com and create an account.
-
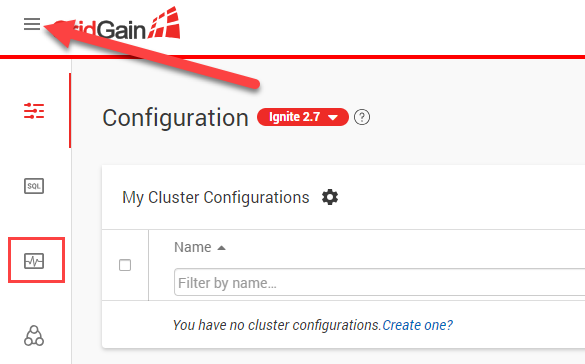
Log in with your new account and go to the "Monitoring Dashboard" screen. Click the three horizontal lines at the top in order to expand the left-hand menu:
-
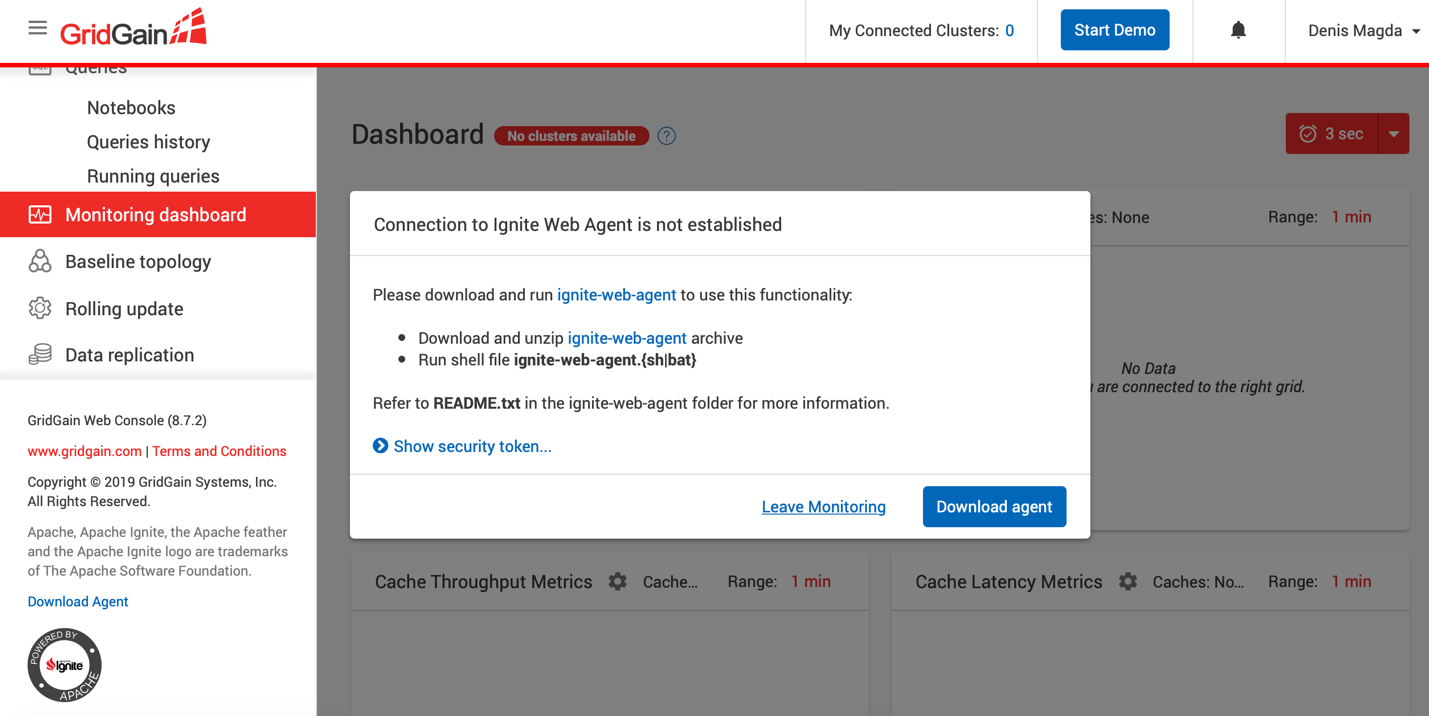
Click the "Download Agent" button as shown in the screenshot below:
-
Extract the web agent into a separate folder.
-
Navigate to the folder where you extracted the web agent files, and execute the
ignite-web-agent.sh(orignite-web-agent.bat) script. -
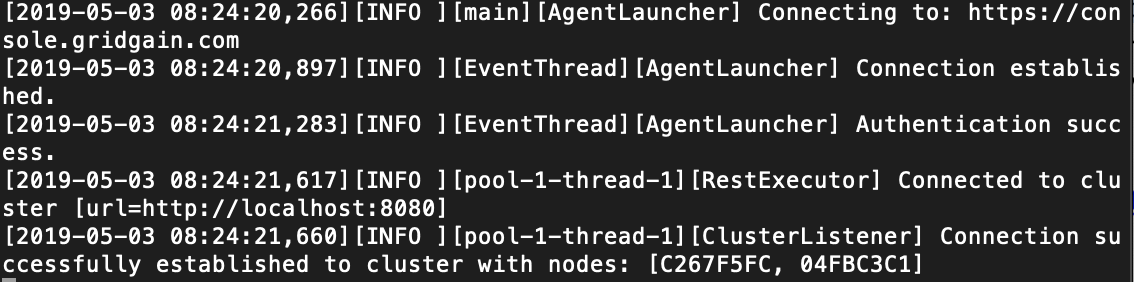
Ensure that the agent can connect to both console.gridgain.com and your single node cluster started earlier. Look for messages similar to the following in the agent’s log:
-
Go back to the console.gridgain.com Monitoring Dashboard and refresh it. Confirm that the tool successfully displays metrics for your local single node cluster.
© 2021 GridGain Systems, Inc. All Rights Reserved. Privacy Policy | Legal Notices. GridGain® is a registered trademark of GridGain Systems, Inc.
Apache, Apache Ignite, the Apache feather and the Apache Ignite logo are either registered trademarks or trademarks of The Apache Software Foundation.